Assigning and editing steel plates and positive reinforcement in composite slab floors
The tools in the "Bottom reinforcement" section of the "Composite slabs" menu, within the "Results" tab, allow you to modify the bottom reinforcement generated and laid out by the program following the structural analysis.
Changes made to the bottom reinforcements using the tools in this section are not retained in subsequent analyses; therefore, their use should be reserved for the final adjustment stage prior to printing or exporting the data.
Each of the available tools is described below.
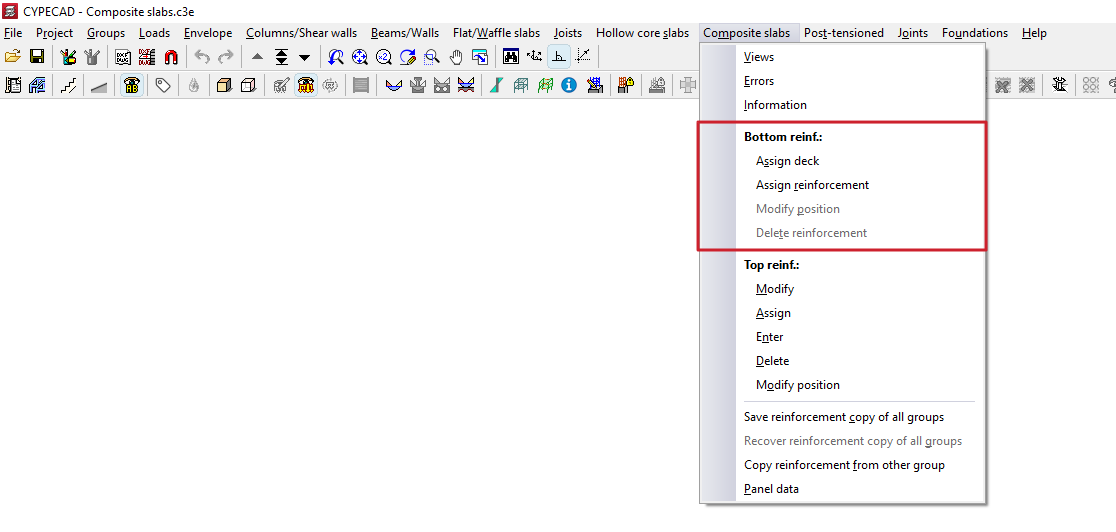
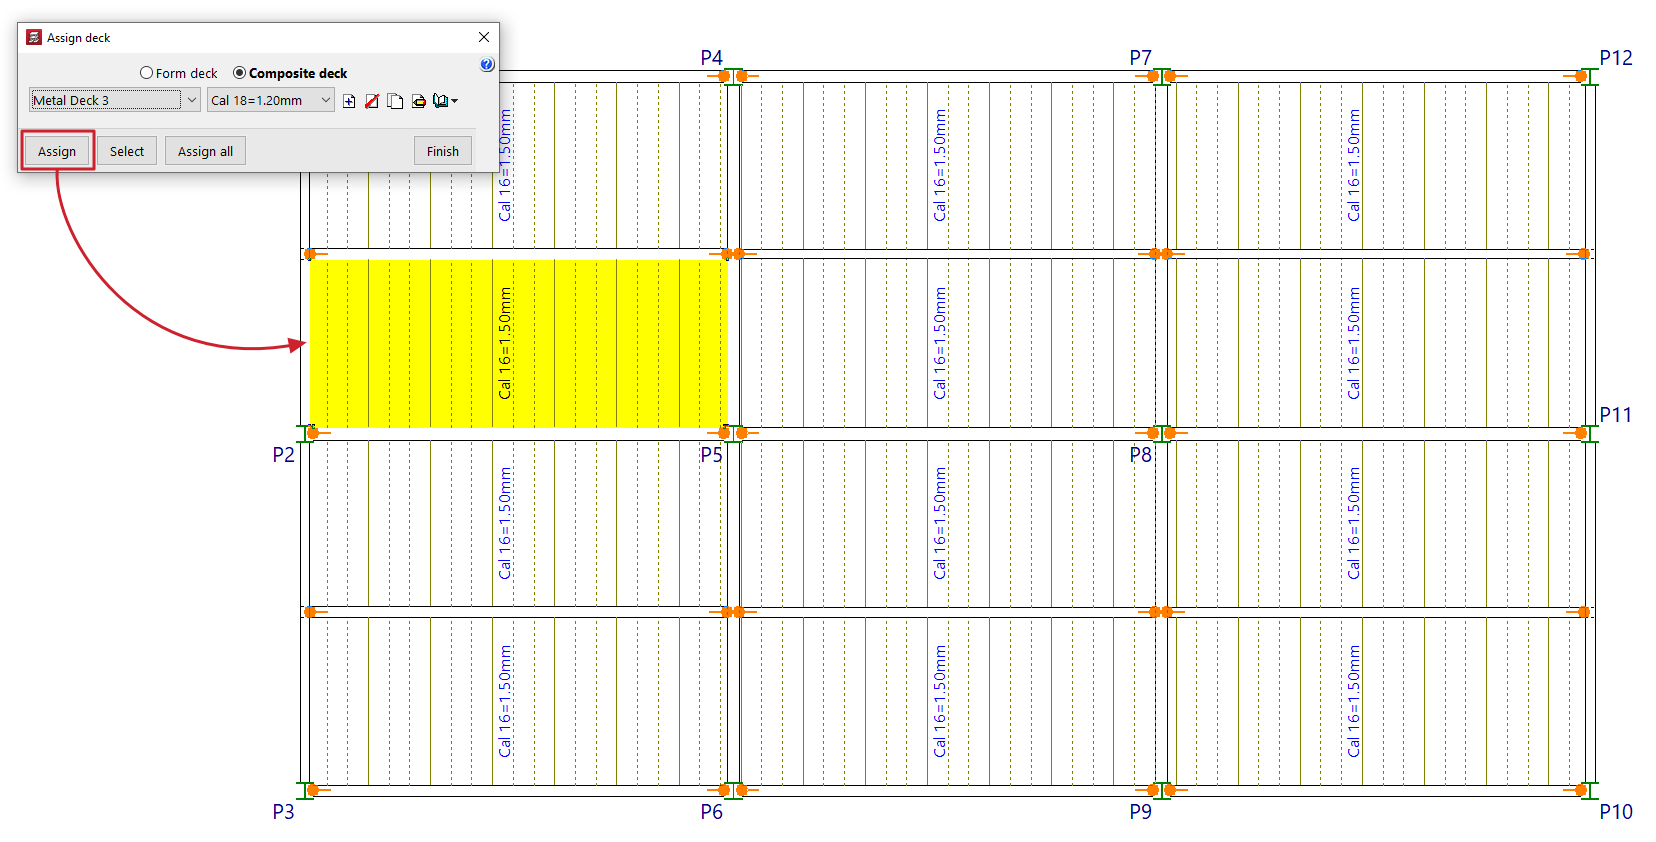
Assign deck
The "Assign" option allows you to change the type of composite slab ("Form deck" or "Composite deck"), the deck series and the type of deck available, by applying these settings to all selected composite slab panels.
To do this, define the data to be assigned in the pop-up window. Then click on "Assign" and select the composite slab floor panels in the floor plan to which you wish to assign this data. In the pop-up window, you can also use the "Select" option to copy the data from a selected slab panel on the floor plan, "Assign to all" to apply it to all the mixed-slab floor panels on the floor plan, or "Cancel" to close the window.
The deck can be modified either before or after the analysis.
Assign reinforcement
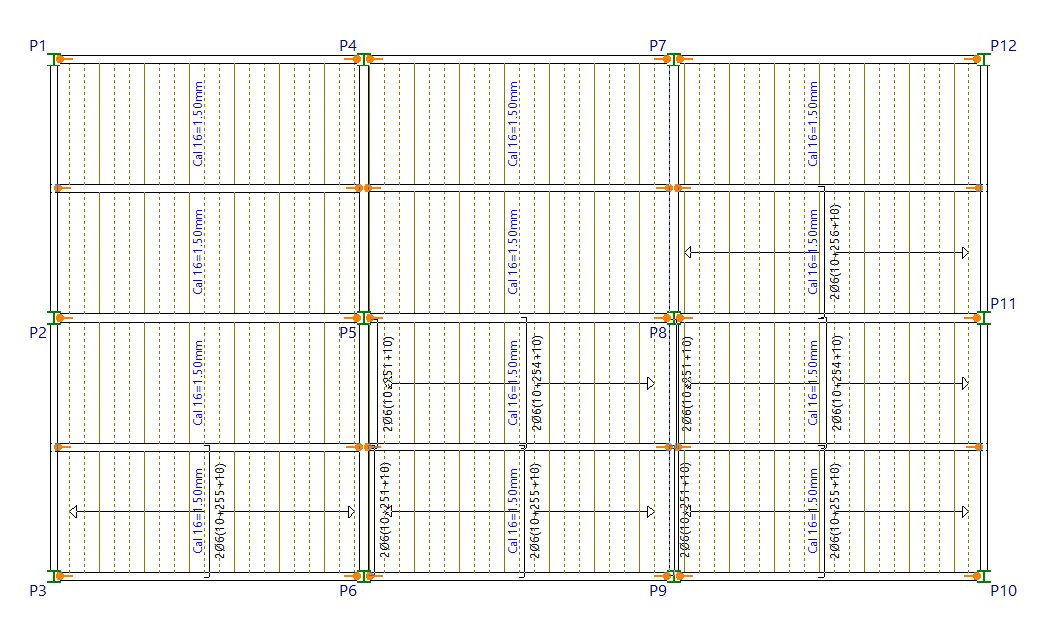
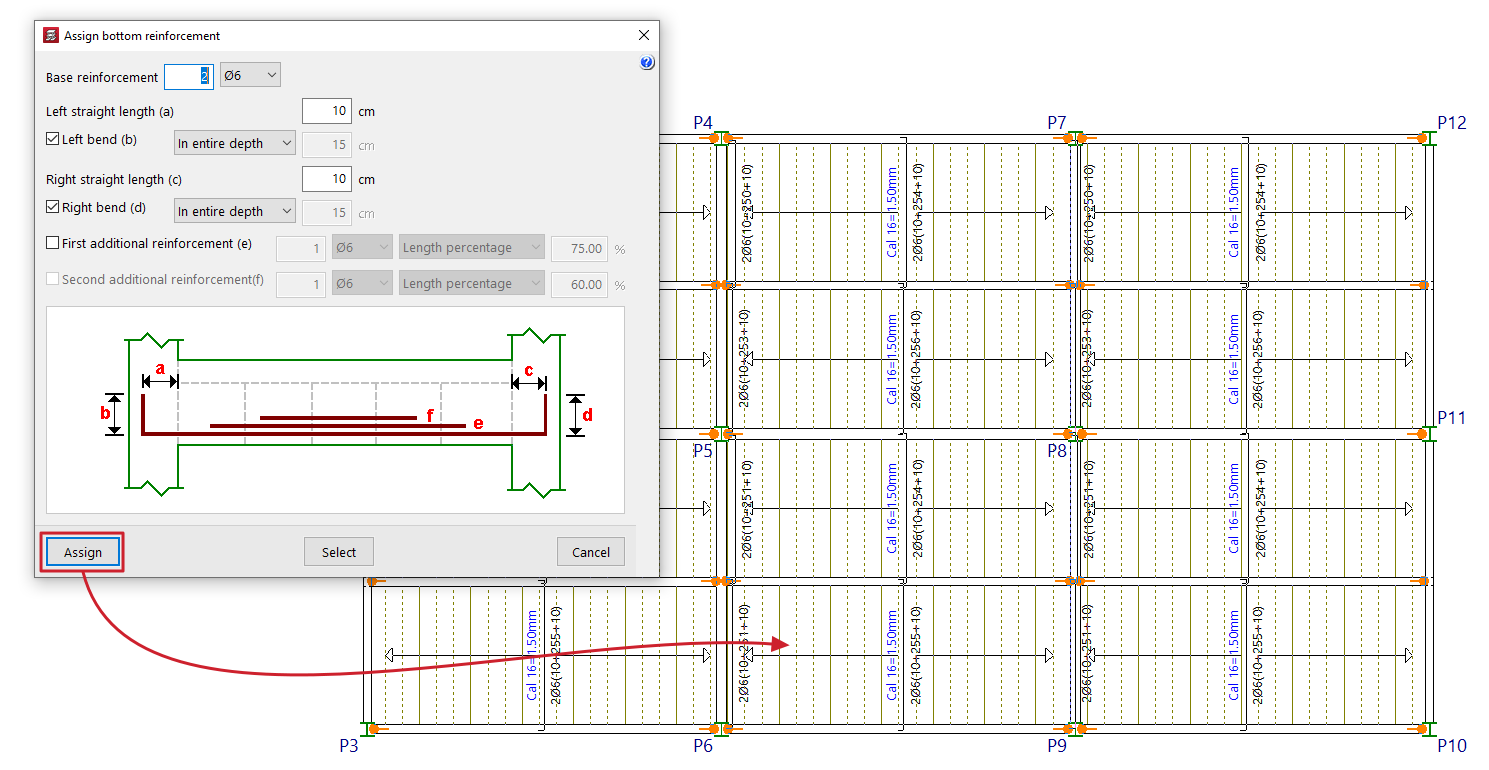
The "Assign reinforcement" option allows you to modify the reinforcement layout in composite slab floors.
To do this, specify the data to be assigned in the pop-up window:
- the "Base reinforcement", specifying the number and diameter of the bars, and including the following details:
- its "Left extension length (a)", with an optional "Left tab (b)" (across the "entire width" or to a "specified length");
- and its "Right straight length (a)", with an optional "Right bend (b)" (across the "In entire depth" or to a "Given length");
- Optionally, a "First reinforcement (e)" and/or a "Second reinforcement (f)" for positive reinforcement may be provided (over the "Full length", a "Specified length" or a "Percentage of length").
The diagram provides a visual aid to help understand each of the defined parameters (a, b, c, d, e, f).
Next, click on "Assign" and select a bottom reinforcement distribution strip on the floor plan to which you wish to assign this data. In the pop-up window, you can also use the "Select" option to copy the data from a selected bottom reinforcement distribution strip on the floor plan, or "Cancel" to close the window.
Modify position
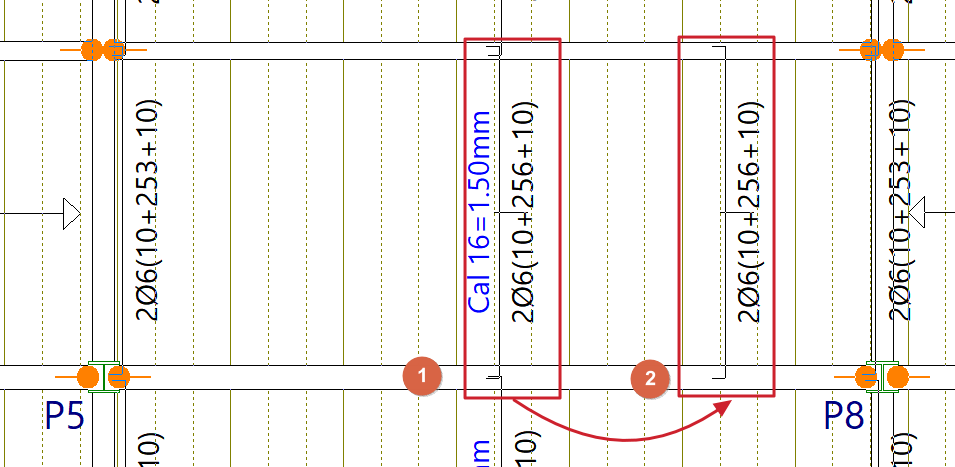
The "Modify position" option allows you to move the display of the top reinforcement from the slab width to another point within the same slab width. This can be useful when the reinforcement label interferes with other text.
To change the position of the reinforcement display, click on the label text in the reinforcement slab width, then click on a point in the same panel to define its new position.
Delete reinforcement
The "Delete reinforcement" option allows you to remove reinforcement bar distribution zones from positive sections.
To do this, select the slab width you wish to delete by tapping it on the screen.