Inserting joist floor slabs
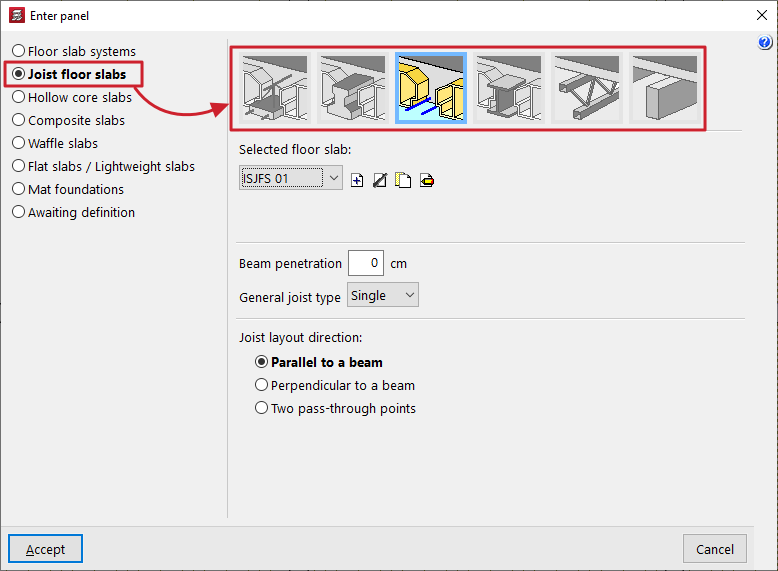
The "Joist floor slabs" option, within the "Enter panel" window (accessible via "Slabs > Panel manager”), allows you to enter precast concrete joist floors, both reinforced and prestressed, as well as in-situ, steel, joist and timber floor slabs.
Selecting the type of joist floor slab
The type of joist floor slab to be entered is selected using the options at the top of the "Enter panel" window:
- Reinforced joist floors / Prestressed joist floors
These options allow you to input prefabricated reinforced or prestressed joist floors in two ways: by using the "Library" types or by defining them "By geometric characteristics". - In-situ joist floors
This option allows you to include concrete joist floors that are fully assembled on site. - Steel joist floors
This option allows you to insert single-T or double-T rolled steel and isostatic steel joist floors. - Joist floor slabs
This option allows you to insert truss and isostatic steel joist floor slabs. - Wooden joist floors
This option allows you to input wooden joist floors with rectangular cross-sections and isostatic floors.
Next, in the "Selected floor slab" drop-down menu at the bottom, select and configure the properties of the specific floor slab to be entered.
Additional options and on-plan insertion
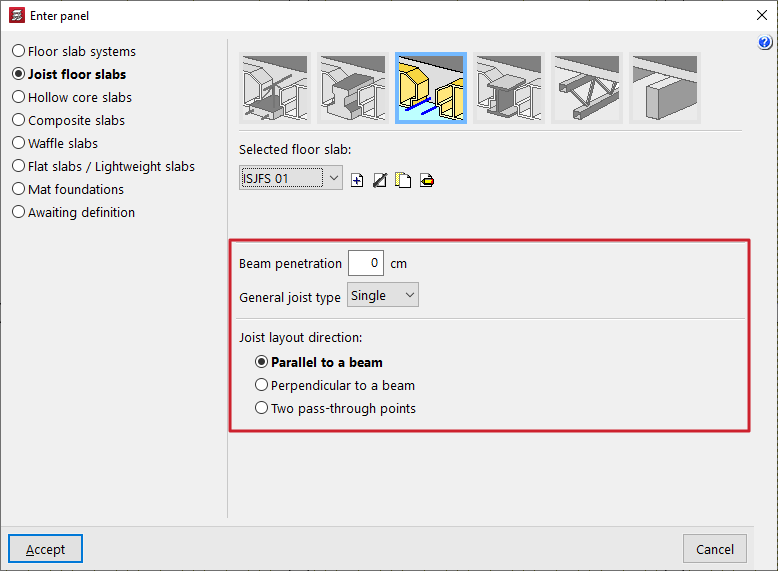
In the "Beam penetration" field, enter the length of the joist section that is inserted into the supporting beam. This is used solely for the purposes of measuring and drawing the joists on screen and in the drawings.
The "General joist type" field specifies whether all the joists in the floor slab are single, double or triple.
| Note: |
|---|
| If you need to change the number of joists at a specific point in the panel after it has been entered, use the "Enter double joist" and "Delete double joist" options in the menu. |
At the bottom of the window, you can specify the "Joist layout direction". These can be:
- "Parallel to a beam" or "Perpendicular to a beam", to be selected by the user;
- Alternatively, you can mark "Two pass-through points" on the floor plan to indicate the direction of the joists.
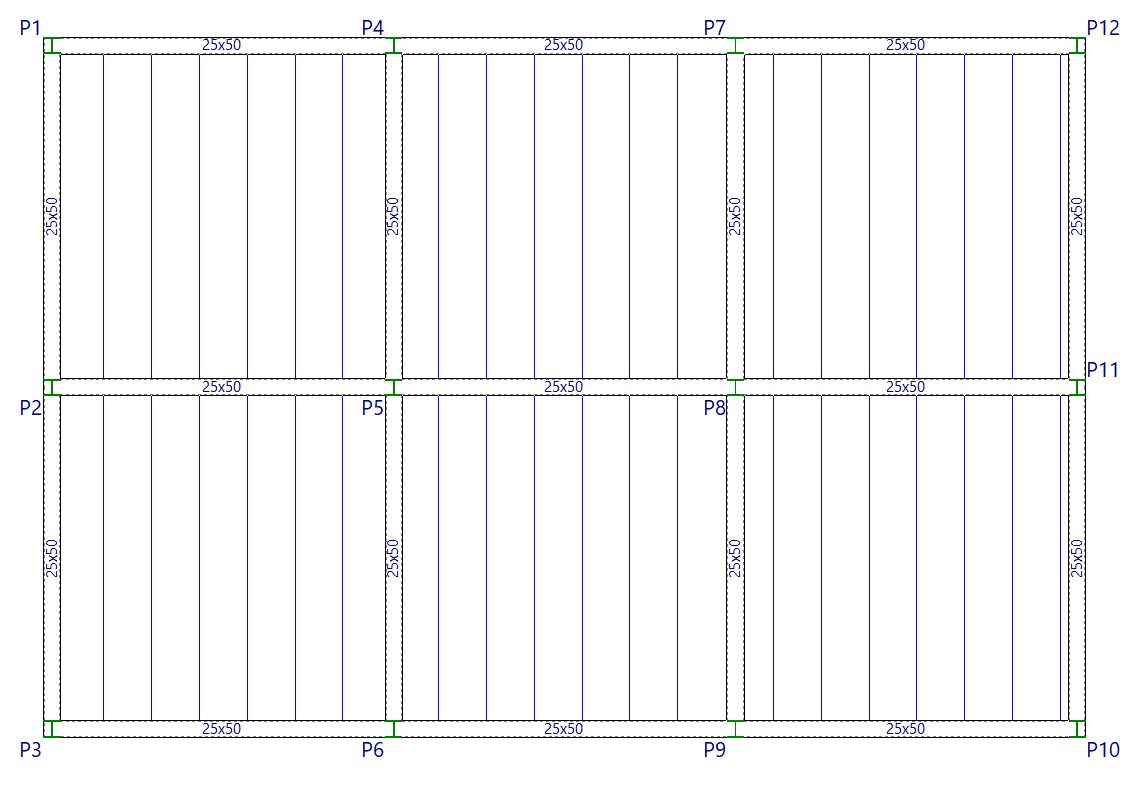
Once you have accepted, moving the cursor over the various closed outlines on the plan view will highlight the areas where the panel can be inserted. Then, click the left mouse button to insert the panel into that area.
Finally, using the left mouse button, you must select the beam or the support points that define the direction of the joists. The panel will be defined using this data and will be displayed on screen.