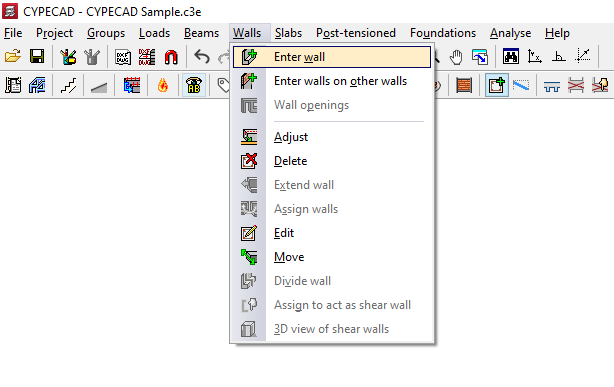
Inserting reinforced concrete block walls
To add reinforced concrete block walls, open the "Beam Input" tab, select the "Walls" menu, and choose the "Enter wall" option.
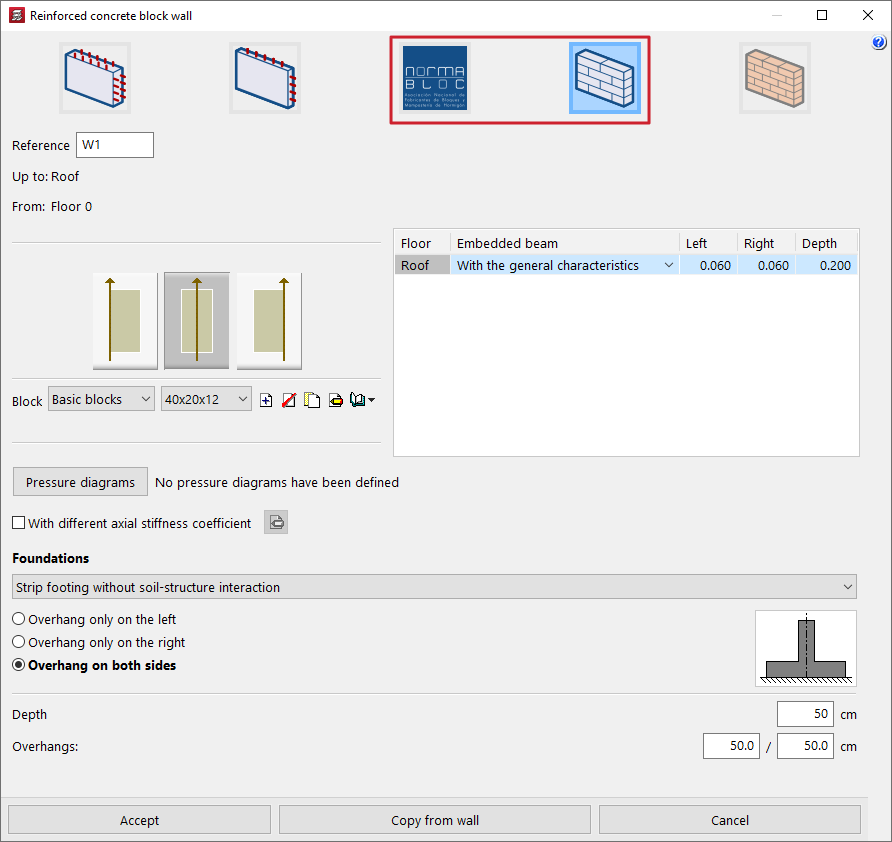
Next, select one of the following options at the top:
- "NORMABLOC", if you wish to use concrete block walls from this particular manufacturer’s group (this option is only available if a Spanish concrete standard is selected);
- or "Concrete block wall", if you wish to use generic user-defined concrete block walls.
These two types of walls offer specific options for their configuration, as described below.
The definition of the remaining wall data (such as its reference, its initial floor plan and final floor plan, the pressure conditions acting on the wall and the characteristics of its foundation), as well as the process of laying out the wall on plan, is identical to that carried out for other types of walls, such as concrete or masonry walls.
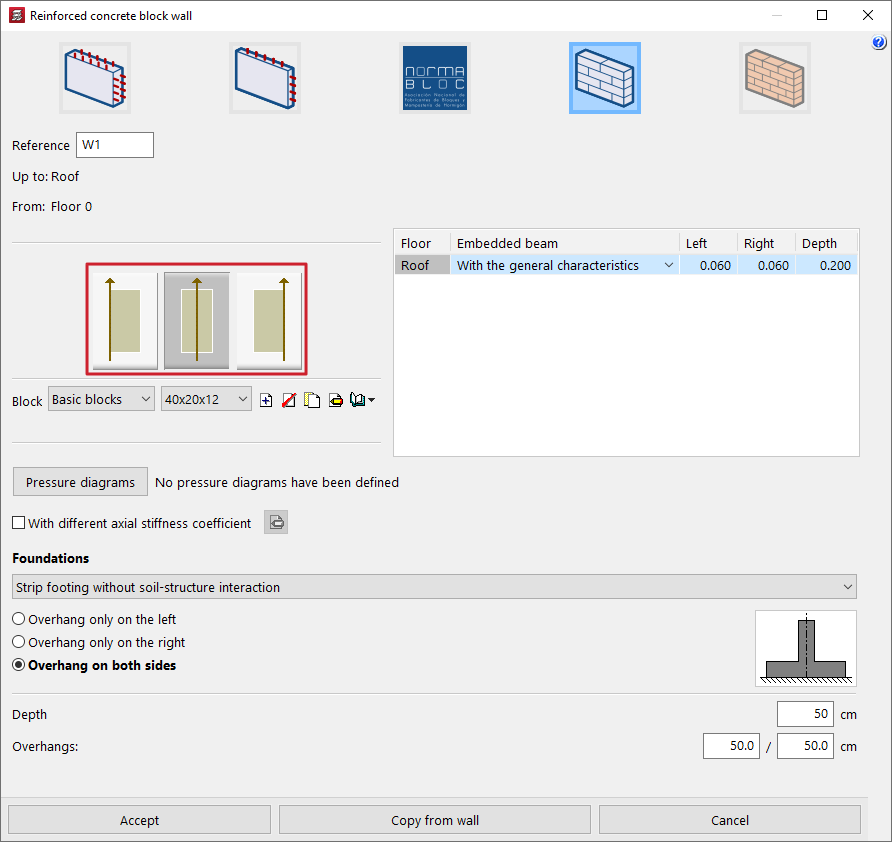
Wall adjustment
On the left-hand side of the panel, the program allows you to specify the wall thickness relative to the line along which the wall is entered on the floor plan (measured from the starting point to the end point entered) by selecting one of the following options:
- The wall is to the right of the line entered
- The wall is centred on the line entered
- The wall is to the left of the line entered
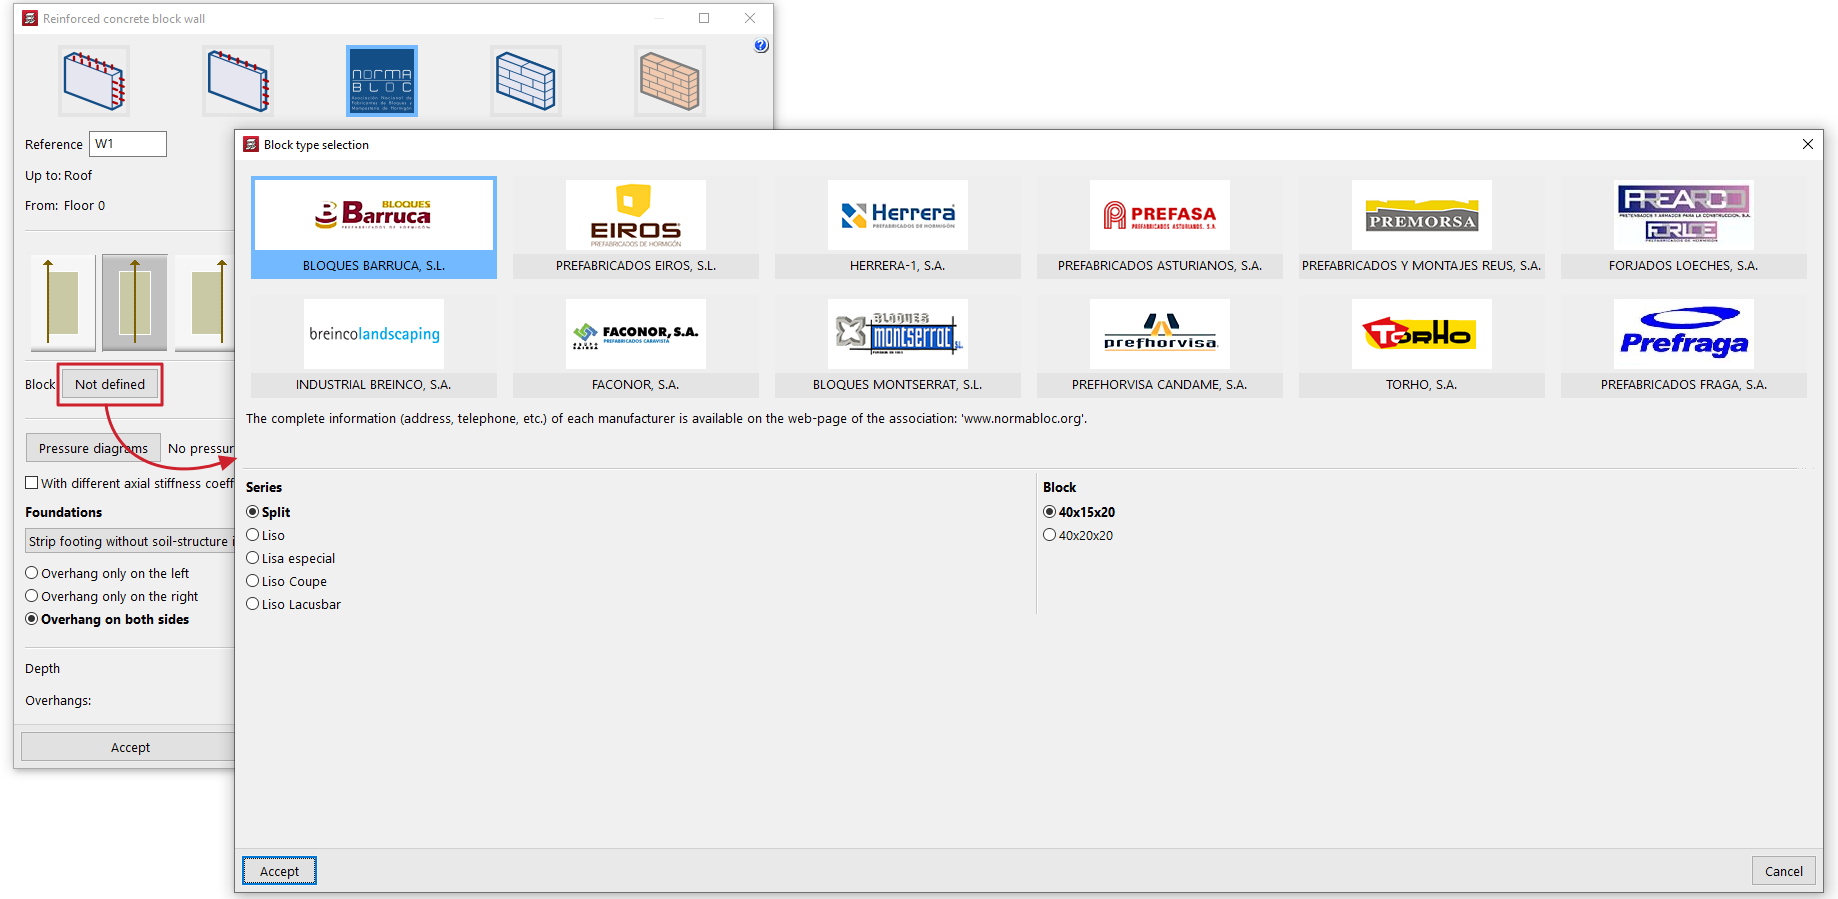
NORMABLOC wall selection
If a "NORMABLOC" wall is selected, clicking the "Block" option opens a window where you must select one of the manufacturers belonging to this association, as well as the specific "Series" and "Block" you wish to use, from the list of products offered by each of them.
Selecting the block type (generic concrete block walls)
If the "Concrete block walls" option is selected, in the "Block" section you can select the series and block from two drop-down menus from those available in the library.
The options on the right allow you to "Create", "Delete", "Copy" and "Edit" series of concrete block walls, as well as carry out the "Management of the section library" of concrete block walls by importing or exporting the data from the created series to files on the hard drive.
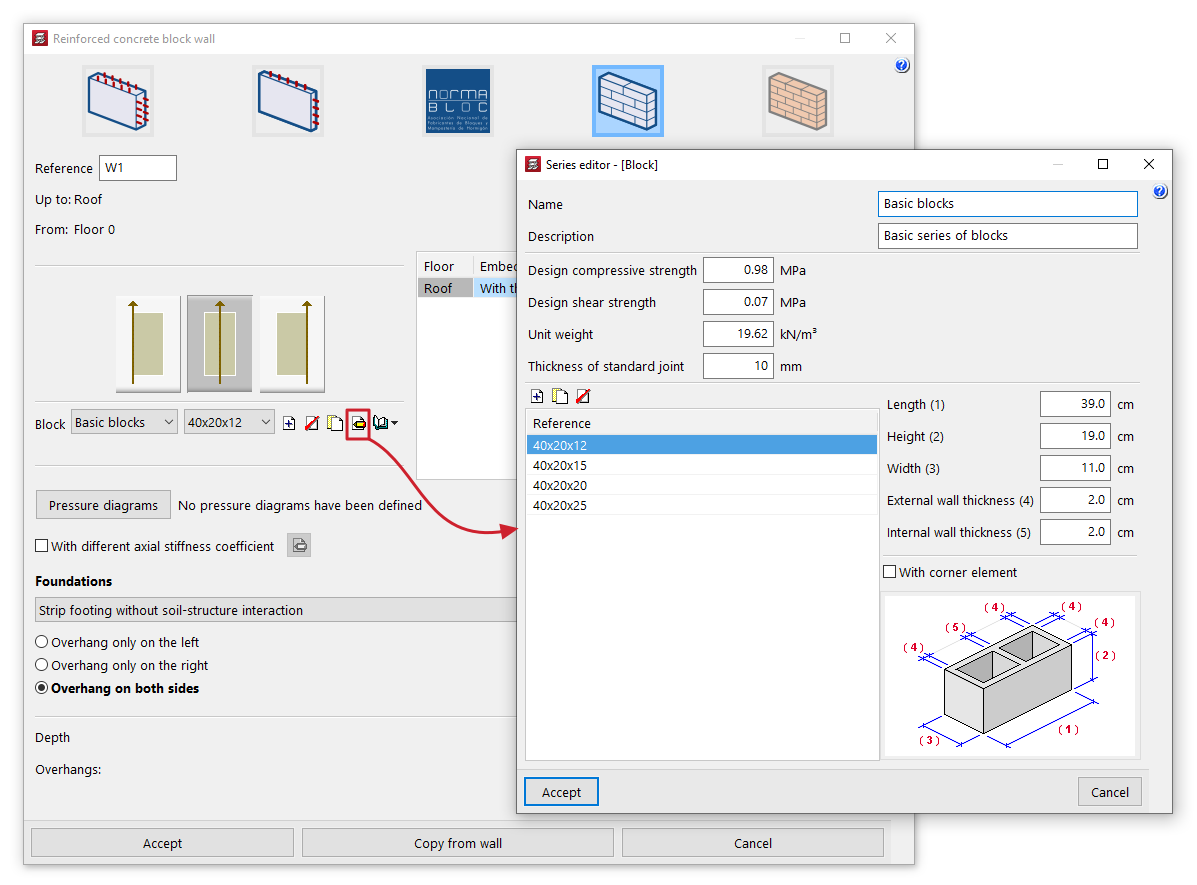
When creating or editing each series, you must define the following parameters:
- Name
Series name. - Description
Series description. - Design compressive strength / Design shear strength
Design compressive and shear strengths of the masonry, based on the gross area. These may be estimated based on the strengths of the components and the mortar, or based on the characteristic strength obtained from tests and reduced by the corresponding safety factor. - Unit weight
Average specific weight at the factory, based on gross area. - Thickness of standard joint
The thickness of the joint between the concrete blocks.
For each series, you must define the list of block types using the table on the left. To do this, when creating or editing each type, enter its "Reference" and the dimensions of each block. These are the actual manufacturing dimensions of the component, without taking into account the joints between blocks in the wall:
- Length
- Height
- Width
- External wall thickness
- Internal wall thickness
The program displays a diagram showing the block's dimensions at the bottom to help users understand these parameters.
Finally, the "With corner element" option allows you to specify that special corner pieces are available for the selected block type. Corner pieces are only necessary when the block's width is not equal to half its length. Otherwise, the corners can be fitted without special elements.