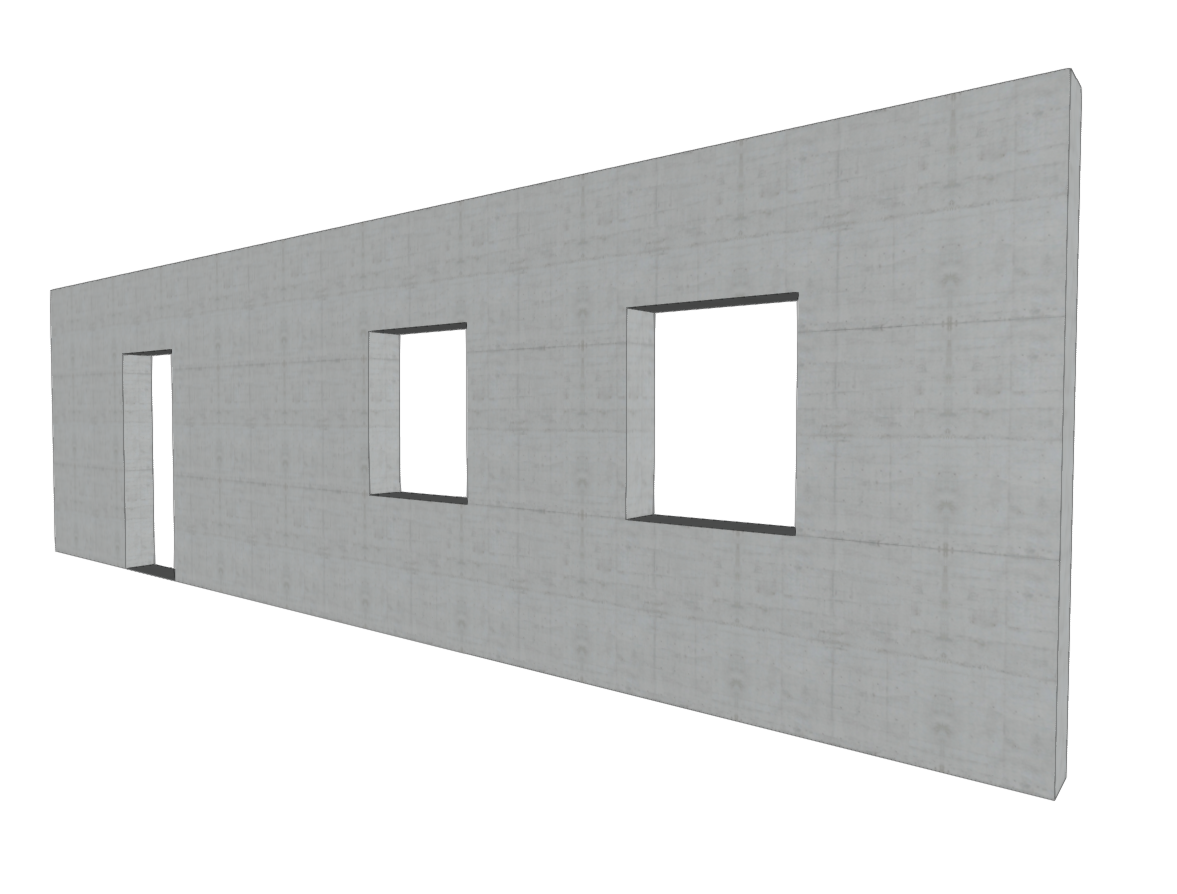
Inserting wall openings
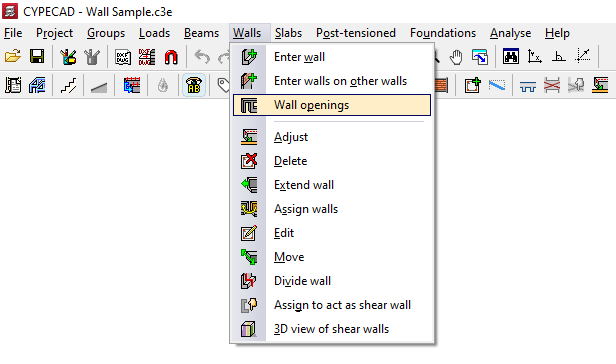
The "Wall openings" option in the "Walls" menu of the "Beam entry" tab allows you to enter and edit doors and/or windows in reinforced concrete walls, concrete block walls, and masonry walls.
| Note: |
|---|
| In order to insert the openings in the correct place, you will need to view the floor plan of the section of the wall between the floors where you want to open the hole. For example, if you want to insert a door or window in a wall between floor 1 and floor 2, you must view floor 1. Openings cannot overlap. It is also not advisable to insert openings very close to each other in order to ensure correct discretisation across the entire surface of the wall. |
The options available in this menu are as follows:
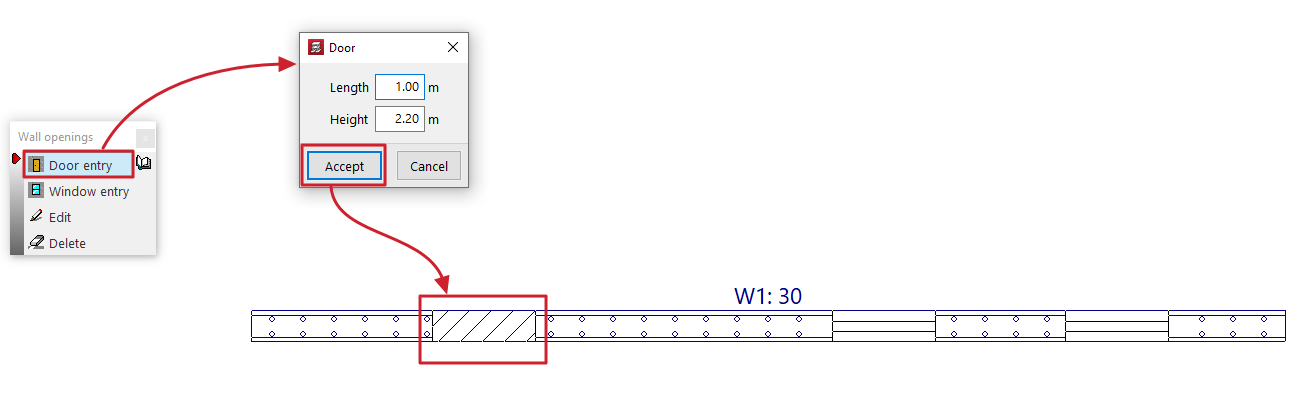
Inserting doors
This allows you to open a door in a wall.
The door is defined by the values for "Length" and "Height" entered in the dialogue box that appears when this option is selected.
After clicking "Accept", position the door on the wall by clicking and dragging one of its ends with the left mouse button on the floor plan.
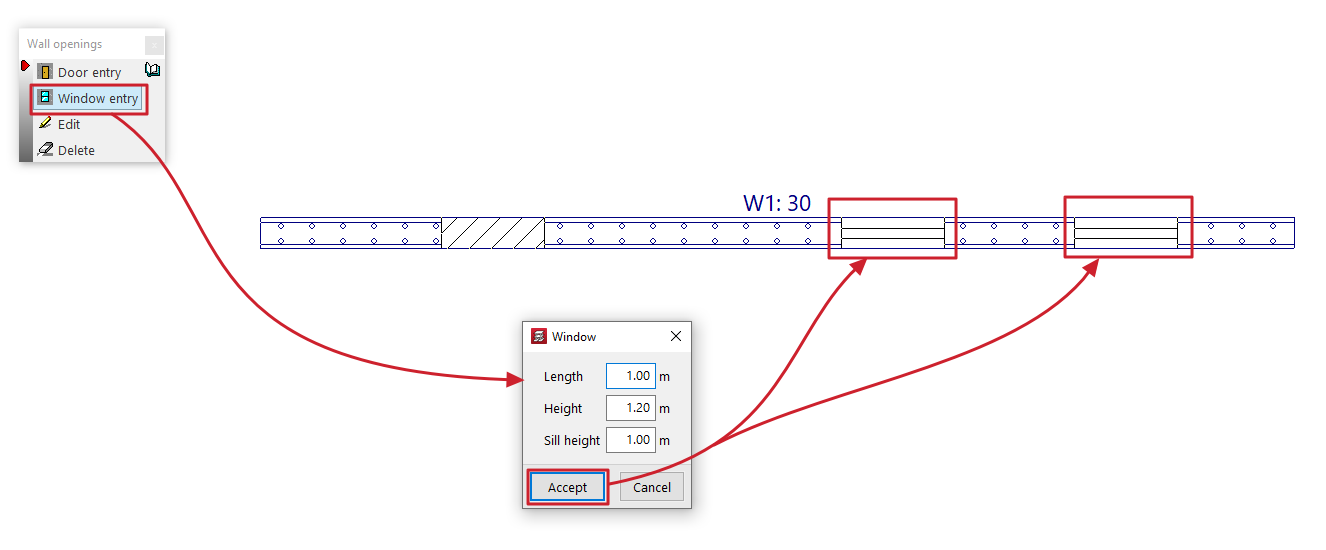
Installation of windows
This allows you to open a window in a wall.
The window is defined by the values for "Width", "Height" and "Sill height" entered in the dialogue box that appears when this option is selected.
After clicking "Accept", position the window on the wall by clicking the left mouse button on the floor plan to mark the position of one of its corners.
Edit
This allows you to edit the geometry of a door or window that has already been added to a wall.
To do this, simply select the opening on the floor plan and edit its details in the dialogue box that appears when you click on it.
Delete
This allows you to delete doors or windows previously added to the walls by selecting them one by one with the left mouse button or by using a selection area.