Matching reinforcement for slabs and waffle slabs
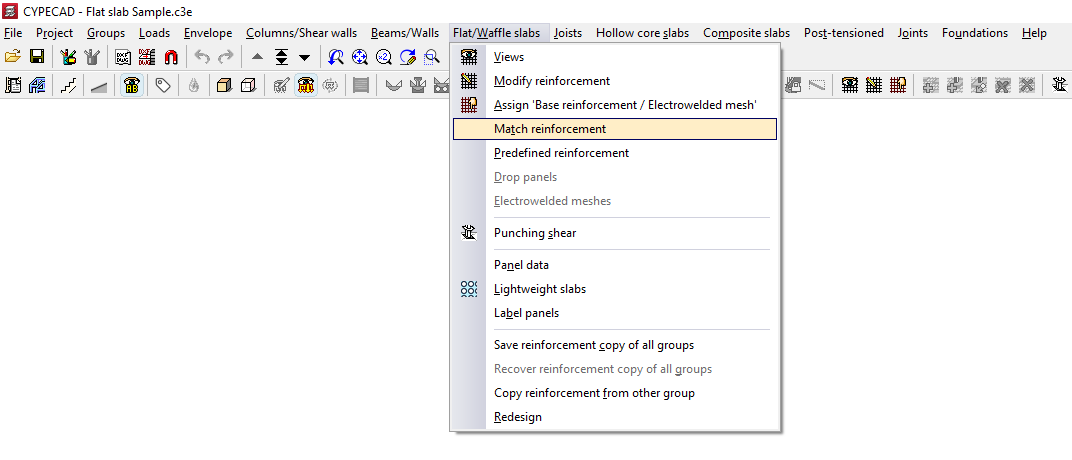
The "Match Reinforcement" option, available in the "Panels" menu on the "Beam input" tab and also in the "Slabs/Waffle slabs" menu on the "Results" tab, allows you to enter alignment lines or rectangles that unify the reinforcement of slabs and waffle slabs obtained after the analysis.
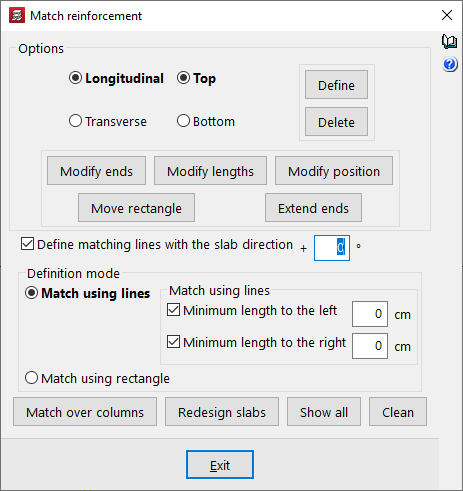
In the "Match reinforcement" window that appears when you click this option, the program offers various operations for aligning the reinforcement in grid slabs or flat slabs:
- Options
- Longitudinal / Transverse / Top / Bottom
This allows you to specify the type of reinforcement you wish to match, whether longitudinal or transverse, on the top or bottom face of the slab. - Modify ends
Moves one end of an alignment line or rectangle whilst keeping the other end fixed. If the "Define matching lines with the slab direction" checkbox is deselected, you can rotate the alignment line by dragging the selected end. - Modify lengths
Changes the minimum lengths of the alignment lines or rectangles entered. If the minimum length options are enabled and defined, they are replaced by the new lengths. If they are not, you must set the desired length by dragging the lines parallel to the main line with the cursor. - Modify position
Changes the position of the alignment line within a rectangle. - Move rectangle
Changes the position of an alignment rectangle. To do this, left-click to select it and drag it to its new position. - Extend ends
Lengthens or shortens the position of the ends of alignment lines and rectangles.
- Longitudinal / Transverse / Top / Bottom
- Enter
After selecting the type of assembly to align and the alignment mode, this allows you to insert alignment lines or rectangles on the floor plan. - Delete
Allows you to delete previously entered alignment lines or rectangles. To do this, go to "Options" and select the assembly in which you entered those lines or rectangles, then select the alignment lines or rectangles on the floor plan using the left mouse button. - Enter levelling lines with slab direction + 'X'º
If you wish to enter a levelling line at any angle, deselect this box. If you wish to set a specific angle, tick this box and specify the angle to be applied. If this box remains ticked with a value of 0°, as is the default, alignment lines can only be entered in the main directions of the slab. - Input mode
Allows you to select whether alignment is performed by lines or by rectangles:- Match using lines
This allows you to enter an alignment line. The procedure is as follows: after selecting the type of reinforcement to be aligned in the "Options" section of this window, click the "Enter" button. Next, enter the alignment line in plan view by marking its start and end points, ensuring it is perpendicular to the reinforcement ribs or bars to be aligned, and extending from the first to the last rib or bar to be aligned. All bars intersected by this line will be aligned when the "Reinforce slabs" option is used.- Min. length on the left / Min. length on the right
If you wish to align the line by adding minimum lengths on both sides of the alignment line, tick these boxes and enter the lengths in centimetres. If you prefer to mark these lengths on the plan, deselect these checkboxes and press "Enter"; then mark the two end points of the line, followed by two points on the plan to define the left and right lengths. This is a way of creating an alignment rectangle.
- Min. length on the left / Min. length on the right
- Rectangular bracing
Allows you to enter a bracing rectangle. The procedure is as follows: after selecting the type of bracing to be entered in the "Options" section of this window, click the "Enter" button. Next, select two opposite corners of the rectangle. This rectangle is equivalent to a line-based equalisation with minimum bar lengths applied on both sides of the line. All bars captured by the rectangle will be equalised when the "Redesign slabs" option is used.
- Match using lines
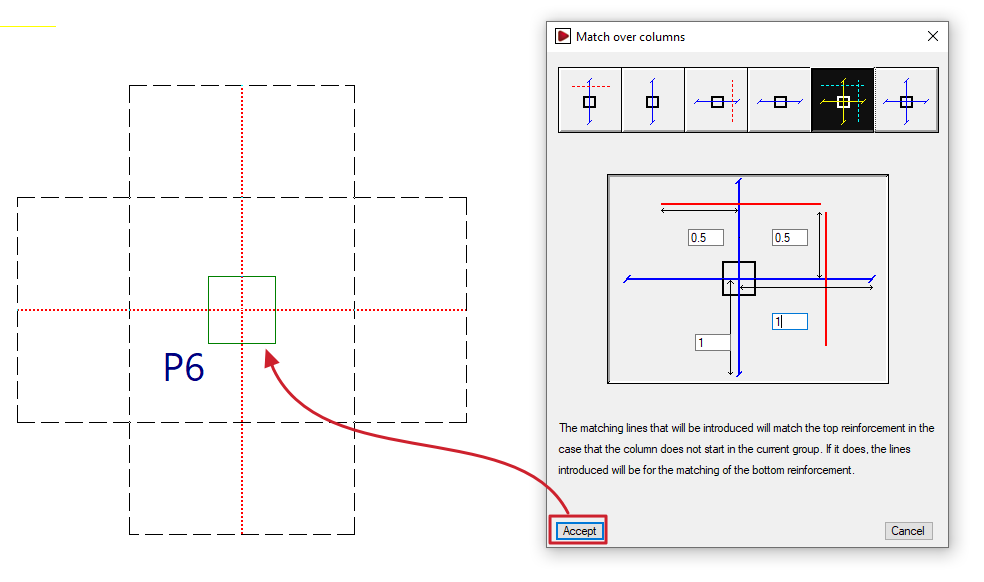
- Match over columns
Generates alignment lines or rectangles by entering dimensions from the column centreline to align the negative reinforcement on columns, either transversely, longitudinally or both. The alignment line is shown in blue in the icons in this window, and the length on either side of the line is shown in red. This allows the reinforcement of abaci to be standardised. If the column originates from the current group (for example, if the column is supported on a floor slab or sits on a foundation slab), instead of entering alignment lines for the upper reinforcement, the lines entered will align the lower reinforcement. - Redesign slabs
If the job has been analysed, this option reinforces the slab, taking into account the presence of reinforcement levelling bars and rectangles. - View all
Displays all the alignment lines and rectangles entered on the floor plan, regardless of the assembly type selected in the "Options" section of this window. - Clear
Removes the balancing lines or rectangles that are not in contact with two-way slabs. To delete them, you must select the reinforcement type in "Options" where the balancing lines or rectangles were entered.
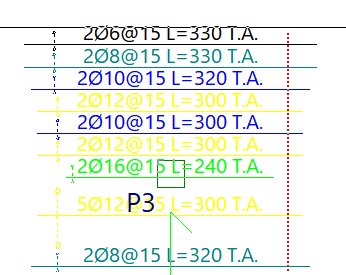
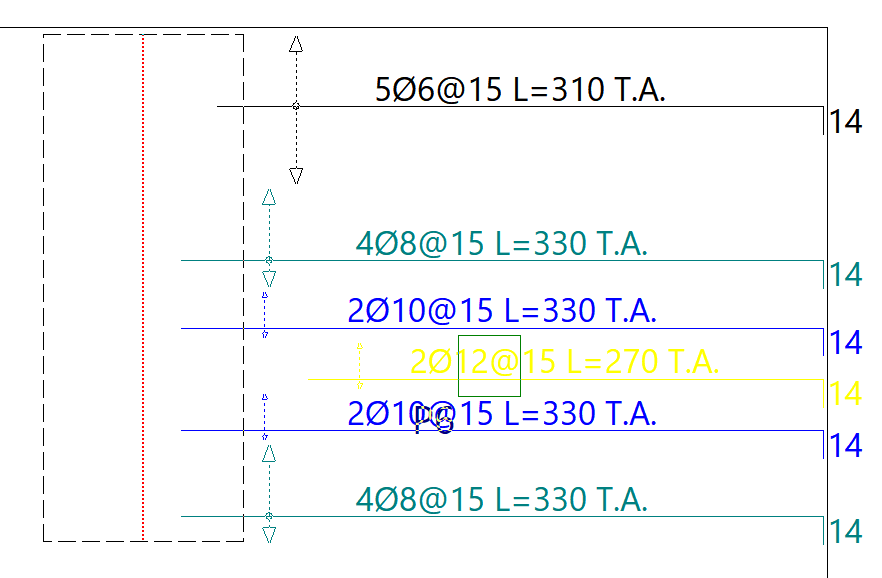
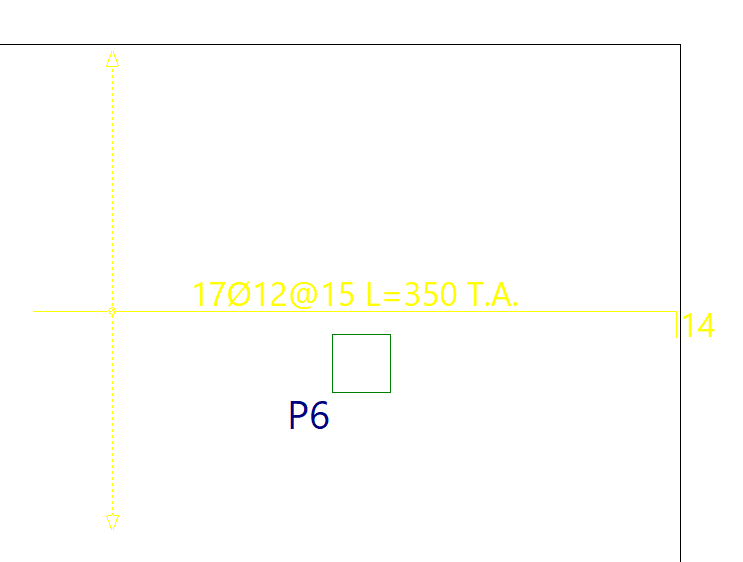
Reinforcement matching consists of determining an envelope of reinforcement, which is roughly equivalent to selecting the largest cross-sectional area and length of reinforcement from all the ribs or reinforcement bars intersected by each matching line.
Matching lines or rectangles will be drawn in red if they are for upper beams and in blue if they are for lower beams, and they remain in place even if the structure is redesigned.