Procedure for entering floor slabs with horizontal elevation changes
The way to define floor slabs with horizontal elevation changes is as follows:
- The floor slabs are inserted into the floor plan without any unevenness, as with the rest of the slabs, defining their outline using beams or walls and then defining and inserting each slab using the options in the "Slabs" menu:
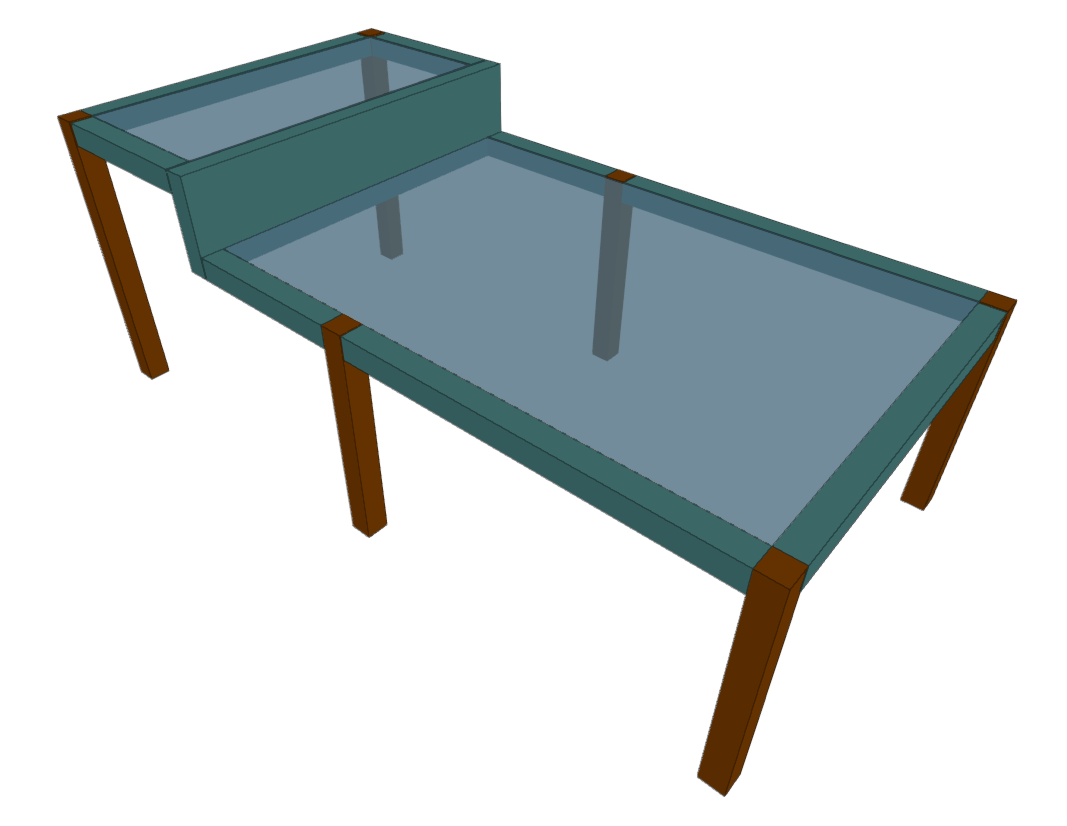
- Each floor area at a given level must have its outline perfectly defined by elements such as beams.
- All floor slabs will initially always be assigned to the group's base plane. The group's base plane is the horizontal plane that has the elevation defined for that floor and will coincide with the upper face of the floor slab entered.
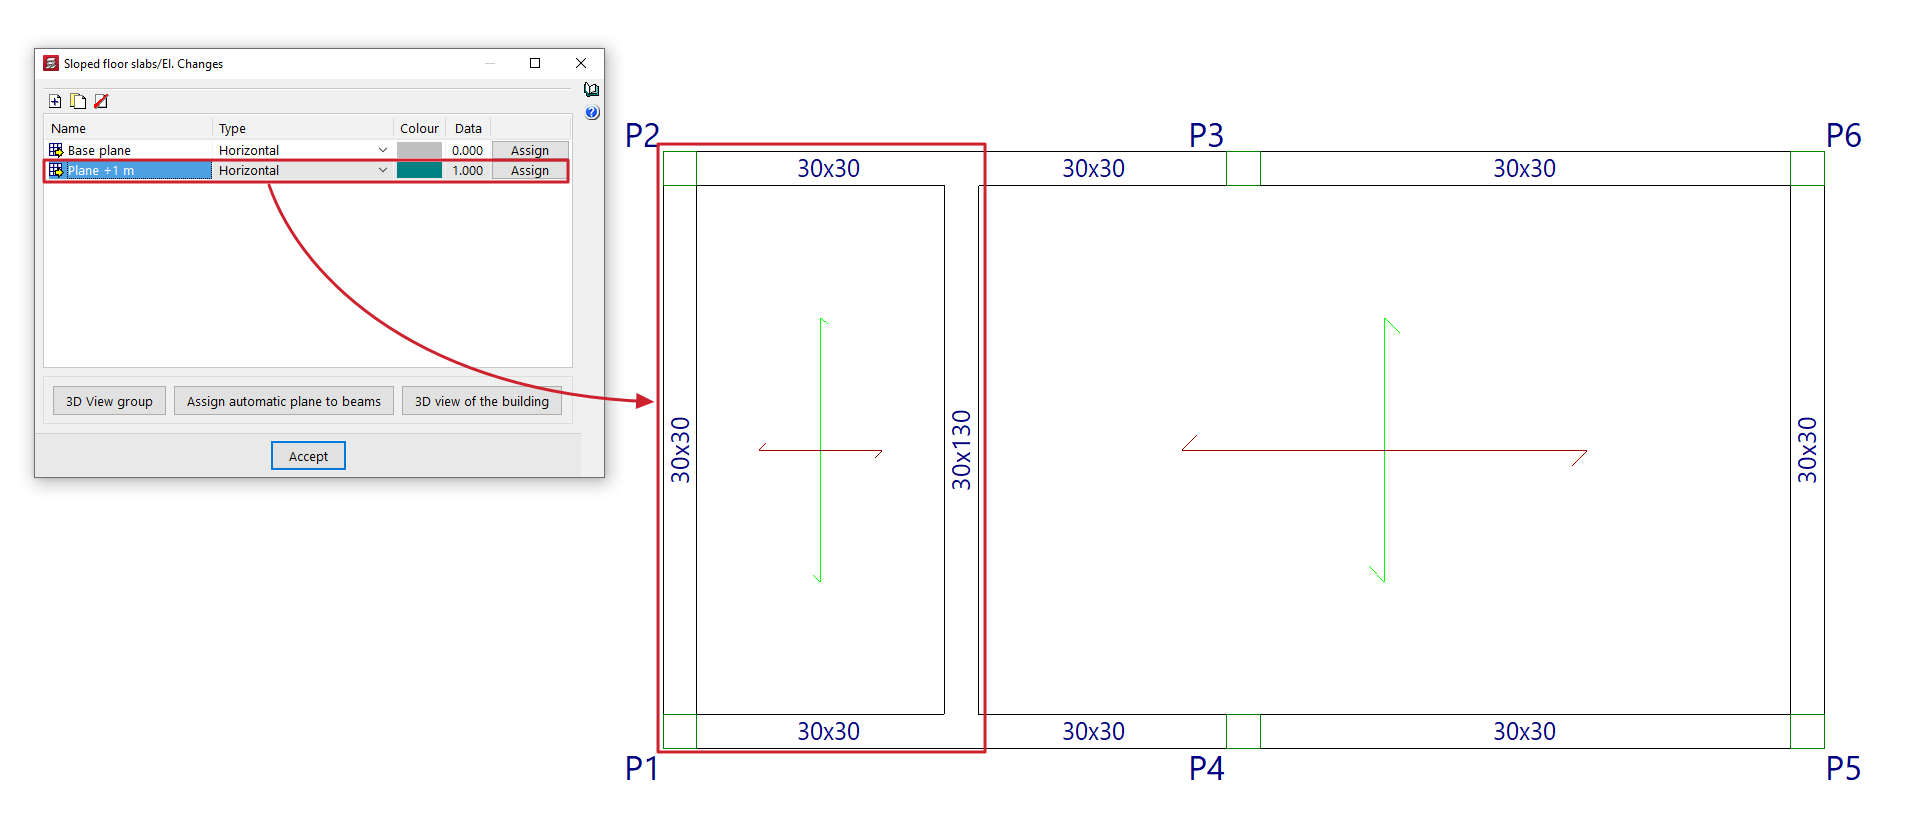
- Then, from "Groups > Sloped floor slabs/Elevation changes", click on "Add" to create a new plane.
- Select "Horizontal", enter the desired "Elevation change" (or distance, negative or positive, from the base plane) and click on "Accept".
- The "Sloped floor slabs/Elevation changes" window will reappear. Now, click on the button in the "Assign" column in the line corresponding to the newly defined plane.
- The program will display a colour code on the floor plan with the assignment of planes to each panel. You must click on each of the slabs or beams to which you wish to apply the elevation change. This will change their colour.
- To finish assigning planes to panels and beams, click the right button, which will reopen the "Sloped floor slabs/Elevation changes" window.
- Steps 2-7 must be repeated to create the other necessary elevation changes and assign them to the corresponding floor panels.
- Click "Accept" in the "Sloped floor slabs/Elevation changes" window to finish the operation.