Quantity status
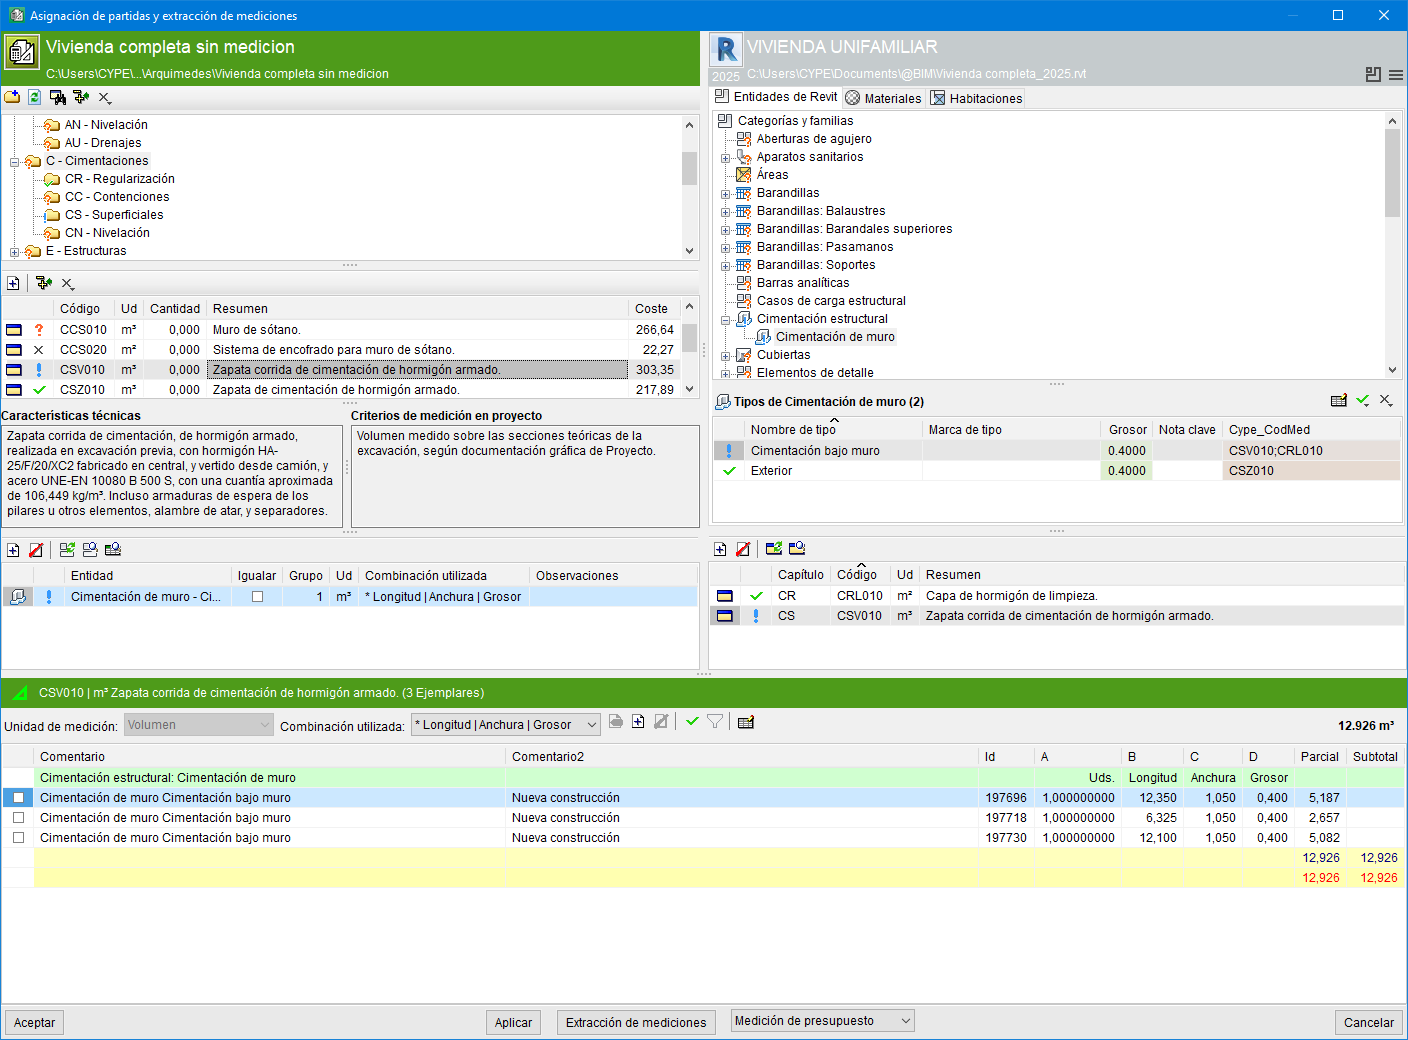
The quantity status allows you to see which Revit items or entities have yet to be assigned to one another in order to extract their quantities. This enables you to ascertain the current status of the quantity extraction tasks for the Revit model.
To indicate statuses, markers are placed over the icons for items, work sections and Revit entities ("Types", "Categories", "Families" and "Materials"). These markers, as well as the status of the quantities, can be viewed in the "Assign items and quantity extraction" dialogue box.
The following marks may appear:
- When there are no allocated items:
 - Do not assign an item to the Revit entity
 - To be assigned to the Revit entity
- When items are allocated:
 - No quantities
 - With quantities, but without a parameter combination for the unit of measurement
 - Available parameter combinations
 - Predefined parameter combination
 - Verified or validated
"Verify" and "Do not assign" options

Once a Revit object has been assigned to an item, or when an item is assigned to a Revit object, the indicator that appears provides information about the status of that assignment.
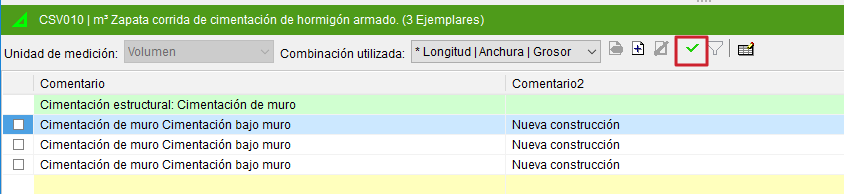
Once the quantity has been reviewed, the item quantity must be marked as verified or validated using the "Verify" button located in the settings area of the quantity details table.
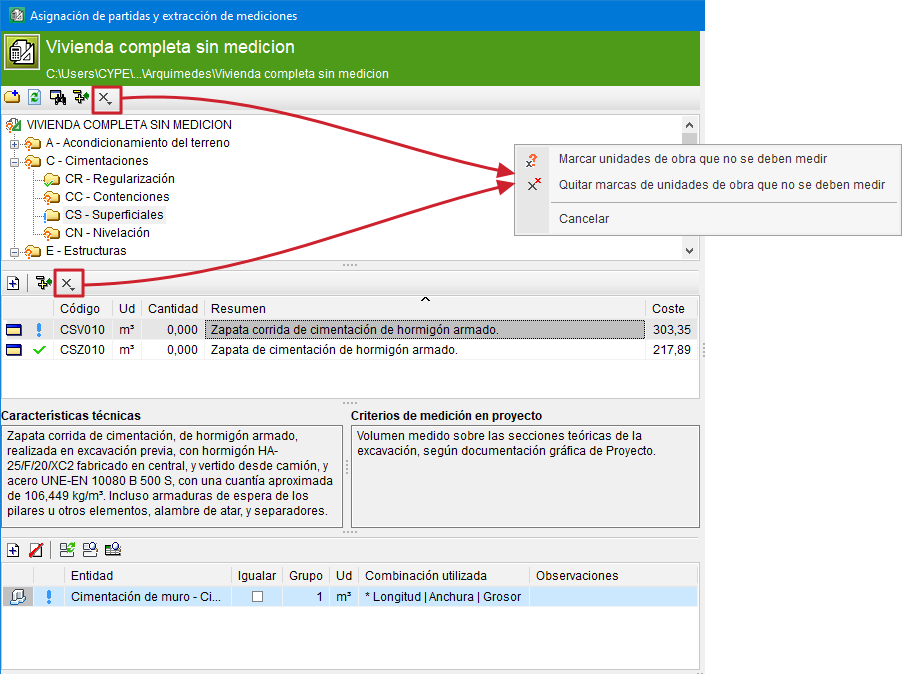
To help users identify the work sections and items that will not be measured by the Revit model, the "Do not assign" button is also displayed in the work sections and items areas of the green section.
To mark work sections or items that should not be measured, click the corresponding button for work sections or items. By clicking the button, you can either add or remove the mark for not measuring.
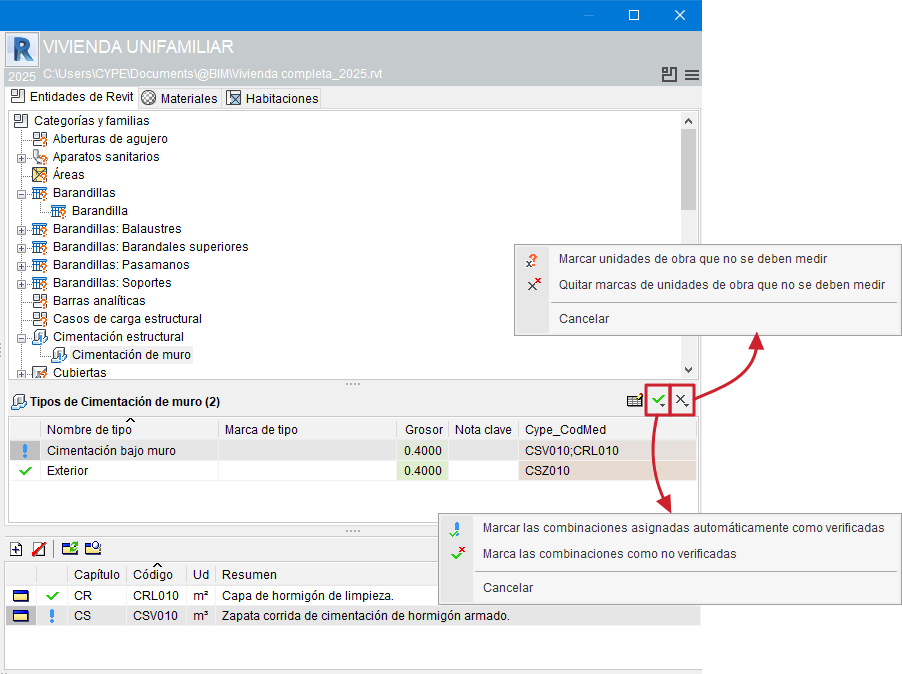
The "Verify" and "Do not assign" buttons at the top right of the "Types" list allow for quicker management of tags when verifying or not assigning items to Revit entities.
- Using the "Verify" button, you can mark all Revit entities (in this case, all "Types") or the selected ones as verified, depending on whether they are assignments of "Available Parameter Combinations" () or a "Predefined Parameter Combination" (). It also allows you to remove the verified flags.
- Using the "Do not assign" button, you can mark all Revit elements or the selected ones as non-assignable, or remove the "Do not assign" flags.
The same procedure would apply to the other tabs, such as "Materials", "Rooms", etc.