Update history
Plugin MedBIM - Revit
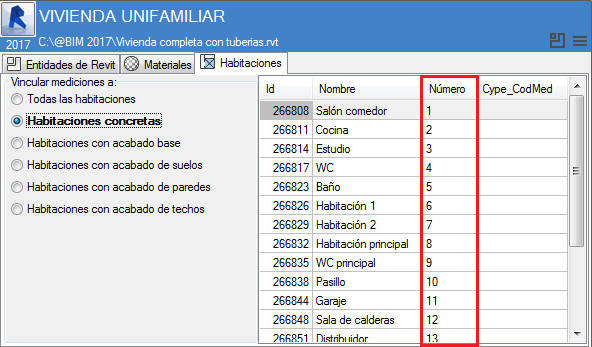
“Number” column in the “Job item assignment and quantity extraction” dialogue box
- Published on
- 2017.b
Part to deduct from quantities
- Published on
- 2017.b
Quantities to deduct
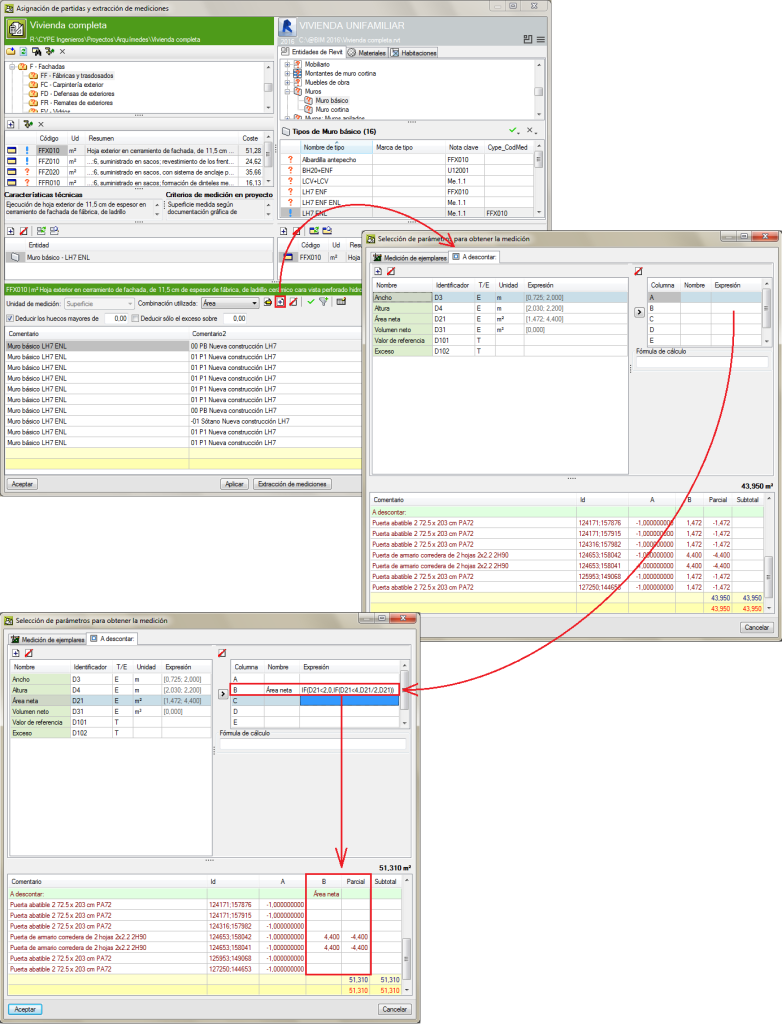
The procedure to generate a table with quantities to deduct from an extracted Revit model has been improved.
A new tab: “To deduct”, has been included in the Selection of parameters to obtain quantities dialogue box (which can be accessed by selecting the ![]() button in the “Job item assignment and quantity extraction” window. This tab only appears when openings have been defined and have to be deducted from the job in Revit. The parameters to be applied in the creation of the table with the quantities to be subtracted can be defined here. It is possible to include rules to establish the quantity to be deducted using logical expressions.
button in the “Job item assignment and quantity extraction” window. This tab only appears when openings have been defined and have to be deducted from the job in Revit. The parameters to be applied in the creation of the table with the quantities to be subtracted can be defined here. It is possible to include rules to establish the quantity to be deducted using logical expressions.
This way more precise values are obtained for quantities, by for example, taking into account quantities to subtract due to openings.
An example that can be resolved using this improvement is the subtraction of openings following more than one rule. E.g.: openings greater than 4 m2 could be subtracted in façade and partition quantities and, if the area of the opening lies between 2 and 4 m2, only half is to be deducted.
- Published on
- 2016.l
Mark chapters or job items that are not to be measured
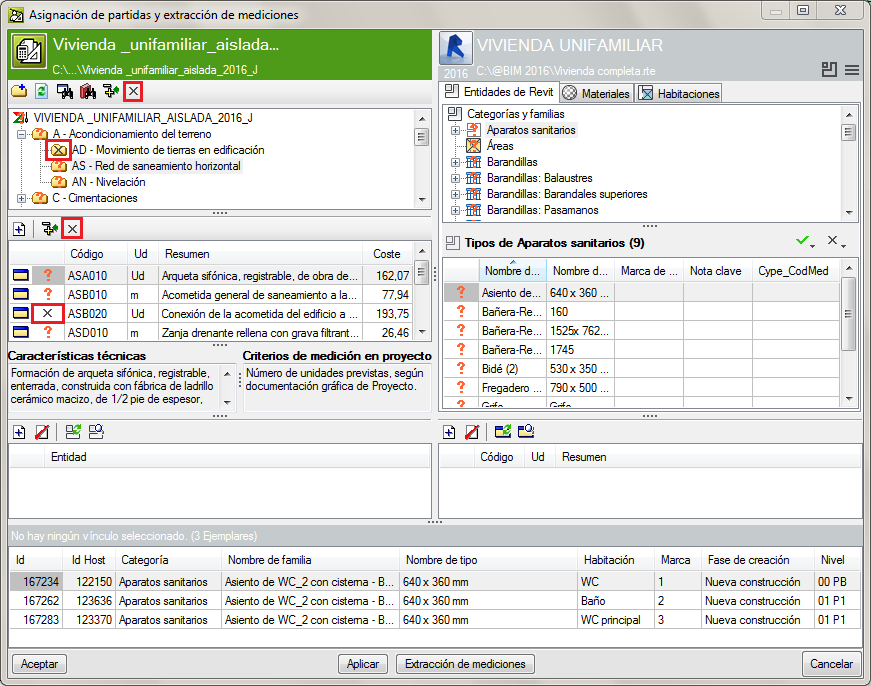
In order to aid users to identify chapters and job items that are not going to be measured using the Revit model, the button has been added in the chapter and job item zones of the Job item assignment and quantity extraction dialogue box.
To mark chapters or job items which are not to be measured, the button corresponding to chapters or job items must be pressed. In no case does the mark prevent or block the program from carrying out the measurement. Upon pressing the button, the mark to not measure can be added or removed.
- Published on
- 2016.j
Show chapter or job item in the “Decomposition tree” window
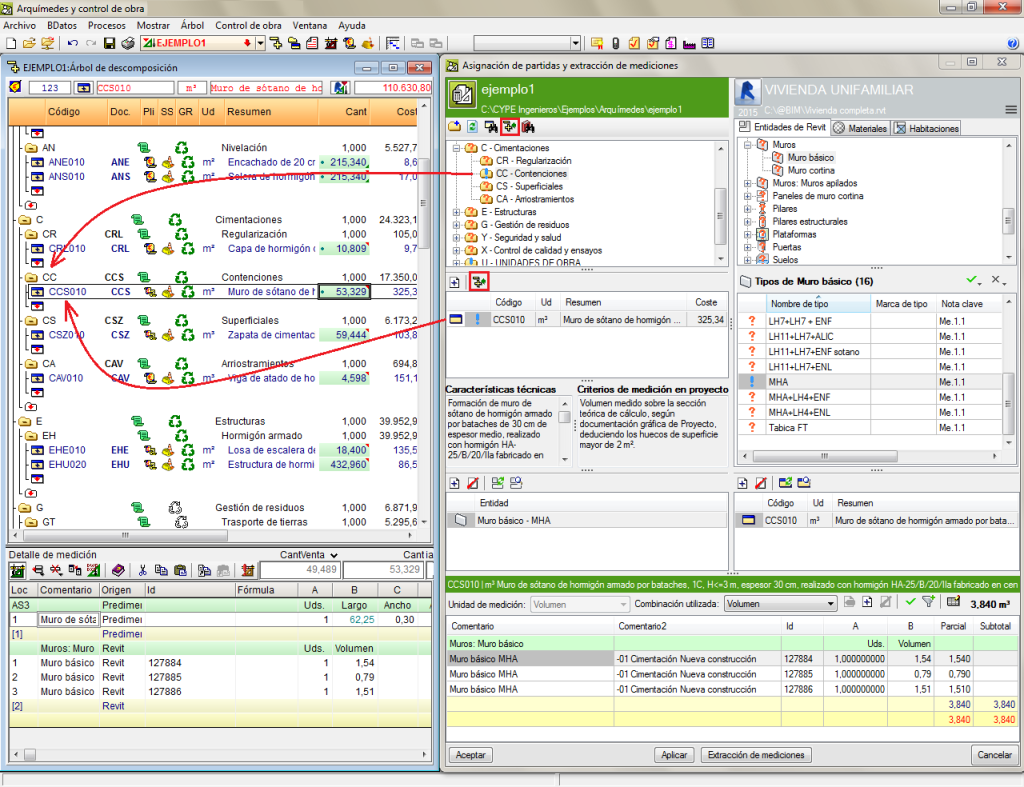
A new button Show in the “Decomposition tree” window  has been added in the Job item assignment and quantity extraction dialogue box (which appears when a Revit job is linked to Arquimedes). This button displays the chapter or job item that has been selected from the chapter or job item zone of the “Job item assignment and quantity extraction” dialogue box, whilst the position of the current column is maintained in the Decomposition tree window.
As an example, using this option, users can obtain a parallel view of the status of the (already consolidated) quantities contained in the Decomposition tree window and those to be extracted in the “Job assignment and quantity extraction” dialogue box.
- Published on
- 2016.j
Comments composition for the quantities table
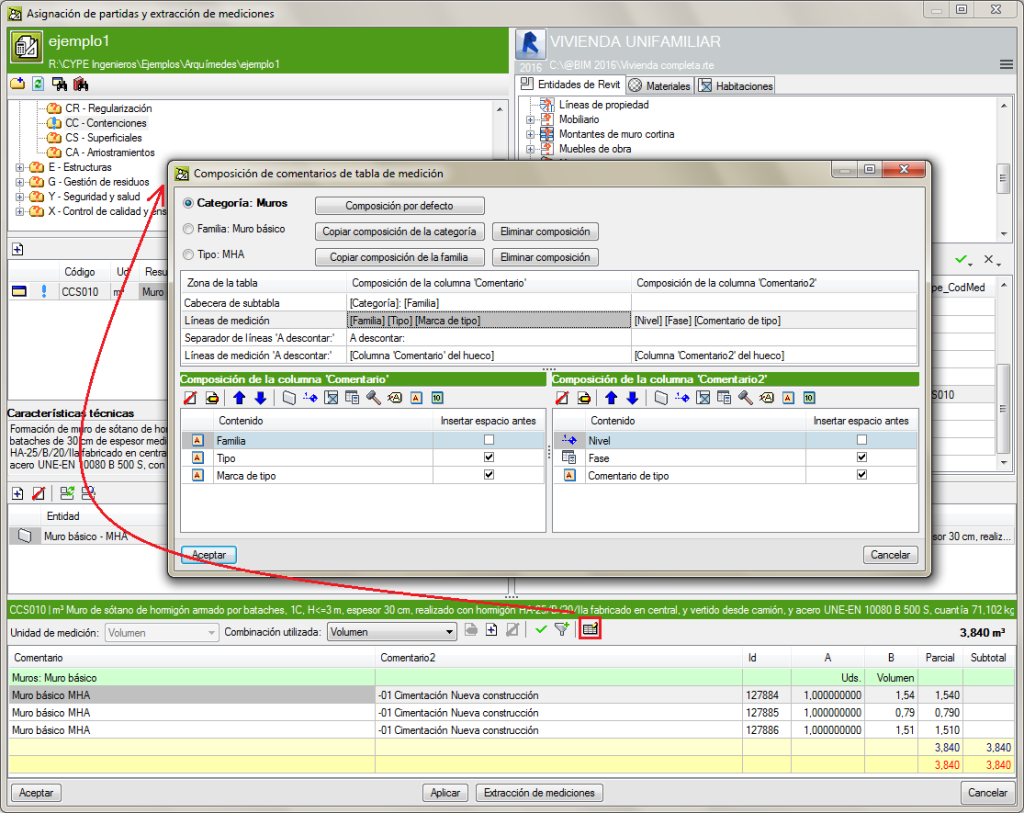
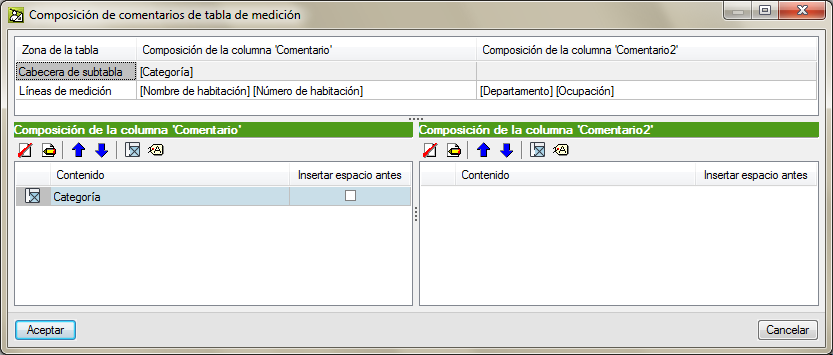
The Comments composition for the quantities table dialogue box, which appears when the Comments button ![]() is pressed, has been improved. Users have more comment construction possibilities for Subtable headers, Quantity lines, Line spacers “To deduct” and Quantity lines “To deduct”. The composition of the Comment and Comment2 columns can be seen in a single dialogue box, allowing users to compare both comments at the same time.
is pressed, has been improved. Users have more comment construction possibilities for Subtable headers, Quantity lines, Line spacers “To deduct” and Quantity lines “To deduct”. The composition of the Comment and Comment2 columns can be seen in a single dialogue box, allowing users to compare both comments at the same time.
Default compositions are created using information of the Category, Family or Type of the quantity elements, which aids in composing the comments.
When quantities are extracted, if comments have been defined using the Category, Family and Type information (or any combination of them), the comments that have been created using the more detailed information prevail. The priority is Type > Family > Category. In other words, the program checks to see if there are any comments in Type and if so, these comments are used. If none are found, the program checks if there are comments present in Family, otherwise it checks if there are comments in Category.
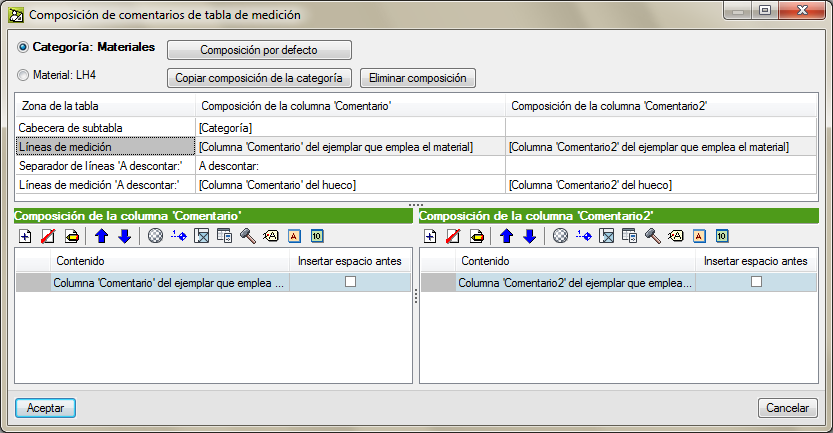
If the quantities of the job item are obtained by linking them to a Material, as of the 2016.j version, comments can be composed by using information of the Material category or of the material itself.
If job items are assigned from the Rooms tab, the creation of the comments is simplified.
- Published on
- 2016.j
Edit the link between a job unit and Revit, from a quantities table
A new option: Edit link between the job unit and Revit, has been implemented in a contextual menu which appears when the right mouse button is clicked on a quantities line in the Decomposition tree window. This option displays the element that corresponds to the selected quantity line in REVIT, helping users to locate it more easily.
- Published on
- 2016.h
Show element properties
A new option: Show properties, has been implemented which displays all the information of an element in a specific window to find information more easily.
The Show properties option appears in a contextual menu when the right mouse button is pressed over an Element or a Type from the Job item assignment and quantity extraction window.
- Published on
- 2016.h
Keynotes with more than one associated job item code
If a Type exists in the Revit model which contains more than one code in its Keynote, Arquimedes reads each job item code and assigns it to the “Cype_CodMed” field, as long as the job item code in the bill of quantities of Arquimedes is linked to the Revit model.
The job item codes in the Revit keynote must be separated by one of the symbols shown in the table below:
| Comma | , |
| Colon | : |
| Semi-colon | ; |
| Forward slash | / |
| Back slash | \ |
| Vertical bar | | |
- Published on
- 2016.f
Identification of elements depending on the room
It is possible to identify, depending on the “Room”, elements of the BIM model containing information of the “Room” in which they are included.
Not all the Revit elements contain “Room” information. This information usually corresponds to elements which are specific to the room containing them, such as doors, windows, furniture, bathroom fittings, etc. For example, when measuring doors or windows, users can indicate in the comments section of the quantities which room each measurement corresponds to using the “Comments” or “Comments 2” field. Doors and windows between rooms are not considered as being in one room but in two, and Revit provides the name of both rooms.
- Published on
- 2016.f
Revit groups
The Revit model which is read by Arquimedes contains all the information on Groups. This way all the information of the groups that have been created in Revit and their data can be viewed from Arquimedes. It is also possible to measure the groups.
- Published on
- 2016.f
New buttons
 button
To help to alternate between the “Job item assignment and quantity extraction” and “Linked job data” dialogue boxes, the button has been added to both dialogue boxes. The F7 key also carries out the same alternating function between the dialogue boxes.
 button
The button has been added to the “Job item assignment and quantity extraction” and “Linked job data” dialogue boxes. This button is the access point to the different options in each of these dialogue boxes:
- In the “Job assignment and quantity extraction” dialogue box, the
 button allows users to access the Global quantity filters and the Design options.
 - In the “Linked job data” dialogue box, the
 button allows users to access the “Find element by ID” option.
- In the “Job assignment and quantity extraction” dialogue box, the
- Published on
- 2016.d


