Creating and inserting user symbols
The options in the "User symbols" menu in the sheet editor are used to create, manage and insert user symbols (freely composed of lines, arcs, polygons, text, tables and other elements) into the sheets to supplement the project information.

This menu includes the following options:
Library
The "Library" option lets you access the library of user symbols stored within the program.
The "User symbols" list is displayed on the left, whilst a "Preview" of the selected symbol is shown on the right.
The "Edit" option at the top lets you change the position of the "Insertion point" for each symbol.
User symbols can be exported to files on the local drive for subsequent import into other projects using the other options on the top toolbar. The symbols are saved in .oblsymbol files.
Create
The "Create" option lets you create a user symbol from a selection of elements such as lines, arcs, polygons, text and/or tables previously placed on the sheets.
Once you have selected the elements that make up the symbol, you must enter a "Reference". When you confirm, the symbol you have created is saved in the symbol "Library".
Insert
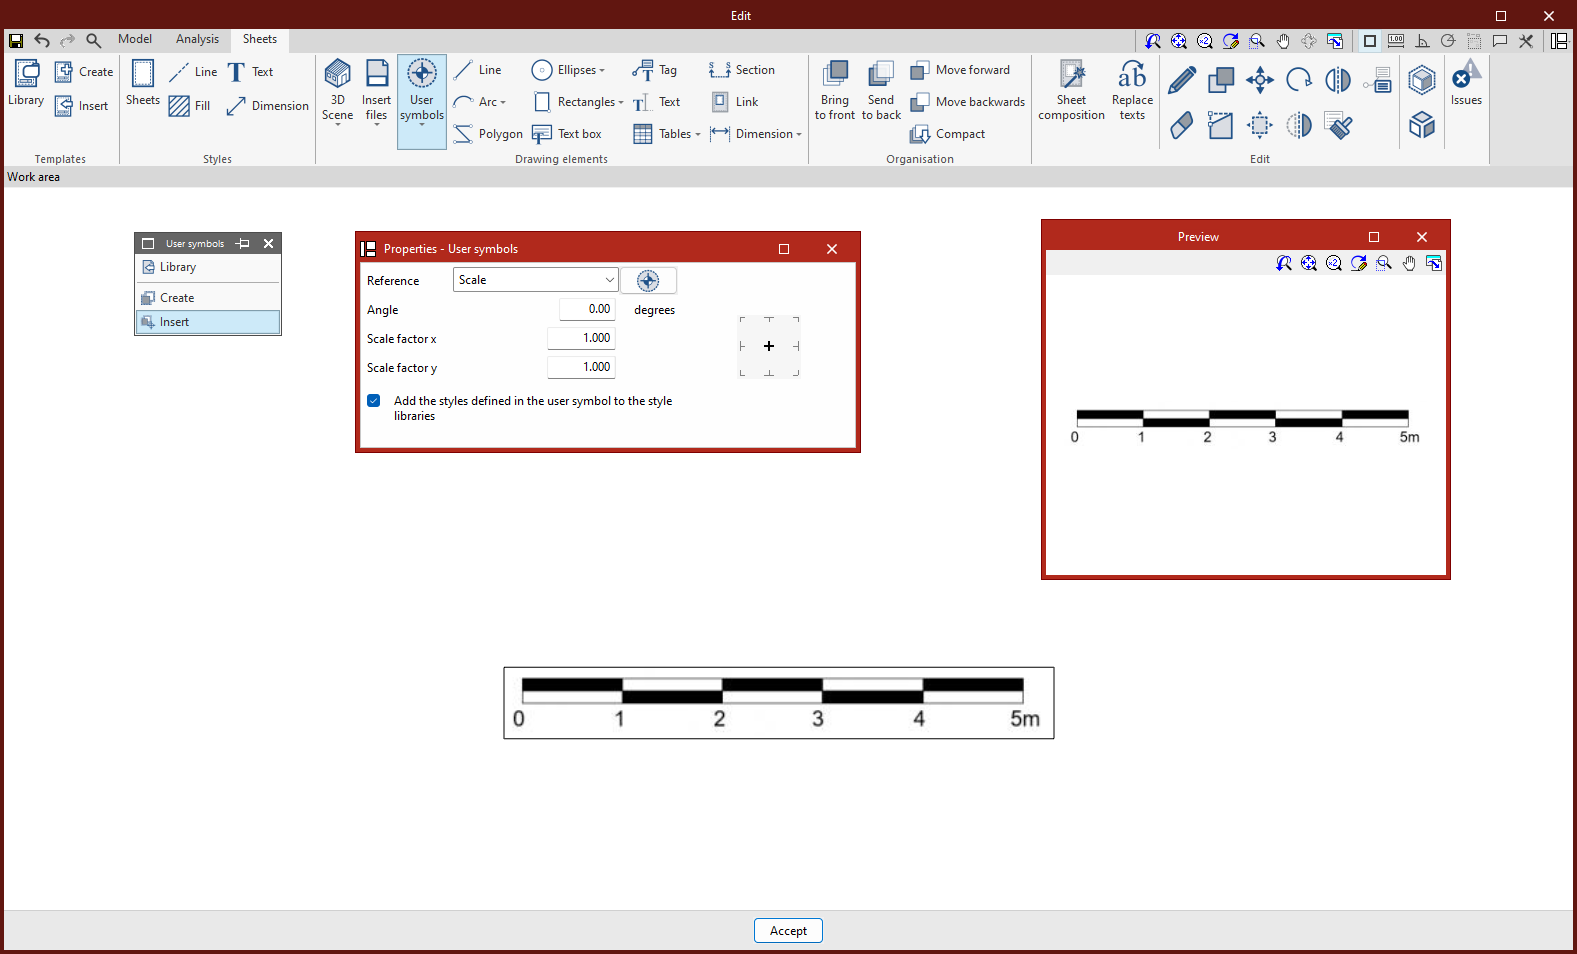
The "Insert" option lets you insert a user-defined symbol from those available in the symbol library.
To do this, in the "Properties – User symbols" window that appears when you use this option, you must select the symbol by specifying its "Reference". The program also lets you apply an "Angle", an "X-scale factor" and a "Y-scale factor" when inserting the symbol. Optionally, you can "Include the styles defined in the user symbol in the style libraries" by ticking the relevant box.
To position the symbol on the sheet, select a point in the work area.