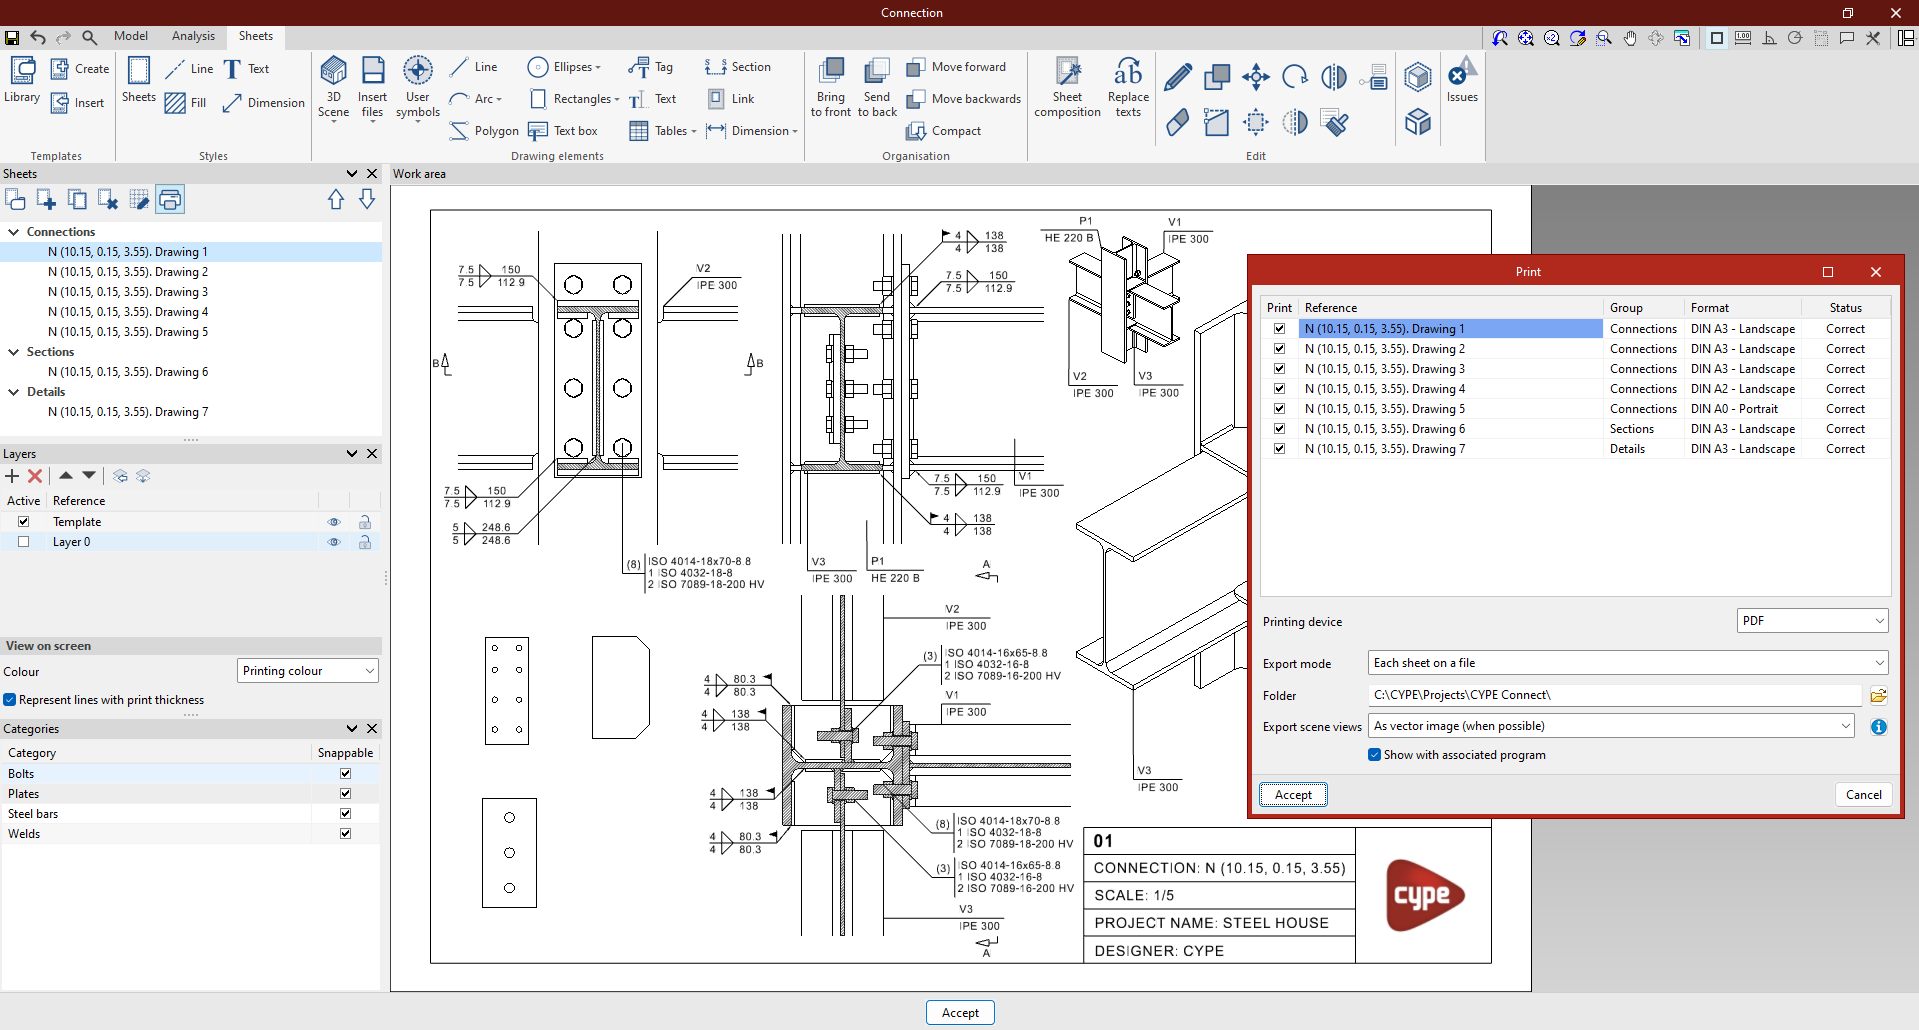
Results output (sheet editor)
Once the sheets for the project have been set up, you can print them. To do this, click the "Print" button on the top toolbar of the "Sheets" panel, located on the left-hand side of the sheet editor interface.
This opens the "Print" pop-up window, in which the following settings are configured:
- Firstly, the list of available sheets is displayed, showing their "Reference", the "Group" to which they belong and their "Format". Select the sheets you wish to "Print" by ticking the box in the left-hand column. In the "Status" column, the program indicates whether there is an issue with the sheet (for example, if any of the elements entered are outside the sheet’s print area).
- In the lower drop-down menus, you can select the "Printing device". Here, the program lets you export the generated drawings to PDF, DWG or DXF files, or print them directly by selecting one of the printers available on the system.
- Furthermore, under "Export mode", you can choose between exporting "All the sheets on the same file" (in which case you enter the "File name" and specify the folder where it will be saved), or "Each sheet on a file" (in which case, you select the "Folder" where the files will be stored).
- In "Export scene views", the program also lets you export scene views "As a raster image" or "As a vector image (when possible)".
- The last box lets you "Show with associated program" for the files generated.
When you click "Accept", the program will print the sheets or save the files in the selected formats to the specified location.