Locking frame reinforcements and reinforced concrete walls
The following options in the "Beams/Walls" menu on the "Results" tab allow you to lock the reinforcement for frames and reinforced concrete walls, respectively.
When you lock the reinforcement, you can reanalyse the structure whilst retaining the reinforcement of the selected elements.
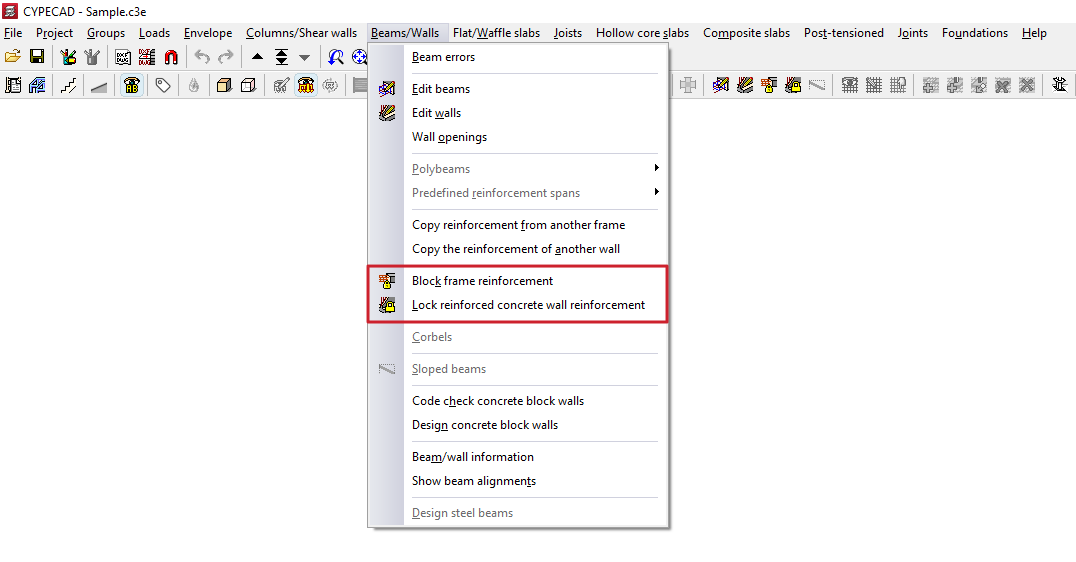
Lock portal frames
This option allows you to lock the reinforcement for the selected frames to prevent the program from modifying them during subsequent redesigns.
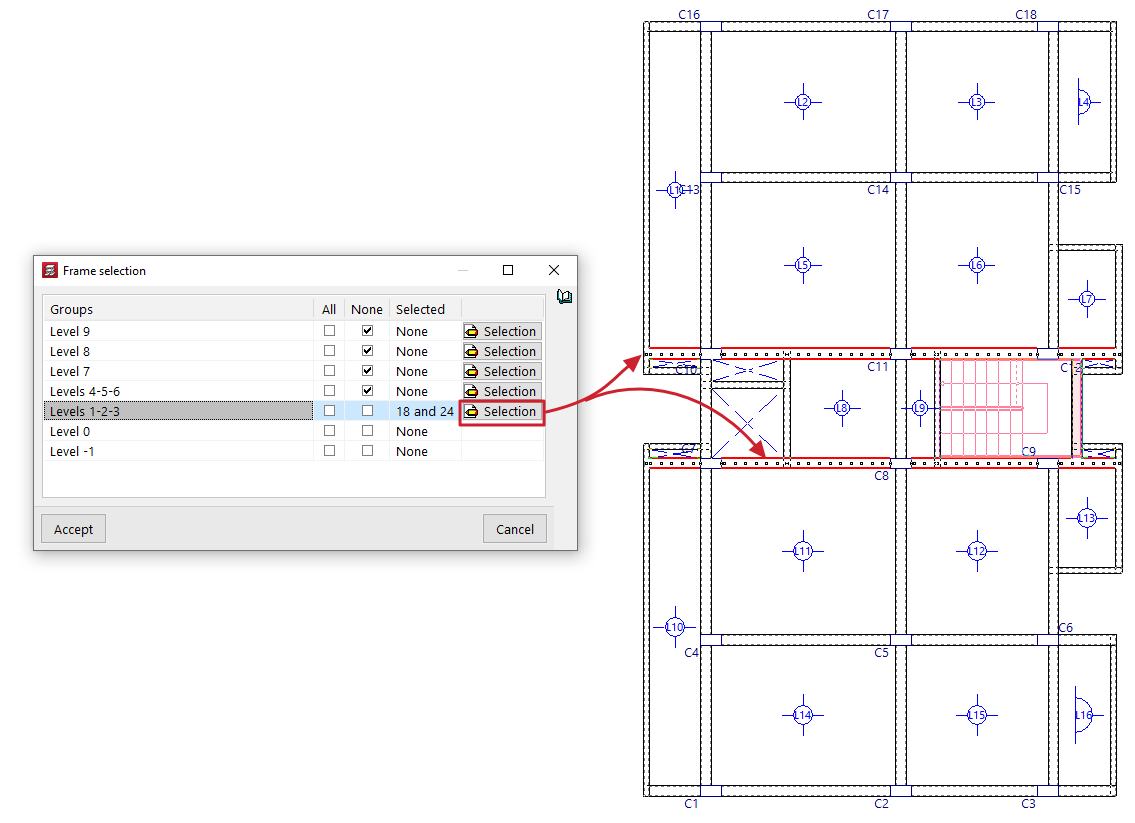
When you click on the option, the "Frame selection" window opens:
- Here, in each of the "Groups" of floors, you can lock "All" or "None" of the doors on that floor by ticking the relevant boxes.
- If desired, by clicking the "Selection" button, you can select the frames you wish to lock on each floor one by one by left-clicking on them (clicking again on a previously selected frame deselects it and therefore unlocks it). Clicking the right button returns you to the "Frame selection" window.
- The "Selected" column will list the references of the frames selected in each group, or will indicate whether they are "All" or "None".
- After clicking "Accept" in this window, the program will lock the reinforcement for those frames.
It is also possible to lock or unlock a portal frame using the relevant option in the beam editor, which can be accessed via "Beams/Walls > Edit beams".
| Note: |
|---|
| The following points should be considered when using the “Lock frame reinforcements” option: - This option allows you to retain any manual modifications made to the reinforcements of the frames, even if the structure is redesigned. It can therefore be used to retain the reinforcement of frames on floors that have not changed or on those where the modifications made are not significant. - After redesigning, locked frames that do not pass the relevant checks will be highlighted in the colour configured for beam errors. In these cases, the user must review the frames with errors (the "Results" tab, "Beams/Walls > Edit Beams”), check whether the errors are significant, and decide whether the problem can be resolved by slightly modifying the reinforcement or whether it is necessary to unlock the frame and re-reinforce it. -Unlocked frames will be fully re-analysed when analysing the structure. During this process, the program performs all the checks required by the selected standard using the forces obtained in the last analysis. - The program offers two options for re-reinforcing unlocked frames: "Re-reinforce all frames", or "Re-reinforce frames with changes" (available in the "Beam Input" tab, "Analysis" menu). This latter option redesigns only the reinforcement of those unbound frames whose section has been modified. |
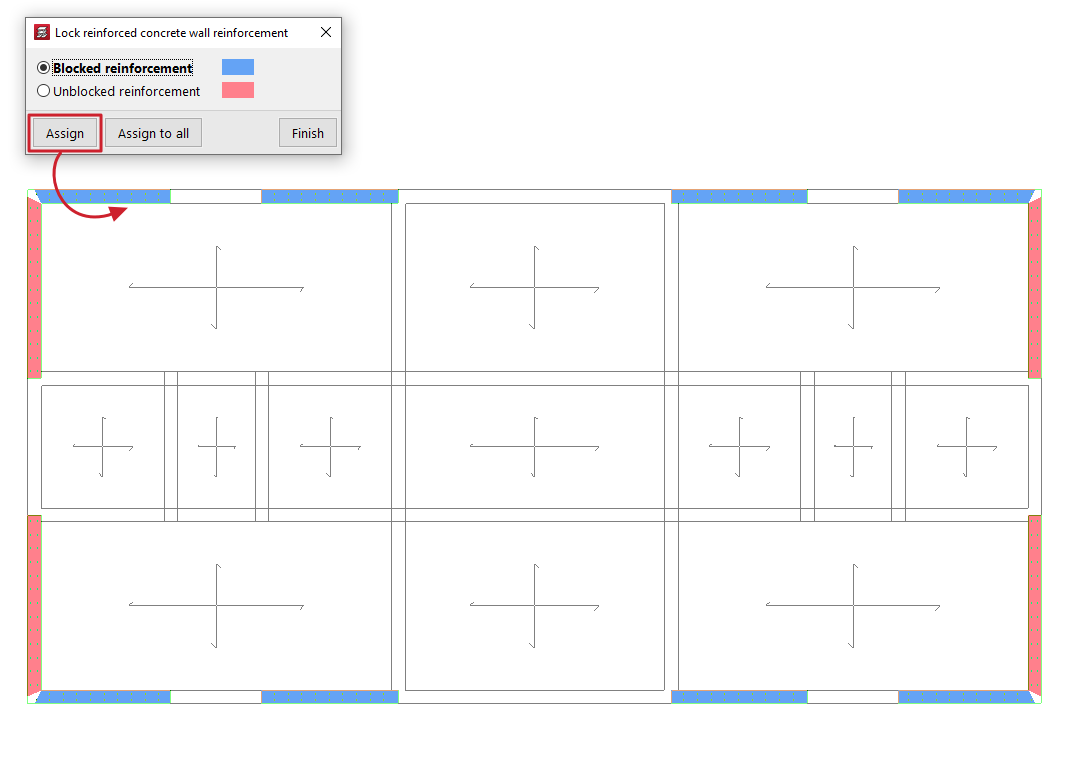
Lock reinforced concrete wall reinforcement
This option allows you to lock the reinforcement of selected reinforced concrete walls and flat-tension walls to prevent the program from modifying them in subsequent redesigns.
When using this tool, a dialogue box appears where you can select one of the following options: "Locked reinforcements" or "Unlocked reinforcements". In addition, the program will highlight the walls assigned to each condition in the floor plan using the corresponding colour.
To apply one of the two conditions, select it; then click on "Assign" and select the desired walls on the floor plan one by one or using a selection area. When you do this, they will change colour to indicate that the condition has been applied. Right-clicking returns you to the dialogue box. It is also possible to click on "Assign to all" to apply the selected condition to all visible walls on the floor plan. The "Finish" option allows you to complete the operation.