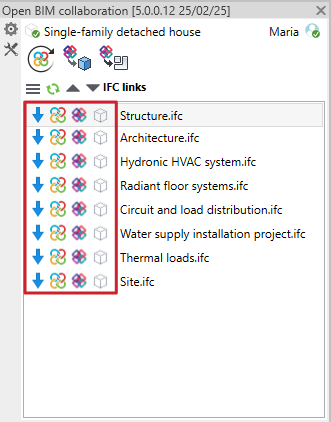
Open BIM project information panel
When linking to a project, this panel shows each of the links, and the status of the links using the following icons:
- Link status
Shows whether the link is loaded or unloaded. - Original IFC status
Shows the status of the IFC located in the ‘bim_projects’ folder. - Local IFC status
Shows the status of the IFC located in the local directory folder where the project is saved. - Content status
Shows the status of the extracted contents (DirectShapes) of each of the links.
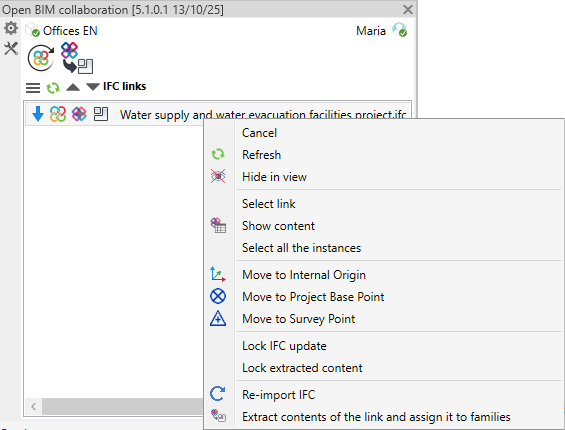
When you right-click on a link, a context menu appears that allows you to perform the following actions:
- Cancel
Closes the context menu without performing any action. - Refresh
Updates the status of the IFC link in the view, displaying any recent changes without the need to manually re-import it. - Hide in view
Completely hides an IFC link in the active view. To display it again, simply run the tool on the same link. - Select link
Select the IFC link in the Revit model, making it easier to locate and manipulate. - Show content
Opens an information panel displaying all the information on the IFC entities contained in the link. This panel is read-only and is for informational purposes only. - Select all the instances
Simultaneous selects all instances generated from an IFC link, facilitating their management and bulk editing. - Move to Internal Origin
Moves the location of the IFC link to align it with the internal origin of the Revit project. - Move to Project Base Point
Adjusts the position of the IFC link to match the project's base point in Revit. - Move to Survey Point
Relocates the IFC link using the project recognition point as a reference. - Lock IFC update
Prevents the IFC link from updating automatically when changes are detected in the original model, maintaining its current status in Revit. - Lock extracted content
Prevents already extracted elements from being accidentally modified or updated, ensuring the stability of the converted model. - Re-import IFC
Forces the IFC link to update, replacing its content with the latest version available in the BIMserver.center project. - Extract contents of the link and assign it to families
Converts the contents of the IFC link into native Revit entities by assigning them to families, allowing you to work with them directly within the Revit environment.
On the left-hand side of the panel, a toolbar is located to improve the accessibility and organisation of the options.
It is structured in two main sections: "Configuration" and "Tools".

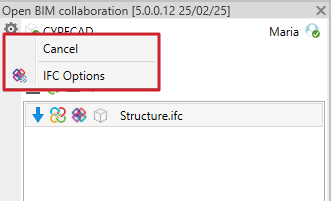
Configuration
The configuration section brings together options for customisation, conversion control and IFC data management.
- IFC options
Specific configurations can be defined for importing and exporting models in IFC format. This tool is explained in more detail in the IFC options section.