
Entering and editing point, line and surface loads
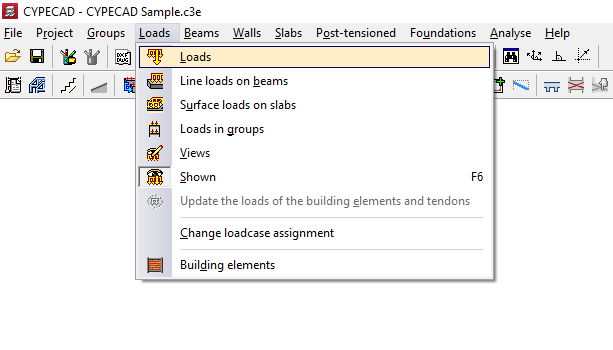
To enter point, line and surface loads in CYPECAD, as well as to view, modify or control their visibility, you must open the "Beam input" tab, move to the required group using "Move up group", "Go to group" and "Move down group", and then open the "Loads" menu.
This menu includes, among others, the following options:
- Loads
- Line loads on beams
- Surface loads on panels
Each of these features is explained below.
Loads
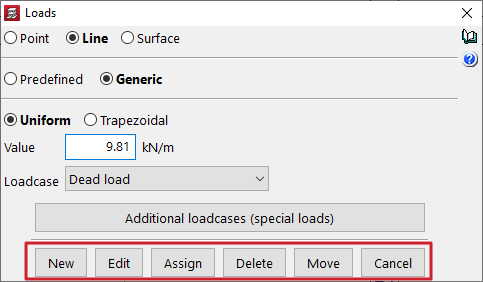
The first option, "Loads", allows you to define and draw "Point", "Line" (uniform or trapezoidal) or "Surface" loads, which are added to the loads defined at group level during the analysis. To do this, you first enter the "Value" and select the corresponding "Load case" from the drop-down list.
For convenience, the program allows you to edit and manage the project load cases by clicking "Additional load cases (special loads)", without needing to open the "General data" panel in the "Project" menu, where this option is also available.
You can also save loads in a predefined load library (by activating "Predefined") or enter them as "Generic" loads.
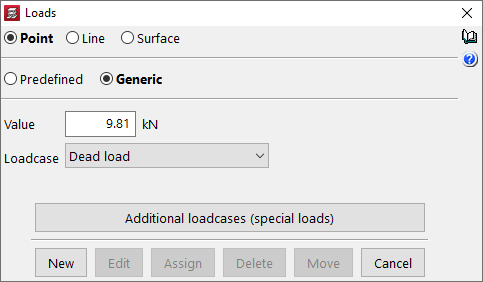
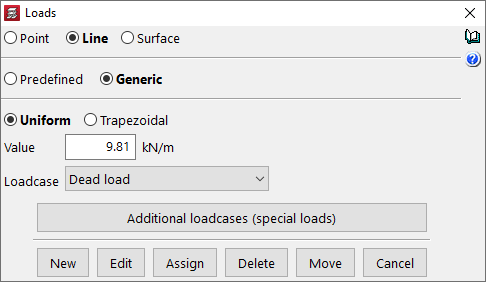
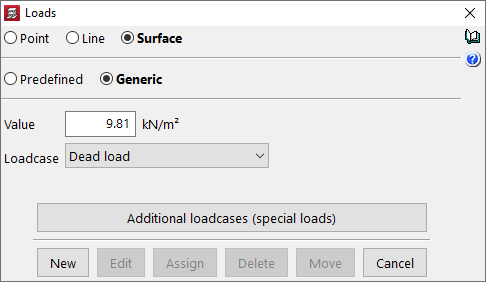
After clicking "New", the load is entered in plan view. Loads can be placed anywhere in the plan; however, for them to be considered in the analysis, they must lie within the geometry of structural elements such as slabs, beams, walls, columns or foundation elements.
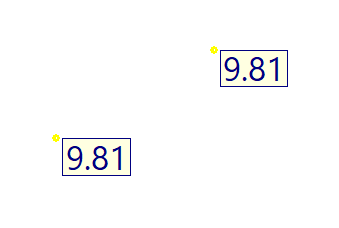
- For a "Point" load, one load is entered each time you click with the left mouse button. To return to the "Loads" panel, right-click.
- For a "Line" load, left-click on two different points to define the load.
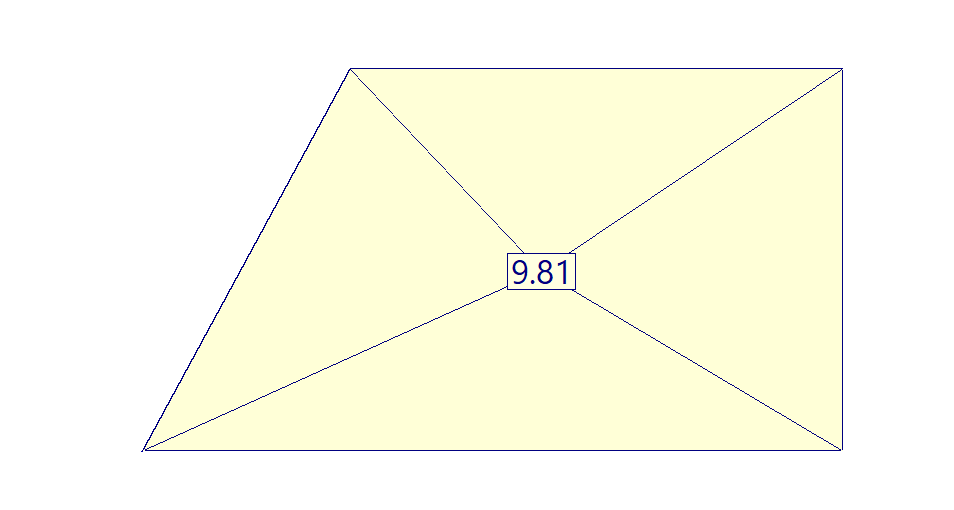
- For a "Surface" load, left-click successively to define the vertices of the polygon that represents the loaded area, and finally right-click to complete the input.

Once loads have been entered in plan view, a number of editing options are available from the "Loads" panel. To use them, the type of load to be modified must be selected: "Point", "Line" or "Surface".
- "Edit" allows you to modify the "Value" or the "Load case" by clicking on individual loads.
- "Assign" allows you to apply the value and/or load case selected in the panel to loads already entered in the plan. In the dialog box, choose "Assign value", "Assign load case" or "Assign value and load case", and then click on the loads in the plan.
- Loads can also be "Deleted" by clicking on them individually or by drawing a selection window to delete a group of loads.
- To "Move" loads, click on each of the defining points and then click again to place them in their new position.
Line loads on beams
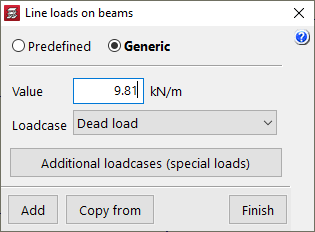
The "Line loads on beams" option is also available in the "Loads" menu of the main interface. If beams have been drawn in the plan, this option allows you to apply line loads by selecting the beams.
You define the "Value" of the load and the corresponding "Load case", or click "Copy from" to take these values from an existing line load.
The "Additional load cases (special loads)" button provides access to load case management without having to open the "General data" panel in the "Project" menu.
After clicking "Add", select the beams one by one or draw a selection window to capture a group of beams and apply the defined line load to them.
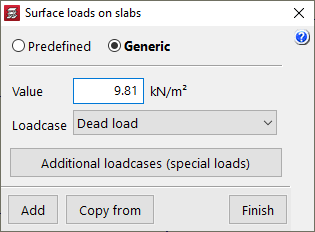
Surface loads on panels
The "Surface loads on panels" option in the "Loads" menu works in a similar way. If slab panels are present in the plan, this option allows you to apply surface loads by selecting the panels.
You define the "Value" of the load and the corresponding "Load case", or click "Copy from" to take them from an existing surface load.
The "Additional load cases (special loads)" button again provides access to load case management without needing to open the "General data" panel in the "Project" menu.
After clicking "Add", select the panels one by one or draw a selection window to capture a group of panels and apply the defined surface load to each of them.
| Note: |
|---|
| To define the boundary of surface loads entered using this option, the program uses beam axes, column perimeters and the internal outline of the walls surrounding the selected panels. If columns end at the group where the surface load is being entered, the extension of the beam or wall axes is used to define the boundary. In the case of walls that end at the group, the surface load boundary is adjusted to their axes. |
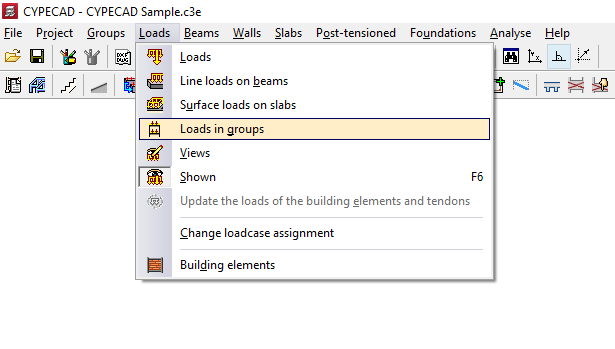
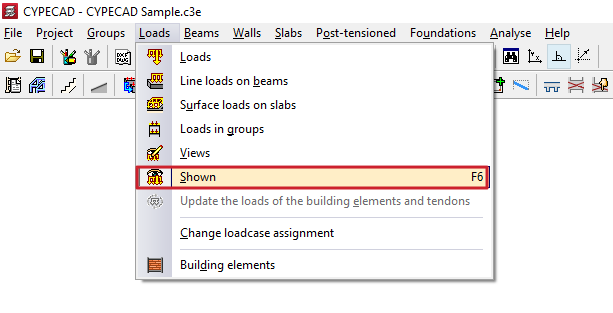
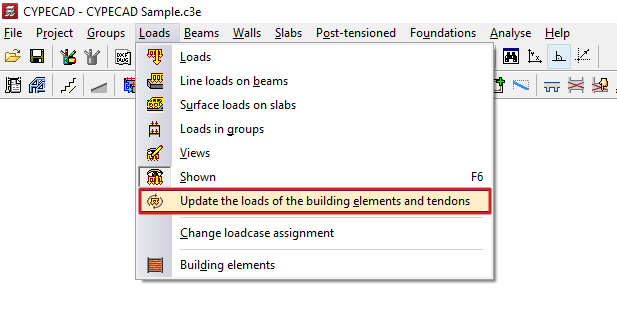
Editing loads in groups, load visibility, load updating and loadcase assignment
To enter or edit loads in groups, adjust the visibility of loads, update loads or modify their hypothesis assignment in CYPECAD, access the "Loads" menu from the "Beam input" tab or from the "Results" tab.
Among others, this menu includes the following options:
- Loads in groups
- Views
- Shown
- Update the loads of building elements and tendons
- Change loadcase assignment
Each of these features is explained below.
Loads in groups
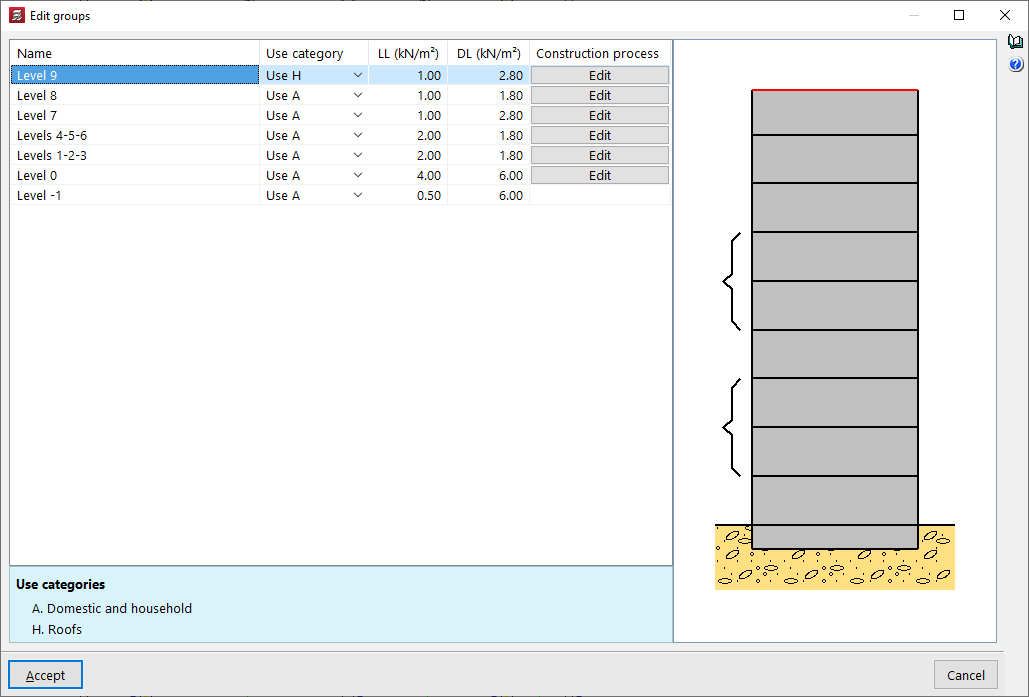
Group loads are surface loads that are automatically applied over the entire floor area of the structural elements in the group.
The "Loads in groups" option is equivalent to the "Edit groups" option available in the "Column input" tab, within the "Enter" menu and the "Floors/Groups" submenu.
In the "Edit groups" panel that appears after selecting this option, you can enter the "Name" of each group, define the "Use category" associated with it, and enter the numerical value of the "Live loads" and "Dead loads" that apply to the group.
Additionally, the program allows you to "Edit" the "Construction process" for each of the groups.
The "Instant of formwork removal" and the "Instant of application" of the "Dead loads" (e.g. partition walls and flooring) and the "Overload" for use, also indicating the percentage of overload considered quasi-permanent ("% Quasi-permanent").
These options are used to adjust the analysis of the deflection of building elements.
Views
The "Views" option opens a window where you can indicate whether the loads are "Shown" on screen or not by checking the first box.
By pressing the different buttons and icons, you can activate or deactivate the display of "All loadcases", or specify to the program whether you want to "View point loads", "View linear loads", "View post-tensioned tendon loads" or "View surface loads".
In addition, you can indicate whether "All loadcases" are visible or make a "Loadcase selection". In this case, mark "Visible" in the list of loadcase to activate the display of each of the "Loadcases".
Finally, you can select the colour range to be used in the representation of surface loads. After accepting, the program will apply the changes to the visibility of the loads.

Shown
From the "Loads" menu, you can also use the "Shown" option to quickly hide or show the display of all loads for the project.
Although the loads are not visible with this option or with the previous one, the program includes them in the analysis.
Update the loads of building elements and tendons
The "Update the loads of building elements and tendons" option regenerates the loads associated with these types of elements if modifications have been made to them or to related elements that may affect their value.
| Note: |
|---|
| Each time a structural element or tendon is added, its associated loads are automatically generated. They are also generated when the project is analysed and when reports and drawings are obtained. |
Change loadcase assignment
The "Change loadcase assignment" option allows you to indicate to the program that all loads acting in a given loadcase will now act in a different loadcase.
This option affects point, linear, or surface loads entered using the options in the "Loads" menu, as well as loads assigned to columns or piers, inclined beams, basement walls, and integrated 3D structures.
To perform this operation, select the "Loadcase to change" and the "Loadcase to assign" from the drop-down menus. After accepting, the program will automatically change the loadcase in all the loads mentioned.

Table of contents
Complete your tour of CYPECAD by exploring the other available sections:
- Introduction
- Introduction and creating new jobs
- General data configuration
- Defining floors and groups of floors and inserting columns, shear walls and starts ("Column input" tab)
- Inserting beams, walls, floor slabs, foundation elements and special elements, and structural analysis (the "Beam Input" tab):
- Checking analysis results and editing elements (the "Results" tab):
- Options on the "Contour plots" tab
- Printing documents and exporting data
- More information:
- General features of CYPECAD