Assembly numbering
Numbering assemblies is necessary in order to subsequently generate the documentation for the structure’s assemblies; this is done using the tools in the "Numbering" group on the top toolbar, under the "Documents" tab of the program’s main interface.

Assemblies
Firstly, the "Assemblies" option allows you to number all the assemblies in the model automatically. Assemblies are groups of structural parts that are joined by bolts or welds carried out in the workshop.
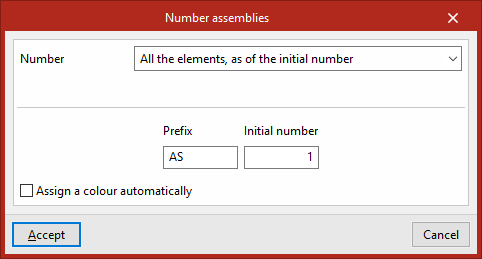
After clicking on the option, the "Number assemblies" window appears.
The drop-down menu at the top lists the elements to be numbered. These may be:
- All elements, starting from the initial number
- Only unnumbered elements, starting from the initial number
- Only unnumbered elements, starting from the last number used
At the bottom, enter the "Prefix" to be used for numbering the assemblies and the "Starting number" from which the numbering will begin.
If required, you can tick the box at the bottom to "Assign a colour automatically" to each assembly.
After clicking "Accept", the program numbers the model's assemblies, comparing the elements that make them up and applying the same numbering if they are identical.
| Note: |
|---|
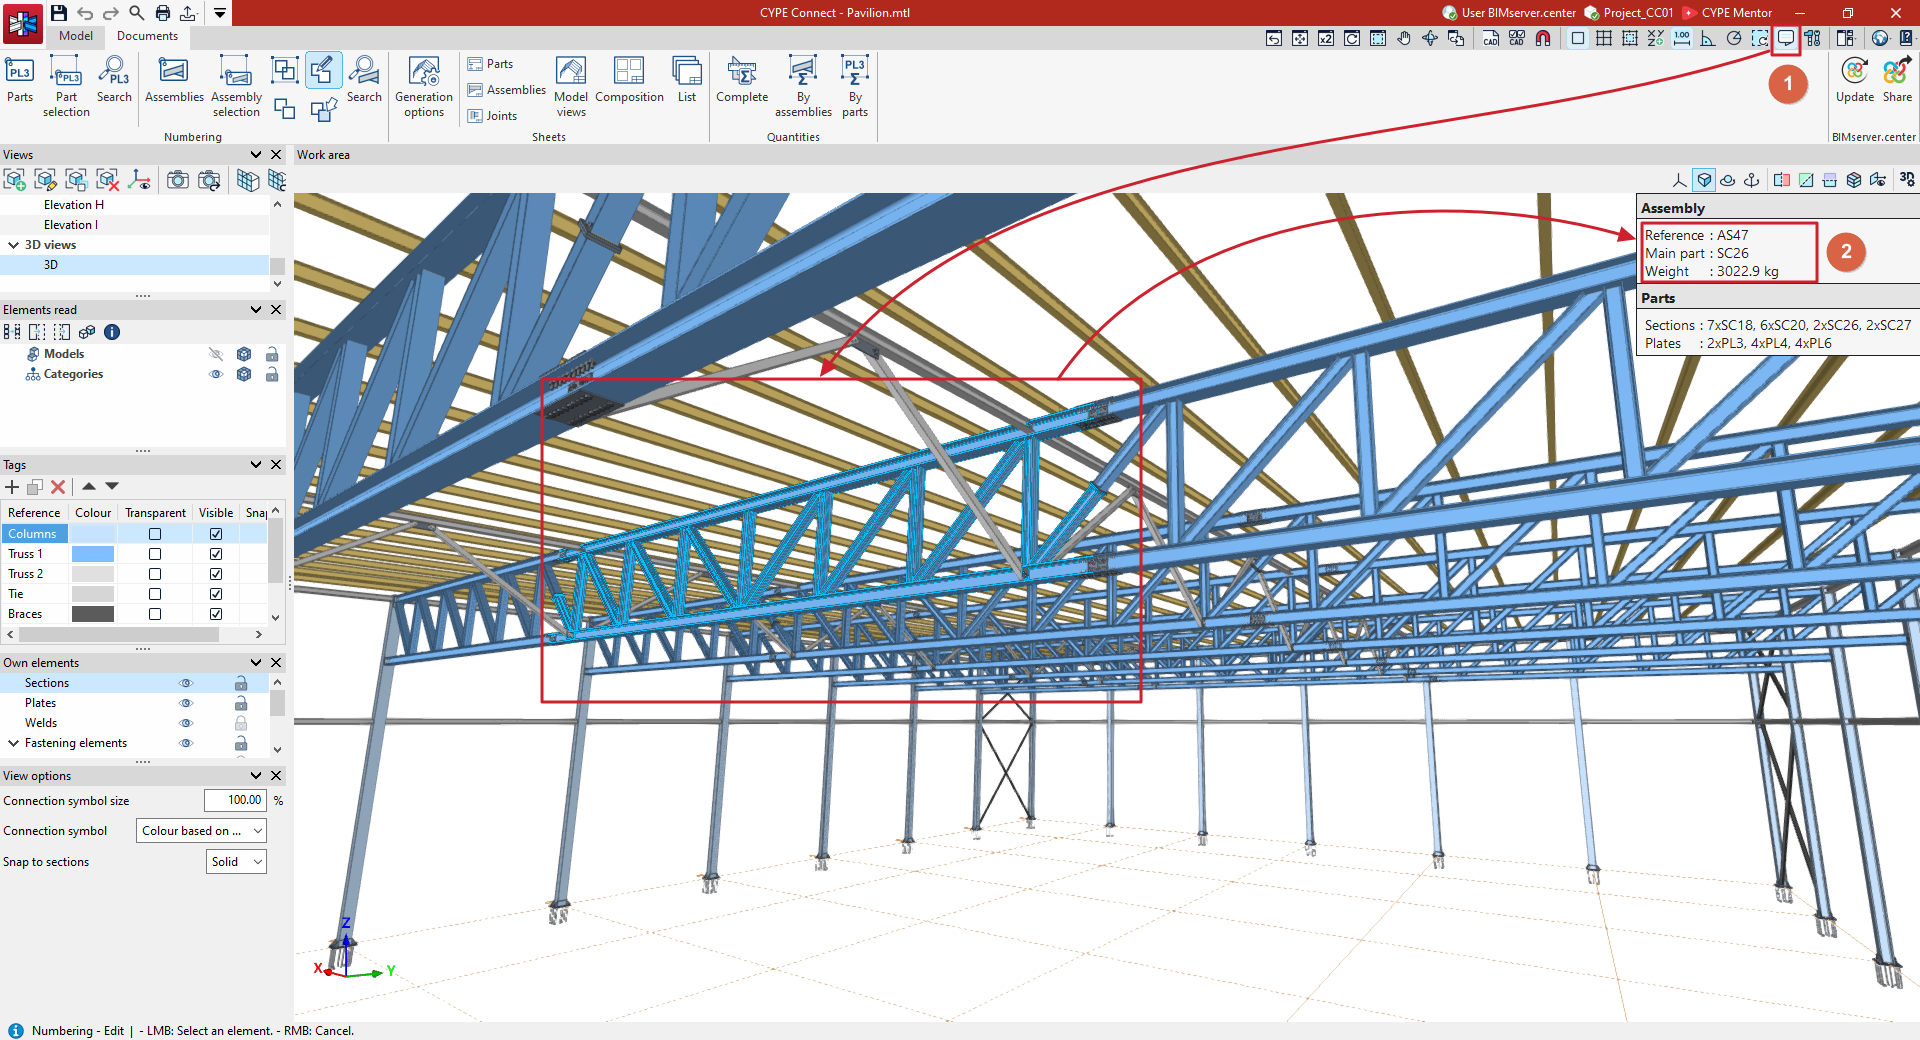
| To view the assembly numbers, click the "Show information texts" button on the top bar and, whilst any of the assembly numbering options remains selected, hover the pointer over each element in the viewer. The assembly number appears in the "Reference" field of the information text box. Its "Main part" is also specified. |
Assembly selection
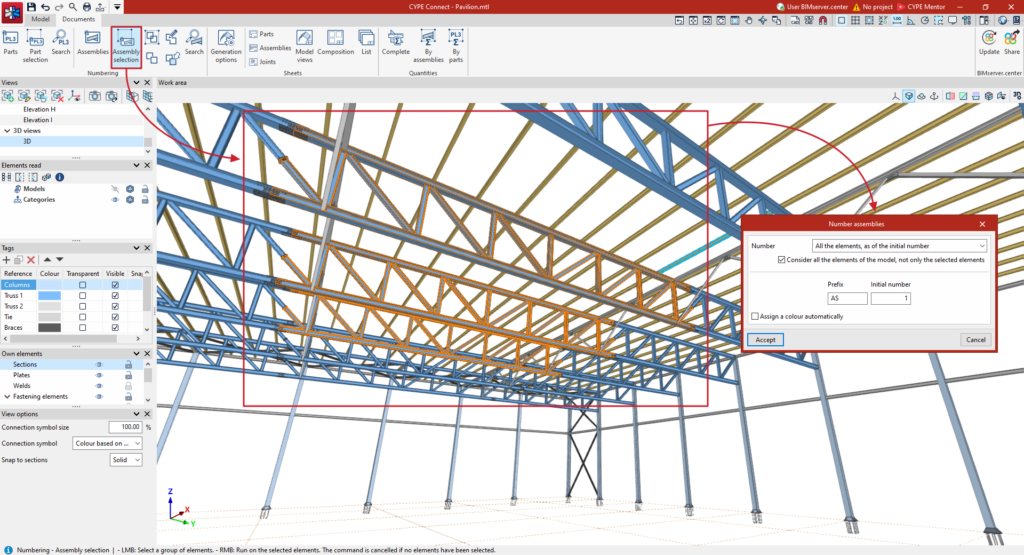
The next option, "Assembly selection", can be used to number only those assemblies in the model that you have selected.
After clicking on the option, select the assemblies to be numbered one by one using the left mouse button or by drawing a selection area. Then, click the right mouse button.
This brings up the "Number assemblies" window again, with the same options as those mentioned in the previous section ("Assemblies").
In addition, you can tick the box labelled "Consider all elements in the model, not just the selected ones" if you want the program to search the entire model for assemblies that are already numbered and match the selected ones; in that case, the same numbering will be applied to them.
If this option is disabled, numbering will be applied taking into account only the selected elements.
Next, click on "Accept".
Assign
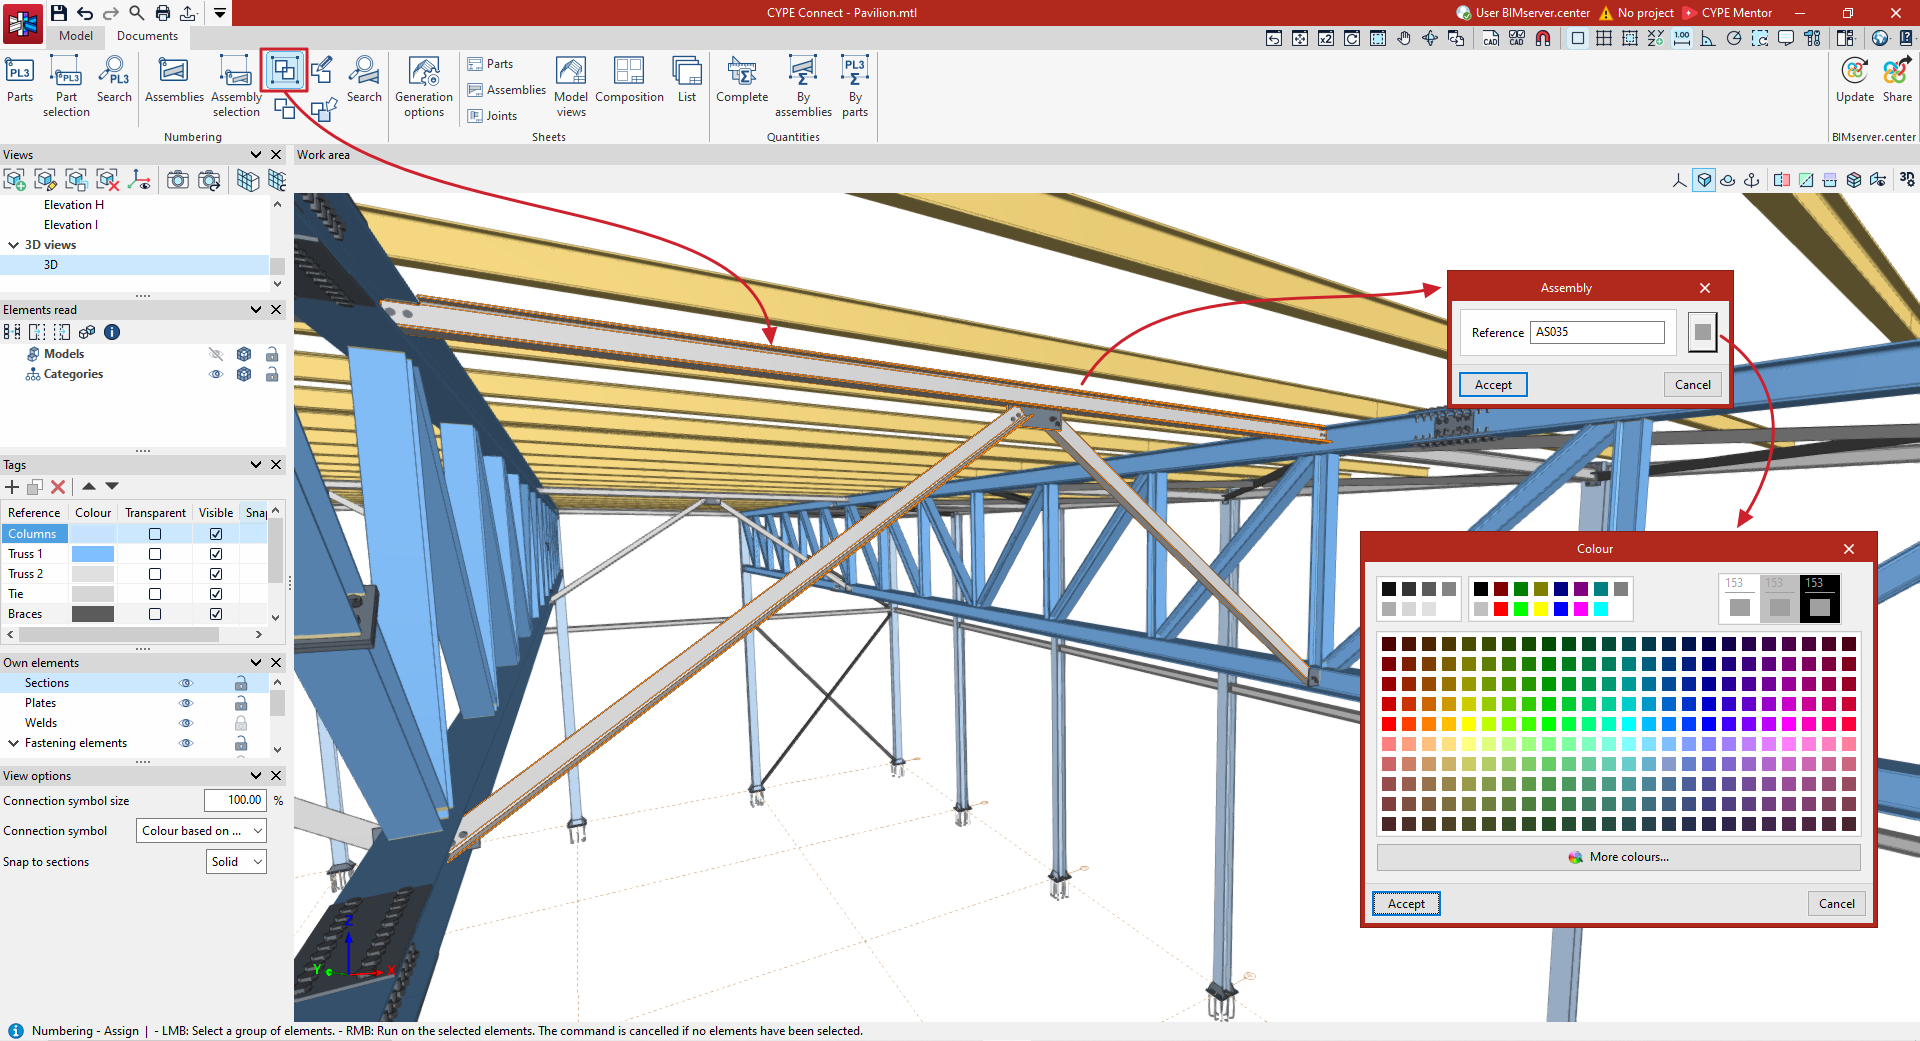
The "Assign" option allows you to create and number assemblies manually. After clicking on the option, select the elements that make up the new assembly one by one using the left mouse button, or use a selection area. Then, right-click.
In the "Assemblies" window that appears, you can enter your "Reference" and assign a "Colour", before finally clicking "Accept".
Ungroup
The "Ungroup" option allows you to ungroup assemblies that have been grouped manually.
To do this, click on the option and then select the groups you wish to ungroup using the left mouse button. Next, click the right mouse button.
Edit
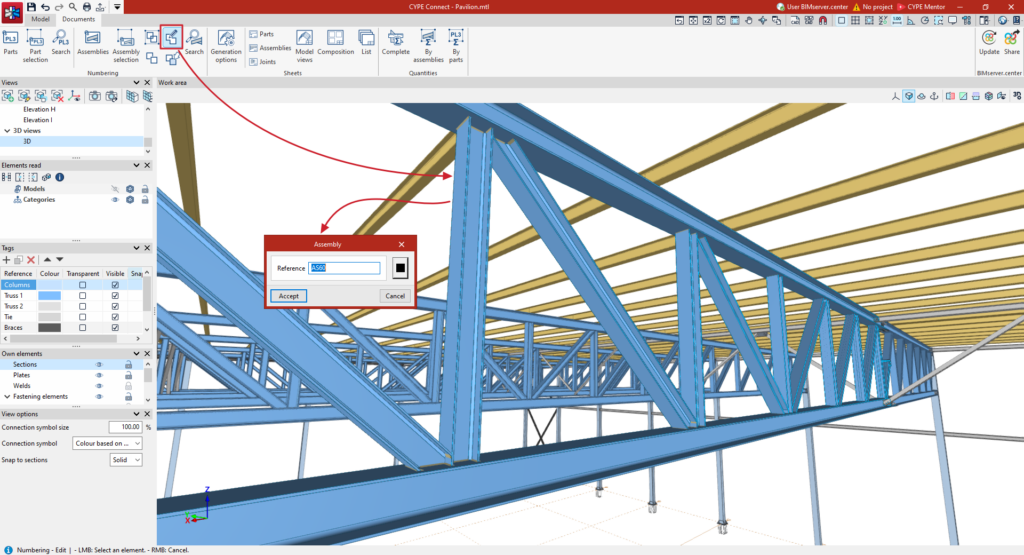
Using "Edit", you can edit the numbering of an assembly. Similarly, click on the option and then left-click on the assembly you wish to renumber. In the "Assemblies" window, change the "Reference" and "Colour" if necessary, then click “Accept”.
Assign main part
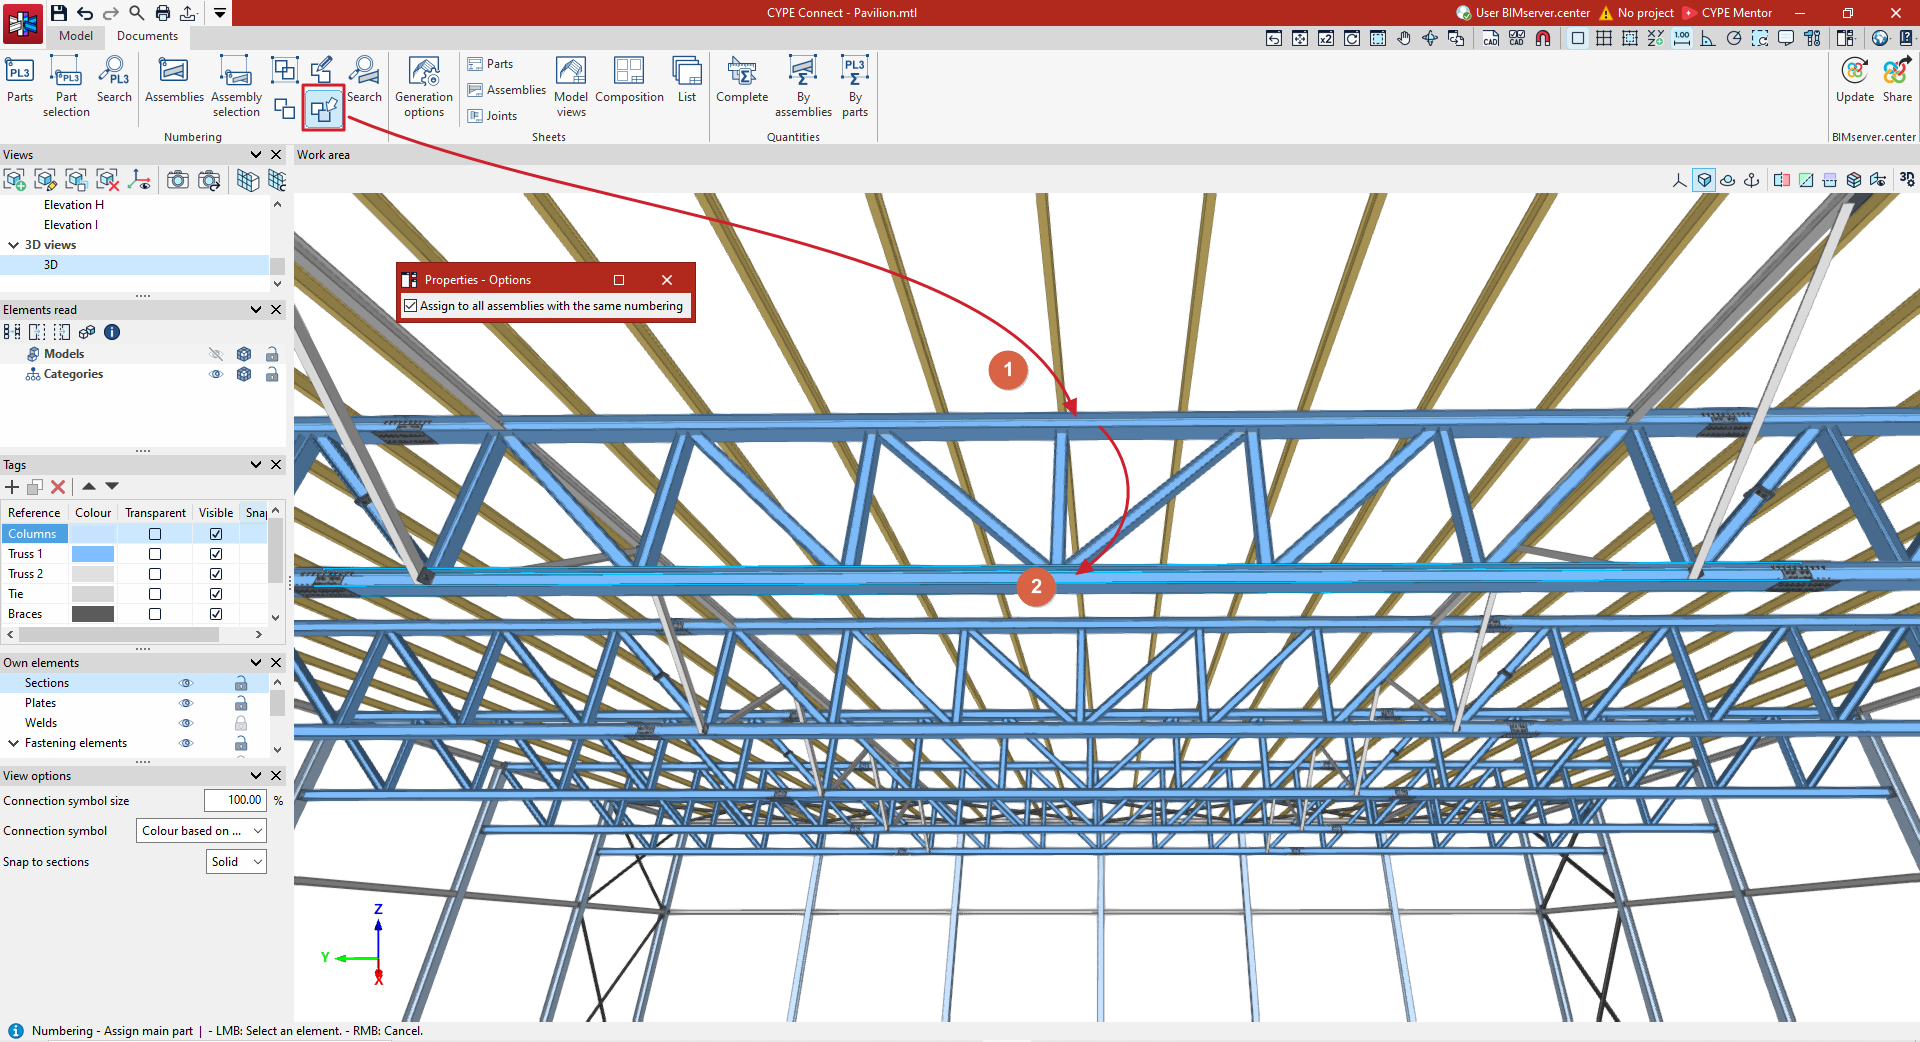
Finally, there is an option to "Assign the main part" to a group.
The main part of an assembly is used in its reference and to define the orientation of the main views in the assembly drawings.
After selecting the option, use the left mouse button to highlight the assembly in the viewport and then the part you wish to designate as the main one. In the "Properties – Options" window that appears, you can specify whether you wish to "Assign to all assemblies with the same numbering".
Search
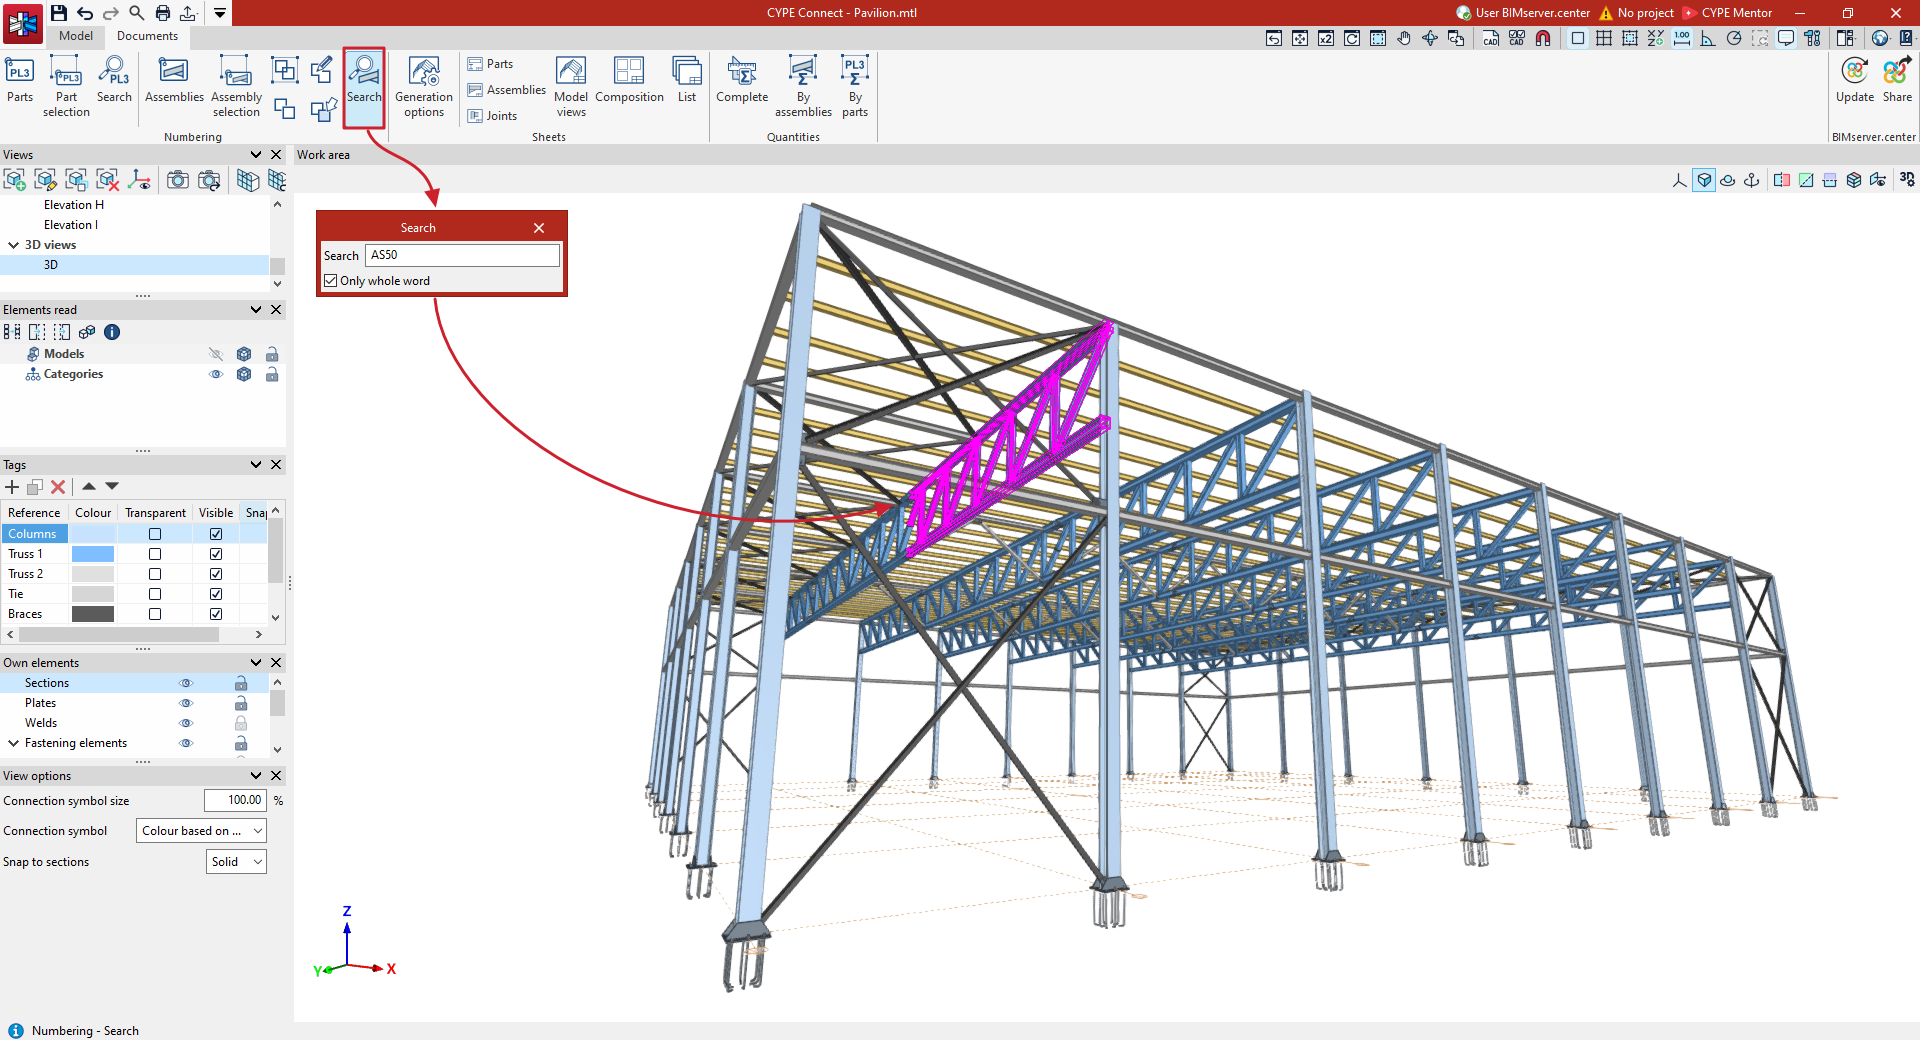
The "Search" option allows you to search for an assembly by entering the assembly’s reference text.
You can choose to search only for references consisting exactly of the word you are typing (by ticking the "Only whole word" box) or for all references containing the text you are typing (by unticking that box).
The assemblies found will be highlighted in magenta in the model.