

Inserting external files
The options in the "Insert files" menu are used to insert external files, such as images and vector drawings, to supplement the project information.

This menu offers the following options:
Library
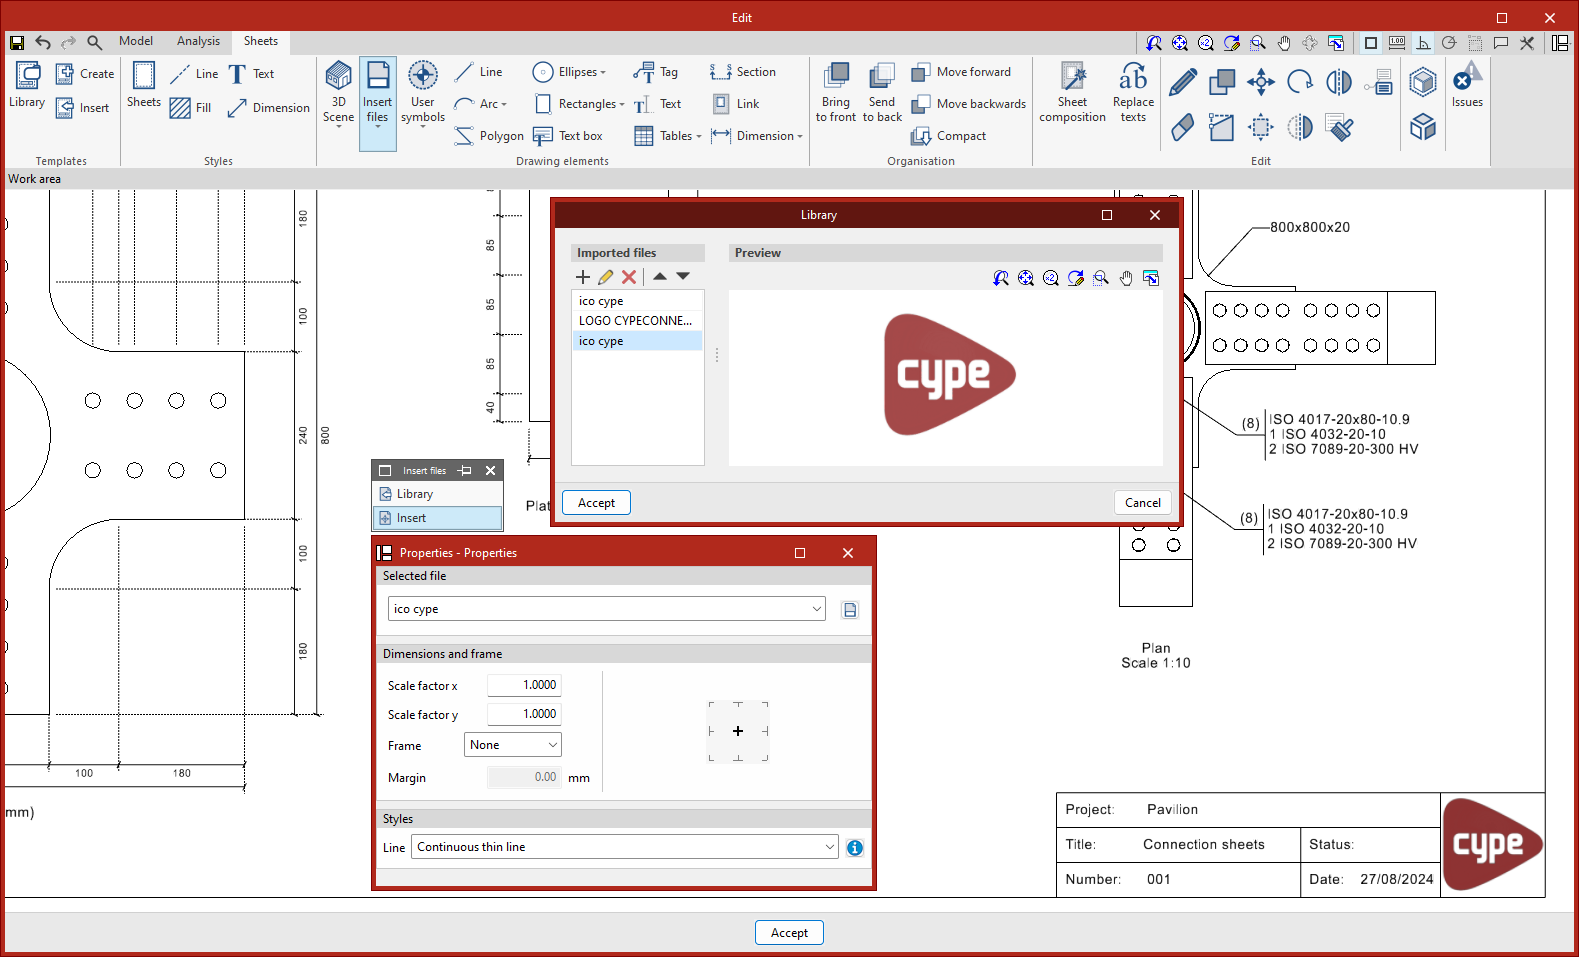
The "Library" option allows you to access the library of external files imported into the program.
The "Imported files" list is displayed on the left, and a "Preview" of the selected file is shown on the right.
To import a file, use the "Add" option at the top of the list. The program can import the following file formats: DXF, DWG, DWF, JPEG, JPG, BMP, WMF, EMF, PCX and PNG.
Insert
The "Insert" option is used to select a file from the library and insert it into the sheet.
In the "Properties" window that appears, you can configure the following settings:
- Under "Selected file", you can select a specific file from those available in the library. The option on the right can be used to access the external file library directly.
- In the "Dimensions and frames" section, you can change the size of the inserted file by entering an "X scale factor" and a "Y scale factor". Furthermore, in the "Frame" drop-down menu, you can choose not to add a border ("None") or create a "Rectangular" border around the file, in which case you must enter a value for the "Margin".
- On the right, the insertion point (either the centre, the centre of the edges or the corners) is indicated; this is where the element being inserted will be positioned.
- In the "Styles" section, you select the "Line" style for the frame, if one is being generated.
When you click on a point on the sheet in the work area, the program will insert the file.
| Note: |
|---|
| The DXF and DWF formats also import layers. Using the "Layers from inserted DXF or DWG files" option in the "Layers" section of the main interface, the program can modify the line weight and colour of the layers in these types of files. |
