Entering welds
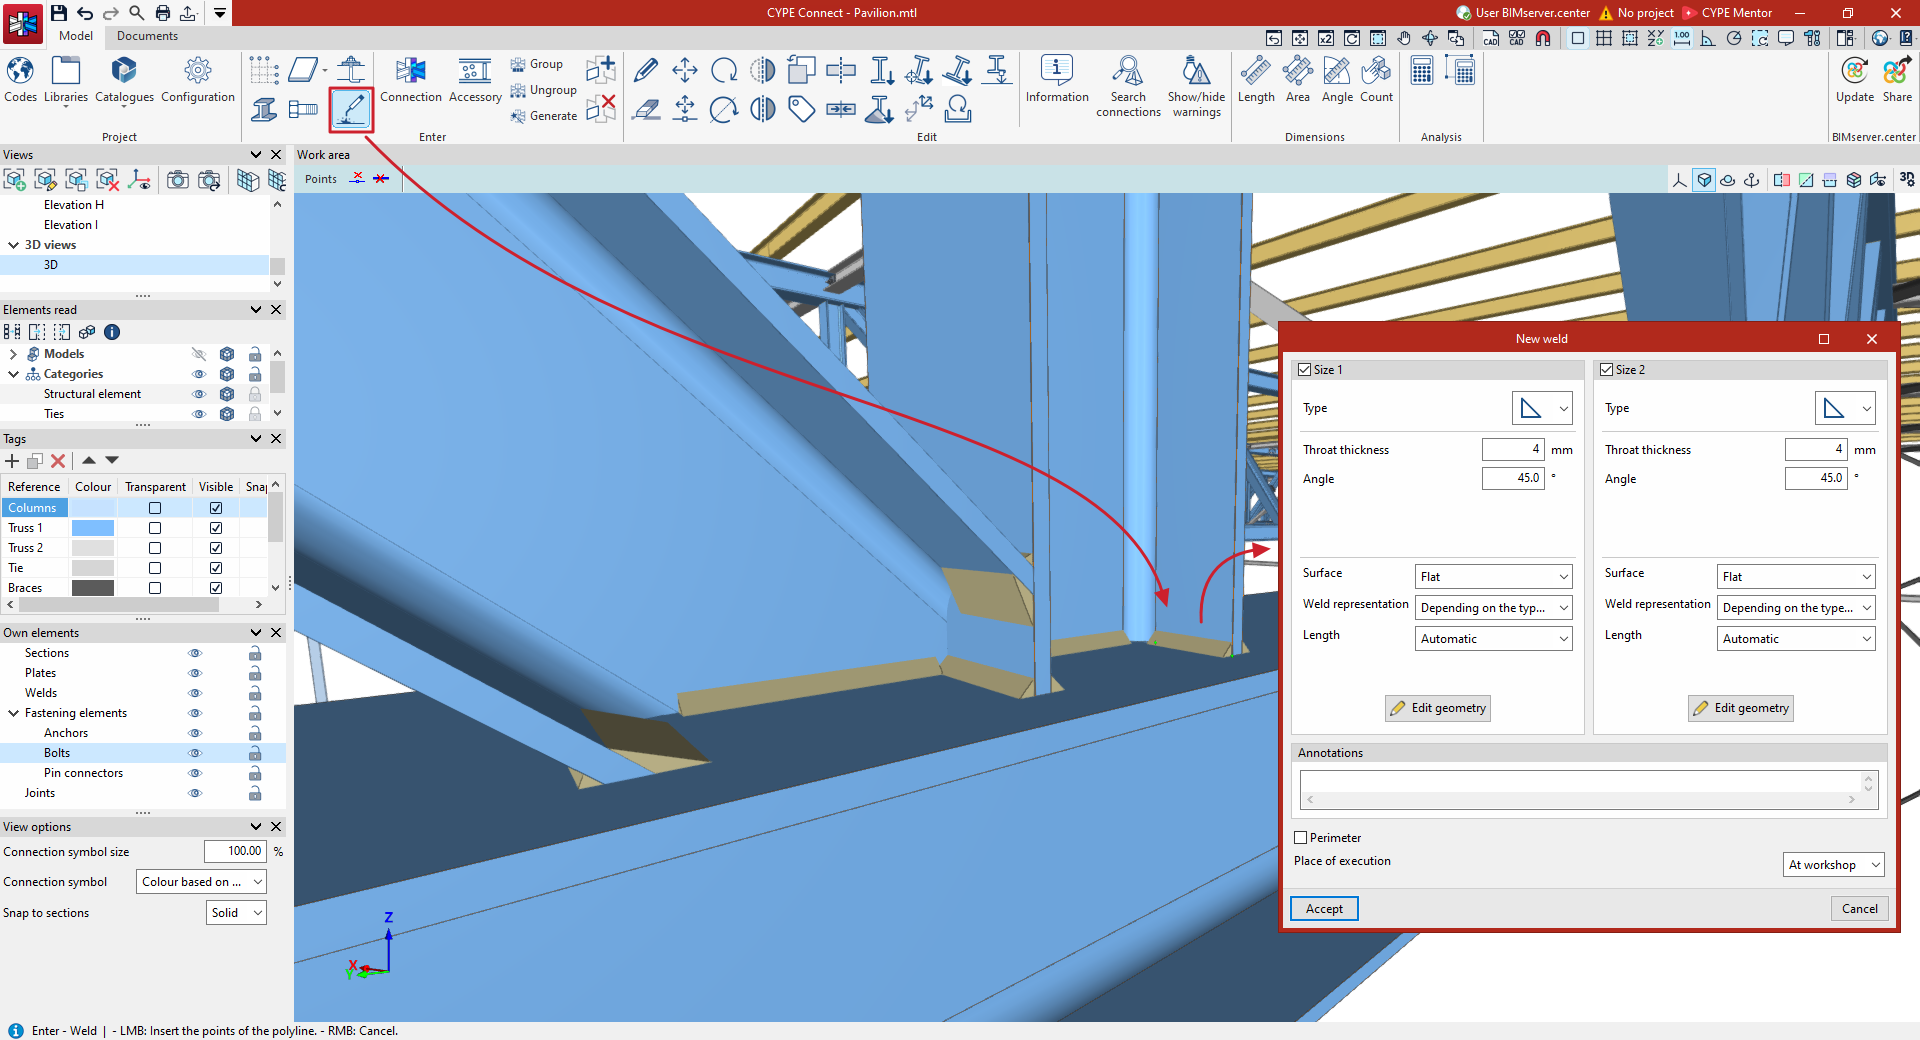
To add welds to the general model of the structure, in the "Model" tab of the program interface, select the "Weld" option from the "Insert" group in the top toolbar.

Welds
Entering welds in the workplace
After clicking on the "Weld" option, you must select the two elements to be welded in the model using the left mouse button.
Next, use the left mouse button to enter the points of the polyline that defines the position of the weld.
Clicking the right-hand button validates the geometry entered and brings up a window where you can define the properties of the "New weld".
| Note: |
|---|
| This tool allows you to enter welds freely to complete the detailing of the structure at specific points. However, if the aim is to model connections, including their analysis and compliance checks, it is advisable to use the "Connection" option instead, from which you can also enter welds. |
Defining weld properties
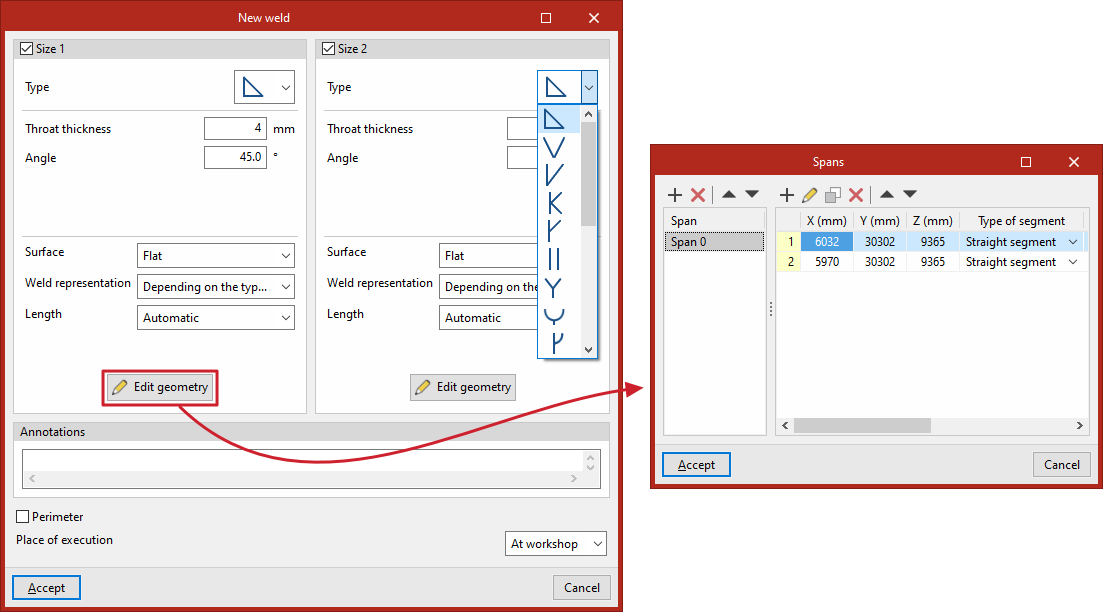
At the top, the "Size 1" or "Size 2" tick boxes are selected to indicate whether they exist and specify the data for each side of the weld bead.
Select the "Type" of weld from the drop-down menu containing the standard symbols and adjust its parameters. For a fillet weld, for example, enter the "Groove depth" and the "Angle".
Next, you select whether the shape of the weld’s "Surface" is "Undefined", "Flat", "Concave", "Convex" or has "Smooth transition curves"; you also specify the "Weld representation" in the model, which can be "According to bead type" or "Approximate"; and its "Length", which can be either "Automatic" or "User-defined".
From the "Edit geometry" menu, you can view each of the welding “Sections” that have been entered in a series of tables and modify the coordinates and characteristics of the segments that make them up.
You can add a "Notes" text in the field below if necessary.
Next, tick the box if the weld is "Perimeter" and, in the last drop-down menu, select whether the "Installation location" is "On site" or "In the workshop".
To validate the data entered, click "Accept".
You can select another pair of elements if you wish to add new welds. If, on the other hand, you wish to finish the operation, click the right-hand button.