
Creating a new job, linking to a project and importing data
When you launch the program and click on "New", you are given the option to create a "New job", which can then be integrated into an existing project on BIMserver.center.
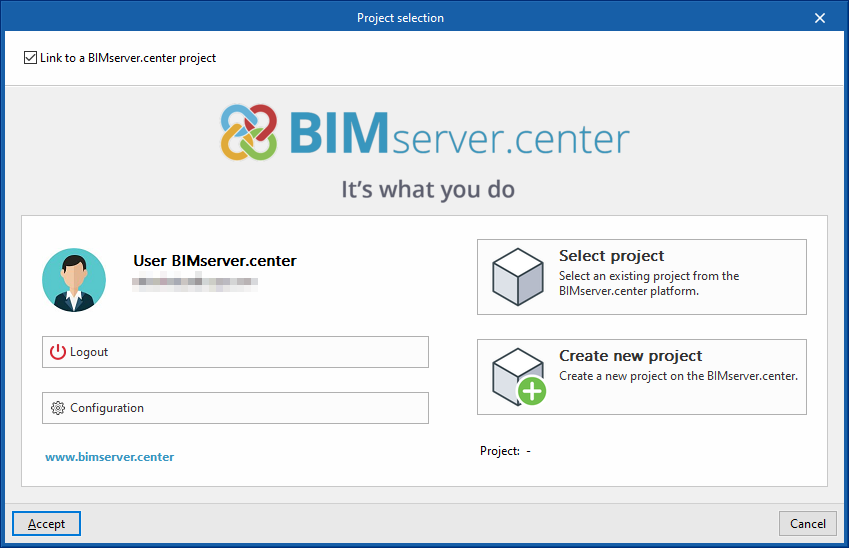
This is done in the "Project selection" window, which offers the following options:
- On the left-hand side, you can sign in using a BIMserver.center account.
- On the right, use the "Select project" option to choose an existing project. You also have the option to "Create a new project". In that case, the project you create will be visible on BIMserver.center from that point onwards.
- The box labelled "Link to a BIMserver.center project", located in the top-left corner, must be ticked. If it is not, the program will display a message stating that the BIM model does not contain the information required to continue.
Once the new project has been created, you will be taken to the program’s main interface after completing the import wizard. At any point thereafter, whilst working on the project, you can share or import project files via the “BIMserver.center” panel, located in the top-right-hand corner of the main interface.
Importing BIM models
When creating a new project, if you have selected a project hosted on the BIMserver.center platform via "Select project", the "Import BIM models" window will appear, displaying the files contained in that project in IFC format.
The app allows you to include one or more existing models from that project. To do this, tick the "Import" box and confirm. You must decide whether the "Type" of each file is "Initial" or "Additional".
The program’s 3D view will then display the imported models, including both the starter files and the additional files. Furthermore, the program allows you to import the geometry of floor plans and spaces from the file marked as the starter file using a configuration wizard.

Setup wizard: selecting floor plans, space types to be imported, and initial configuration
From the "Import BIM Models" window, the program opens the "Configuration" wizard, which consists of the following steps:
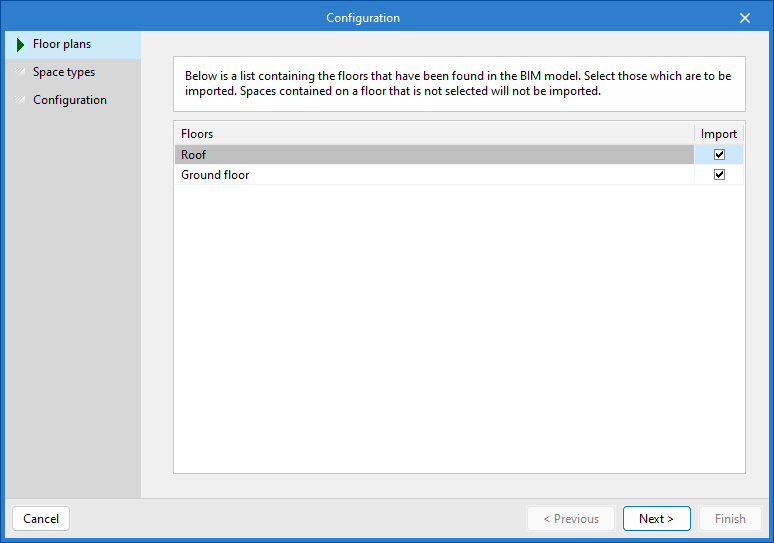
- In the first step, a list of the floors found in the BIM model is displayed. Here, you can select the floor plans to be imported.
| Note: |
|---|
| Spaces included in an unselected floor will not be imported. |
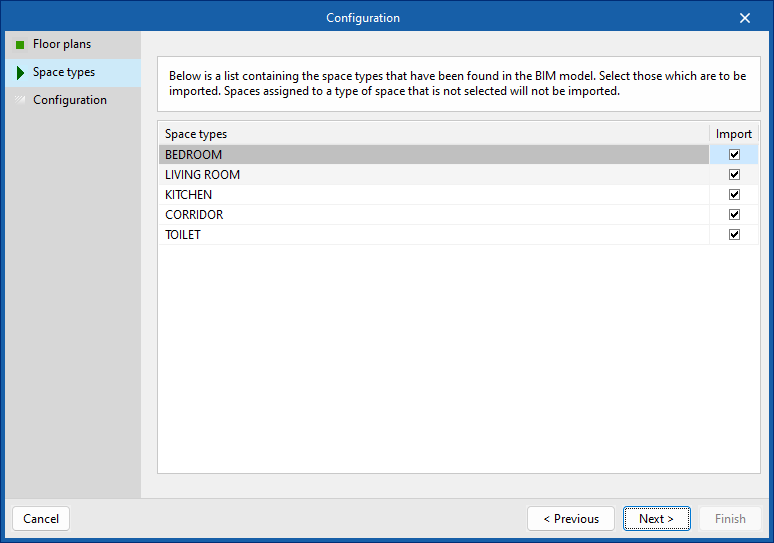
- The next step displays a list of the room types found in the BIM model. Here, you can select the space types to import.
| Note: |
|---|
| Spaces assigned to an unselected space type will not be imported. |
- In the next step, you must define the operating frequencies and analysis options.
- By clicking the blue arrow, you can automatically import the frequency bands based on the selected network type. The program includes the "WLAN/Wi-Fi" standard, as well as the "WPAN/Bluetooth" and "LR-WPAN/Zigbee" options. You must also specify the regulatory body, as this determines the limits of the available frequency bands:
- "FCC" (Federal Communications Commission) applies to the Americas, Australia, New Zealand and various parts of Asia and Oceania.
- "ETSI" (European Telecommunications Standards Institute) applies to Europe, the Middle East, Africa and parts of Asia and Oceania.
- Finally, you can choose to include signals from transmitters located on other floors when analysing the signal for each receiver. In this case, you would need to specify the number of floors above and below the receiver.
- By clicking the blue arrow, you can automatically import the frequency bands based on the selected network type. The program includes the "WLAN/Wi-Fi" standard, as well as the "WPAN/Bluetooth" and "LR-WPAN/Zigbee" options. You must also specify the regulatory body, as this determines the limits of the available frequency bands:
| Note: |
|---|
| It should be noted that the frequency bands may not be exact, given the variations set by the authorities in each country. |
| More information: |
|---|
| The operating frequencies and calculation options can be changed later via the "Settings" option in the main toolbar. |

Import results
Finally, in the last step, the "Import results" table is displayed, showing information about the BIM model elements that have been processed, created, modified or deleted.
