Own element management
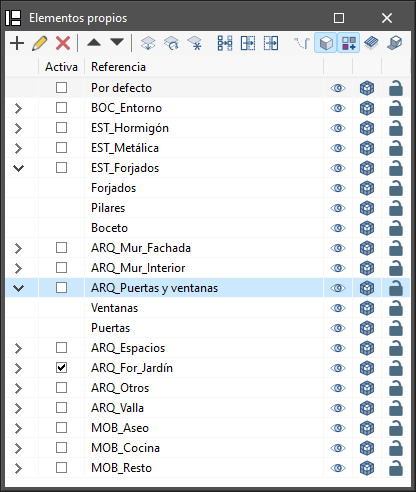
In this section, the elements of the job opened by the program the user is working with are organised in layers that can be created, deleted, edited, sorted, shown or hidden according to their preferences. Within each layer, the elements can be displayed in grouped categories, which can be expanded or collapsed by clicking on the arrows on the left.
Depending on the program being used, the following options and controls appear next to each component of the tree:
- Visible
Enable or disable the visibility of the elements. - Visualisation mode
Choose between normal, transparent and wired display modes. - Snap
Activate or deactivate object snaps of the elements.
In the top toolbar, several options for managing layers can be found:
- Add
Create a new layer. - Edit
Edit the selected layer reference. - Delete
Delete the selected layer reference. - Move selected element up/down the list
Move the selected layer one place up or down in the list. - Assign layer (Ctrl + A)
This makes it easier to change the element from one layer to another. The program allows users to select the layer where the element is to be assigned. - Update layers
Regenerate the display of all layers and makes them visible. - Isolate layer
Isolates the active layer, hiding the other layers available in the project. - Isolate selection (Ctrl + I)
Select several elements to remain visible; those not selected will be hidden. - Hide elements (Ctrl + H)
Control the visibility of each element. - Show elements (Ctrl + U)
Undo the "Isolate selection" and "Hide elements" actions mentioned above.
Note:
Some programs, such as CYPE Architecture, have more specific tools in the top toolbar: "Show/Hide symbols", "Show/Hide sketch", "Show/Hide textures", "Show/Hide tiles" and "Shadows".