Creating rules of measurement
Once the set of measurement rules has been created, the different rules of measurement must be included. To do this, click on the "Edit" button at the top of the screen.
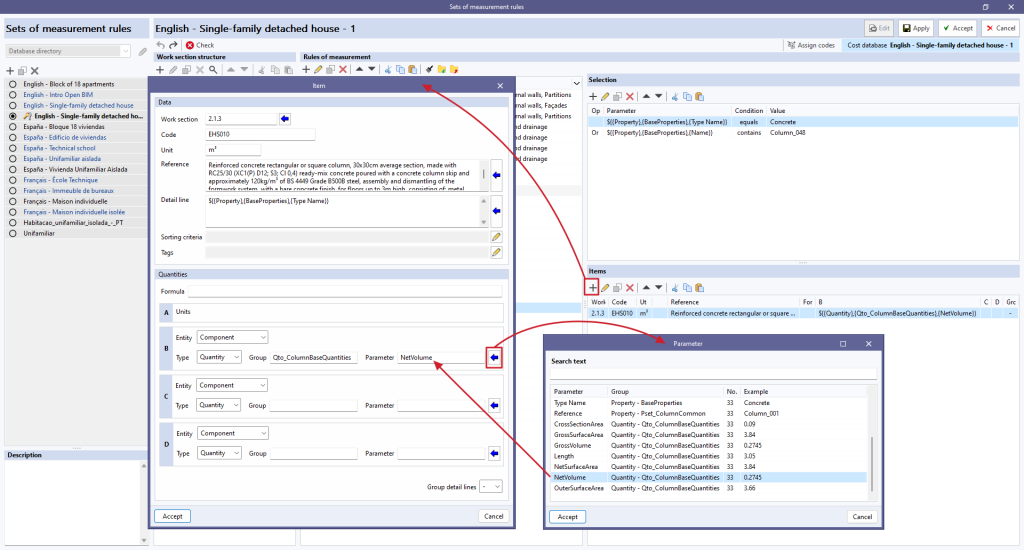
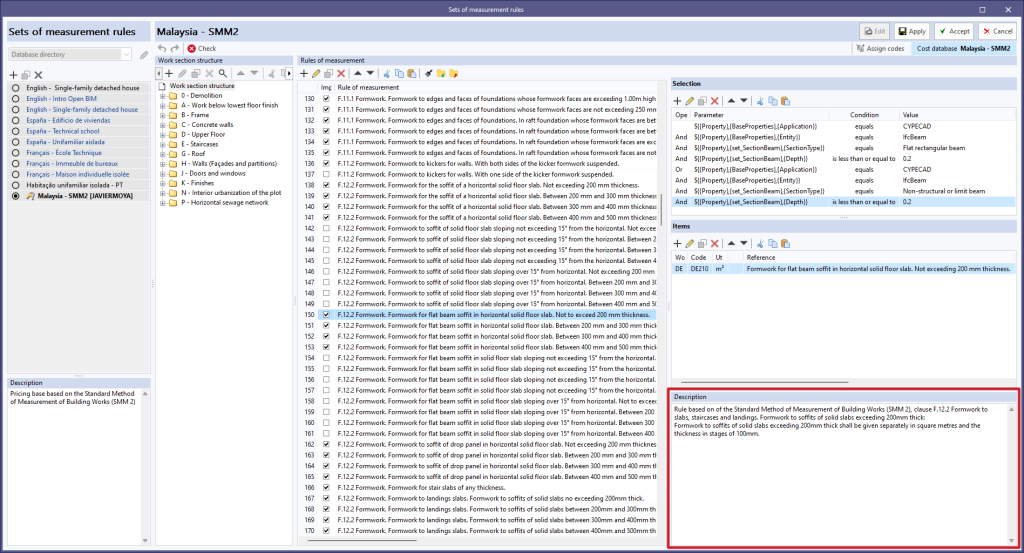
Then, using the "Add" option in the "Rules of measurement" panel, enter a name for the new rule of measurement and click "Accept". This will then be divided into three panels:
- The left panel shows a column with the rules of measurement included in the set.
- The right-hand side displays the following:
- the "Selection" panel at the top,
- the "Items" panel in the middle,
- and a description field for a "Rule of measurement".
Defined rules of measurement and tags
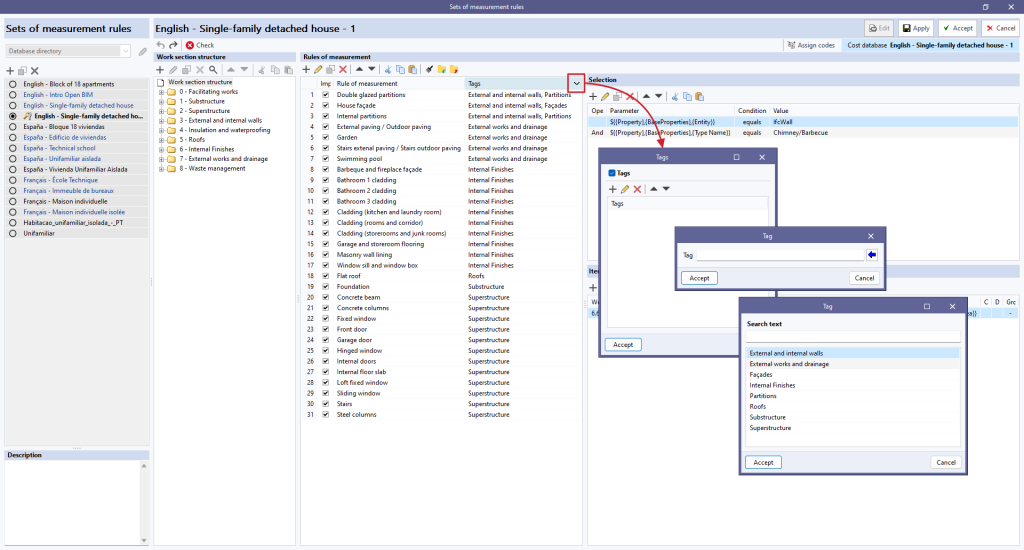
The rules of measurement can be created or modified from the left-hand panel, and tags can be associated to them using the "Tags" field. To simplify this task, the blue arrow button displays a list of the tags defined so far. The "Tags" column allows users to insert several independent text strings and display and filter the rules by a button in the column header. Clicking on the button displays a window for entering a list of tags. When accepted, only the rules containing these tags will be displayed, making it easier to manage a large number of rules in the project.
"Selection" panel
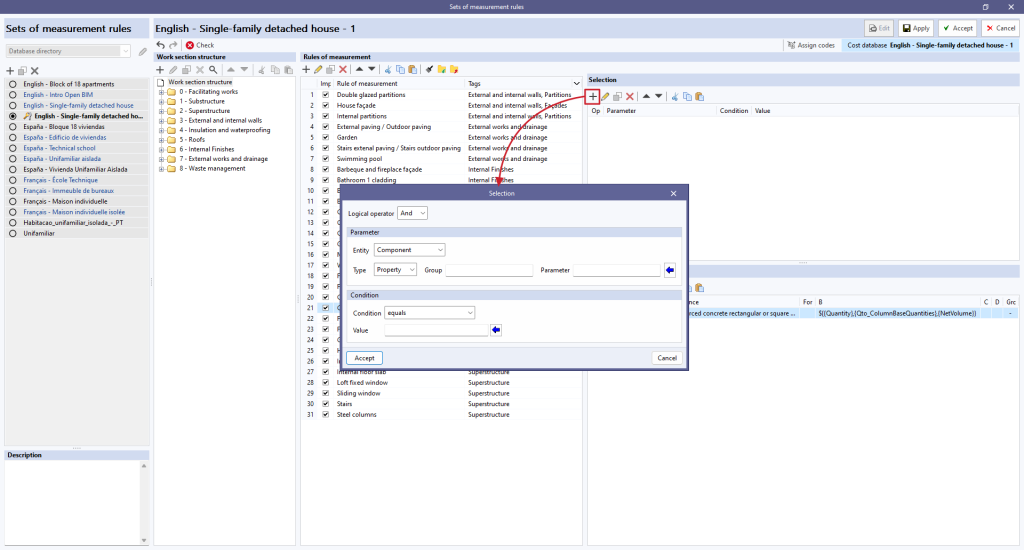
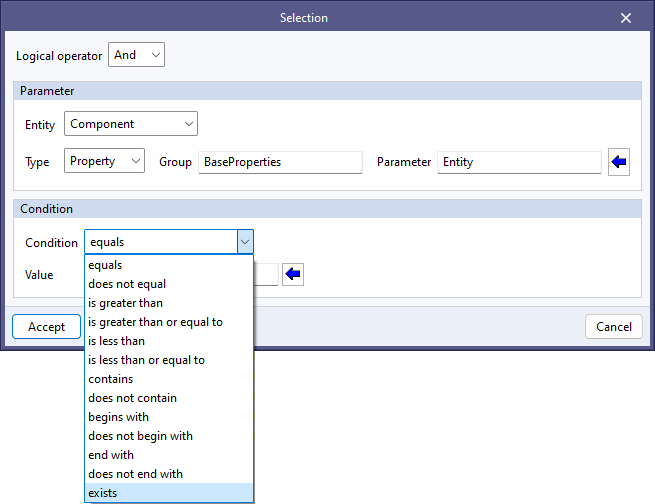
After clicking on "Add" in the "Selection" panel, a window opens where the various fields required for filtering the elements must be defined:
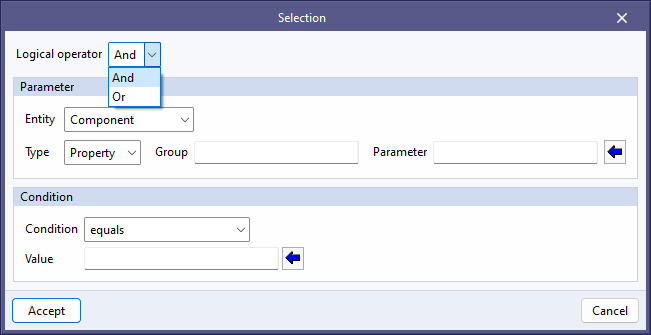
- Logical operator
This operator allows users to choose between the "AND" and "OR" operators, i.e. it sets necessary or alternative conditions for filtering elements during selection. If only one condition for selection is desired, the "AND" operator must be used.
- Parameter
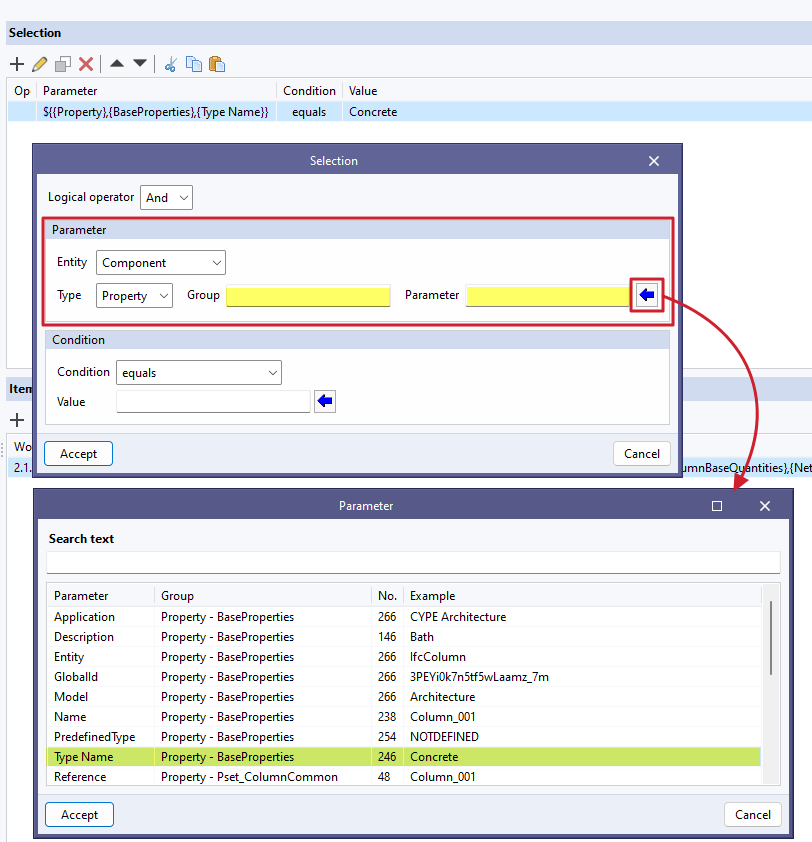
The selection of elements must be carried out from some of the parameters that define them and that can be found in "BaseProperties" of the parameter table. The definition of the parameter also requires setting the entity by "Component" or "Parent Component"; the Type, by "Property", "Quantity", "Layer" or "Group"; and, from the blue arrow, the "Parameter" and the "Set" will be selected from the list.
- Condition
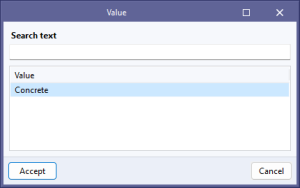
By assigning a condition, the filter criteria is established on the basis of the value taken by the previously defined parameter. Once the type of "Condition" has been established ("equals", "does not equal", "is greater than", "contains", etc.), the "Value" of the parameter must be chosen using the blue arrow on the right.
"Items" panel
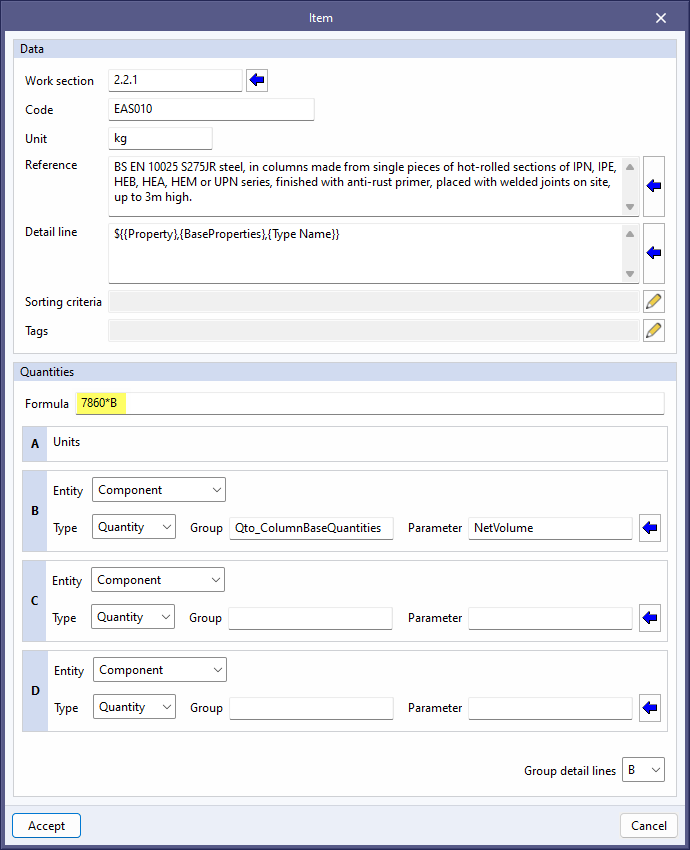
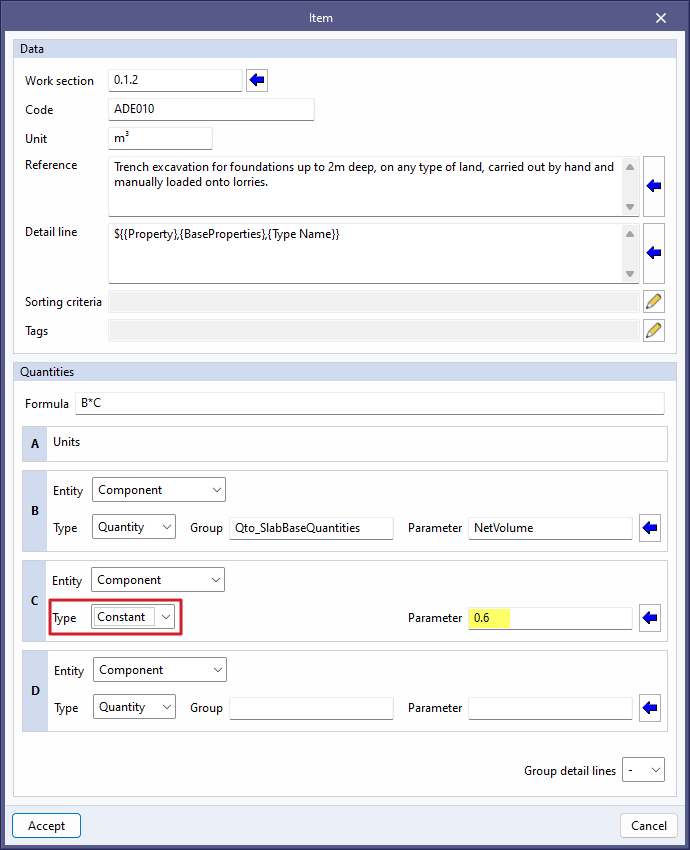
After clicking on "Add" in the "Items" panel, the application displays a window in which the different fields necessary to associate an item and the quantities formula can be defined. The properties of an IFC entity (IfcPropertySet) can be used to carry out the measurement (variables B, C and D). The variable "A" would be per item.
Entering formulas or constants
- Formula. To include a formula in the quantities, it must be written in the corresponding field, "Formula". This field may be associated with other parameters (B, C or D).
- Constant. To add a constant to the quantities, select the "Constant" "Type" in the parameter (B, C or D), and enter the numerical value in the "Parameter" field. Once the constant has been entered, add the corresponding "Formula".
Description of a "Rule of measurement"
For each "Rule of measurement" a field called "Description" can be filled in to provide more details about the content, purpose or use of each rule of measurement. This feature makes it easier to understand and manage rules of measurement, especially in complex projects with multiple rules. Furthermore, it helps to standardise measuring practices and to maintain a more organised and coherent database.


