Editing foundation elements
The following tools for editing foundation elements are available in the "Foundation elements" panel at the top of the interface, within the "Foundation" tab.

Delete
The "Delete" option allows you to delete a foundation element that has already been entered. To do this, select them one by one using the left mouse button or draw a selection area, and then click the right mouse button to confirm their deletion.
Edit
The "Edit" option allows you to modify the properties of any foundation element in a dedicated editing window, as well as perform its analysis separately, view the specific checklist, and carry out its design and reinforcement.
After selecting the option, left-click on a foundation element that has already been entered.
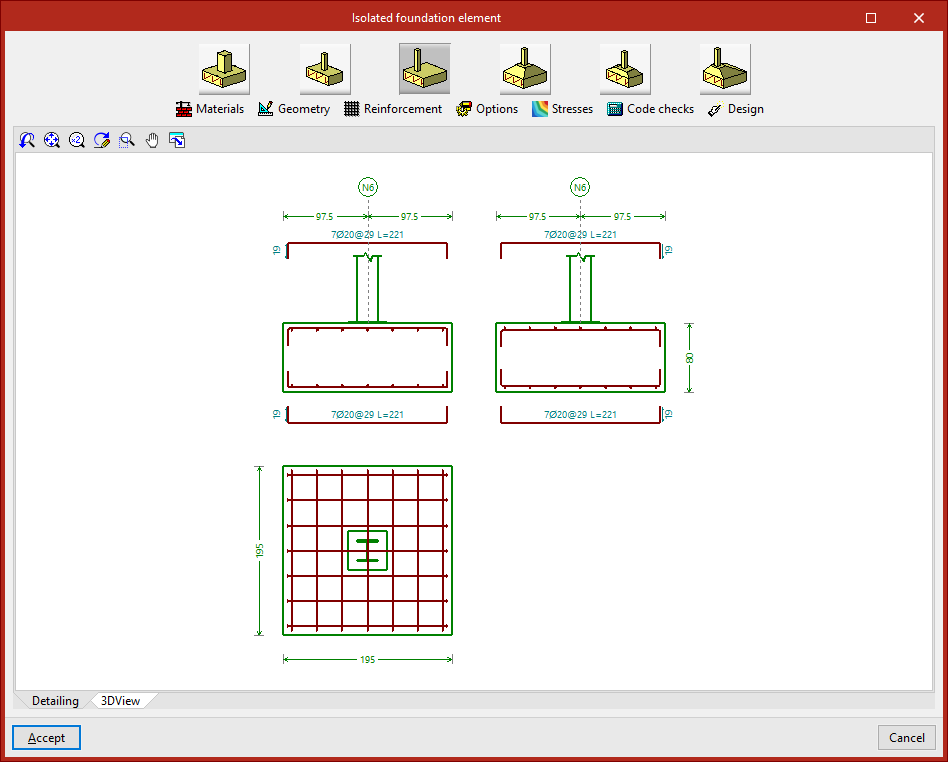
In the case of an isolated footing, the edit window offers the following options:
"Detailing" and "3D view" tabs
A representation of the element’s geometry and layout is displayed in the centre of the pop-up window, provided the "Detailing" tab remains visible.
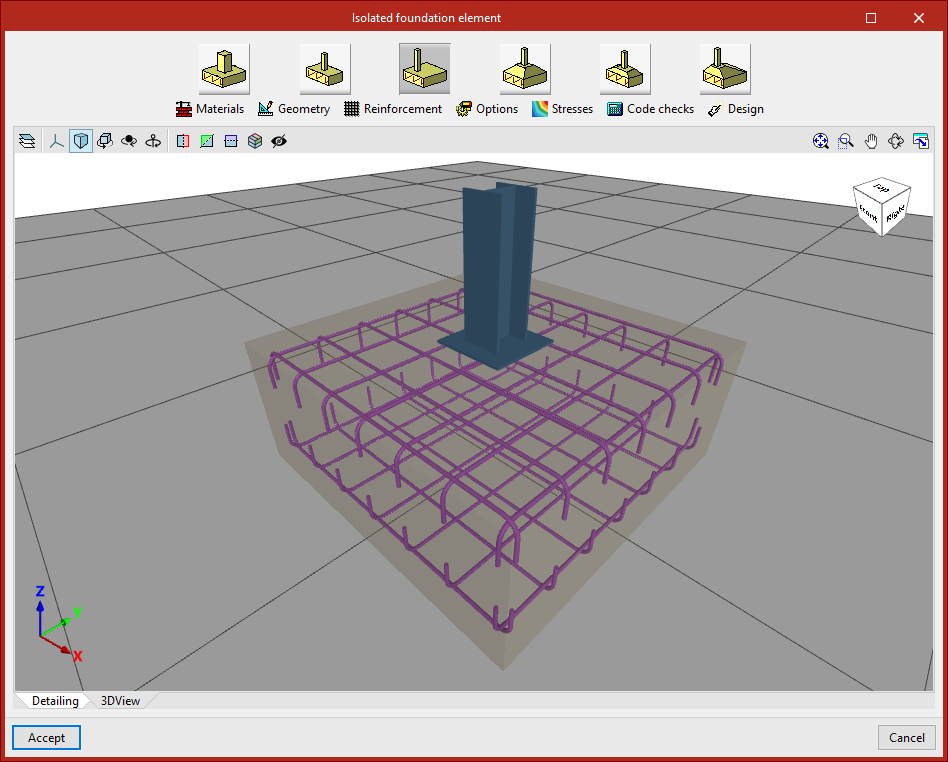
When you click on the "3D View" tab, a three-dimensional view is displayed.
Type selection
At the top of the window are tools for modifying the element's properties.
In the case of footing or pile caps, you can select a different type using the relevant buttons.

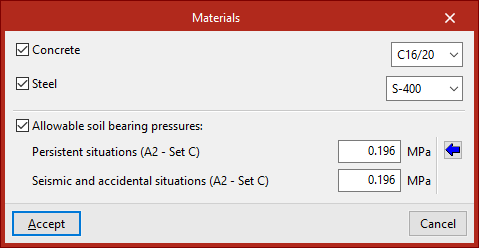
Materials
Next, by clicking on "Materials", you can assign the material properties of the element and the allowable soil bearing pressures.
If none of the boxes are ticked, the program will automatically use the information specified under "Project", "General data".
By ticking the "Concrete" or "Steel" boxes, you can select a material from those available in accordance with the selected standards.
For "Allowable soil bearing pressures", values must be defined for "Persistent situations" and "Seismic and accidental situations". Typical values can be imported by clicking the corresponding button.
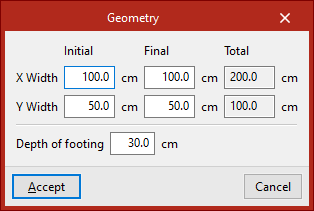
Geometry
The "Geometry" option allows you to adjust the initial and final widths in the X and Y directions, as well as the depth of the footing.
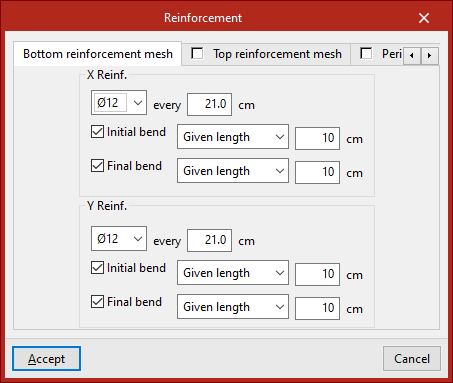
Reinforcement
To change the configuration, click on the relevant option.
In the "Bottom reinforcement mesh", "Top reinforcement mesh" and "Perimeter" tabs, the reinforcement for each part of the element is defined, including the diameter of the bars, the spacing, and whether or not there are bends.
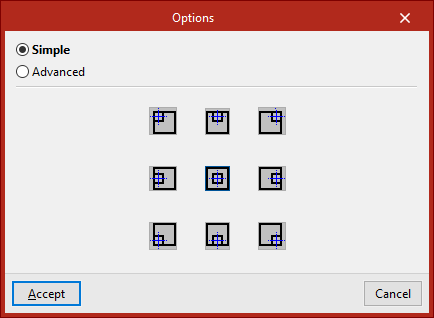
Options
You can now access the "Options" for geometric design.
- If "Simple" is selected, the program allows you to choose the direction of growth using the available symbols.
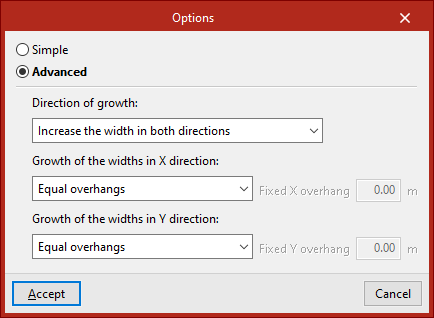
- If you tick "Advanced", you can specify which dimensions should expand and in what order. You can also specify the expansion in the X and Y directions by selecting them from the relevant drop-down menus.
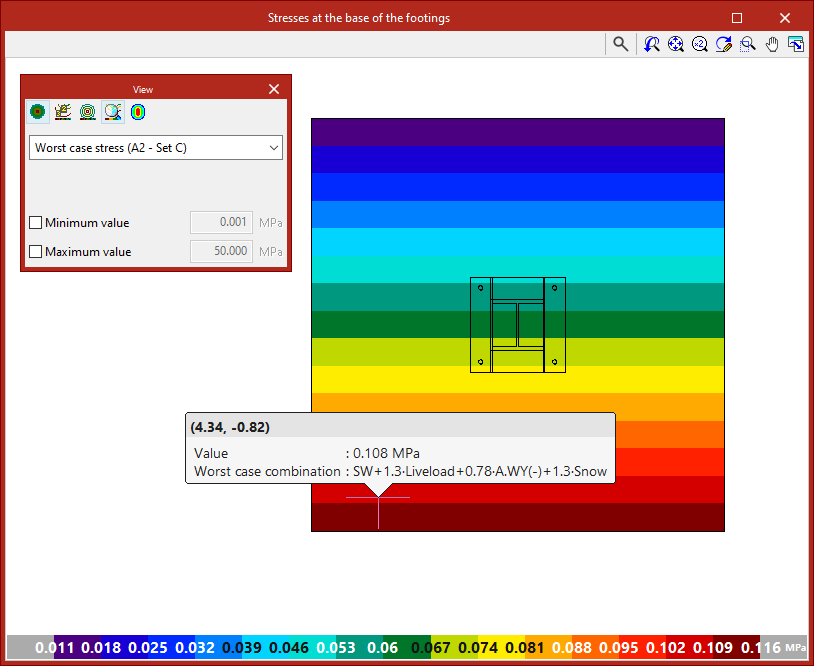
Stresses
This allows you to check the stresses at the base of the footing. To do this, the structure must be analysed.
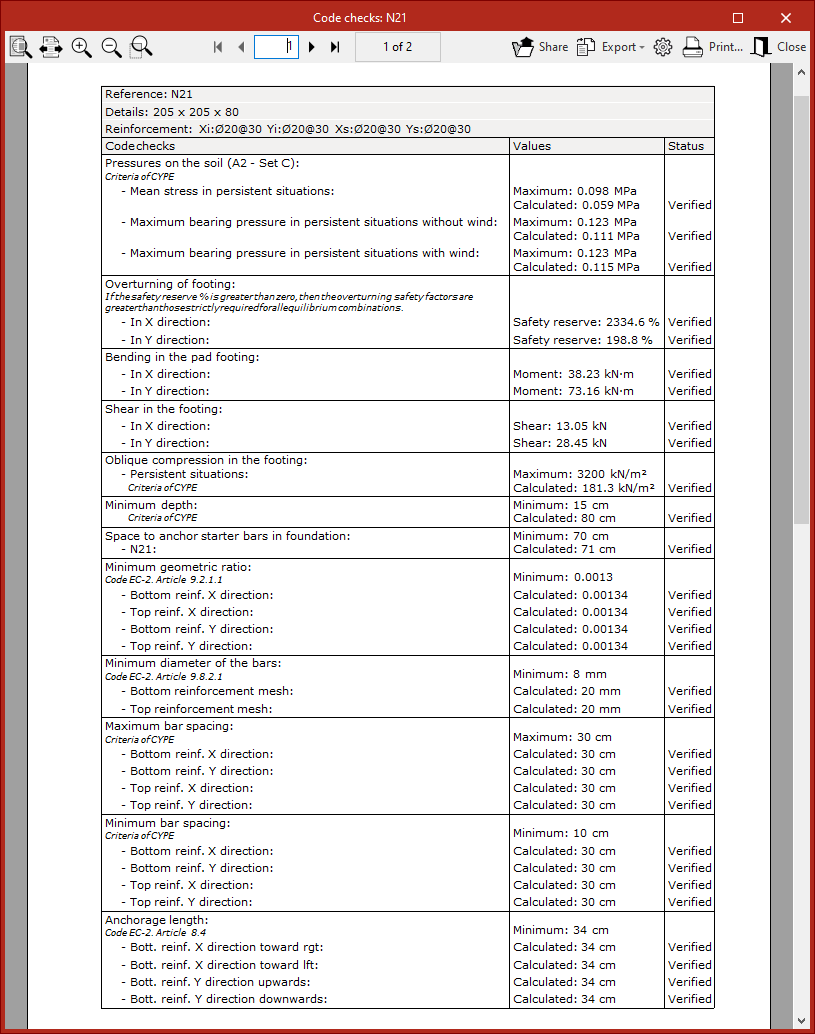
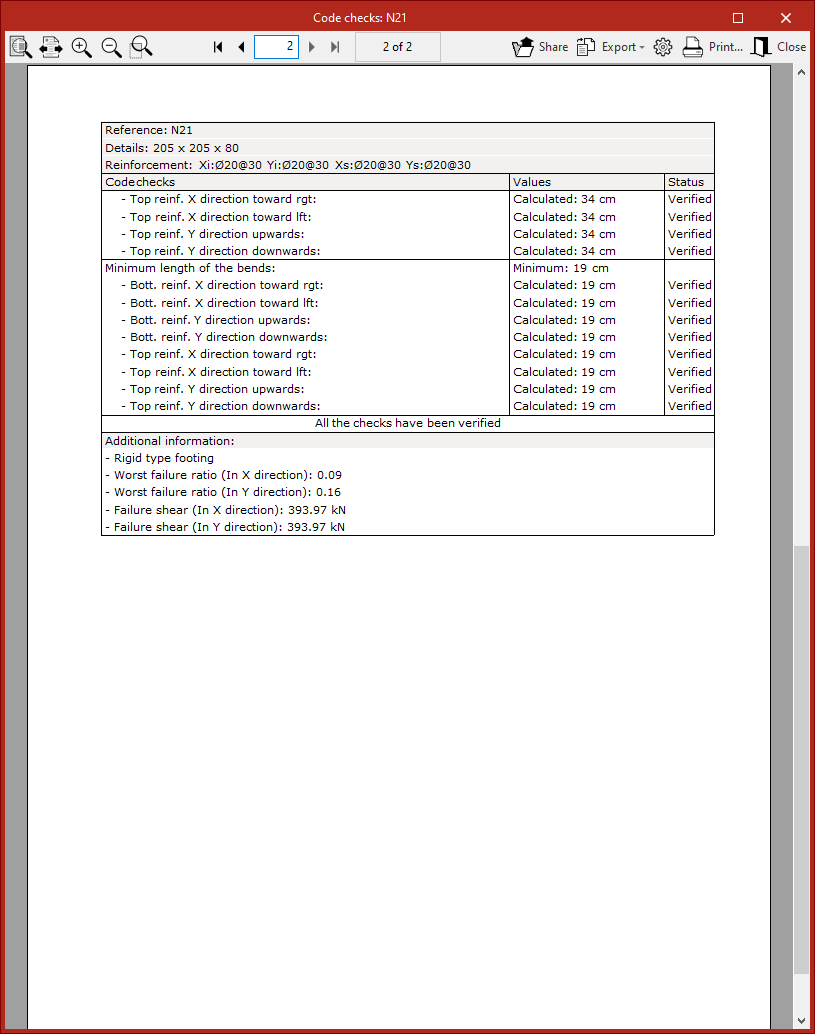
Code checks
The element is then checked against the defined geometric and assembly conditions using the "Code check" function.
The status of each check is displayed in the centre. Clicking on a row opens the detailed report in the lower pane.
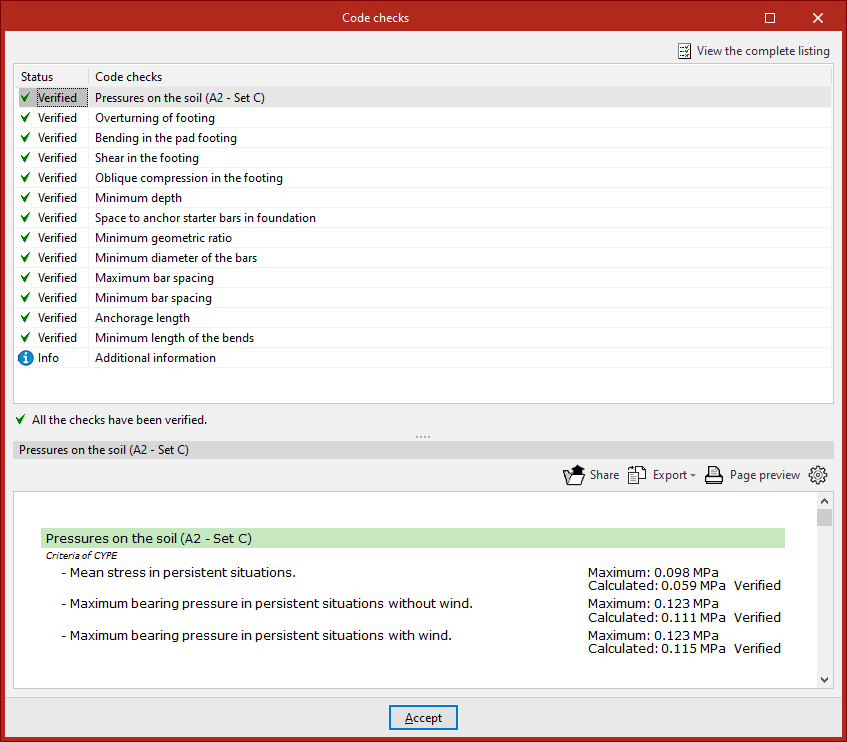
In the top right-hand corner, you can view the full report, as well as share, export or print it.
Design
Finally, using the "Design" option, you can redesign the element using the forces obtained from the analysis.
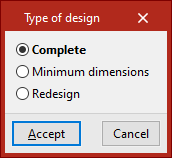
In the pop-up window, the program allows you to select the type of design:
- With "Complete", the geometry and assembly are scaled without taking the user's data into account.
- With "Minimum dimensions", the dimensions entered are retained and are only increased if necessary. The assembly is always dimensioned.
- With "Redesign", only the layout is changed, whilst the geometry remains the same.
To confirm the changes, click "Accept".
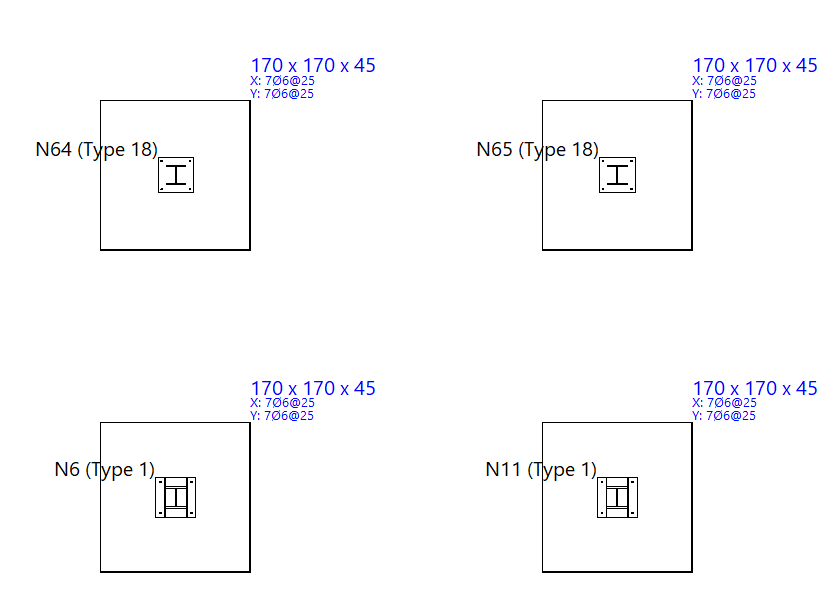
Match
The "Match" option allows you to match the type, geometry and reinforcement of different foundation elements:
- First, left-click on the element you want to obtain information about. If you select a point linked to several elements, the program allows you to choose which ones you wish to "Copy" by ticking the relevant boxes.
- After clicking "Accept", elements with different data are highlighted in yellow, and those with the same data are highlighted in orange. You can now use the left mouse button to select the items with different data that you wish to match to the selected item, or you can use a selection area.
- Right-click to complete the operation.
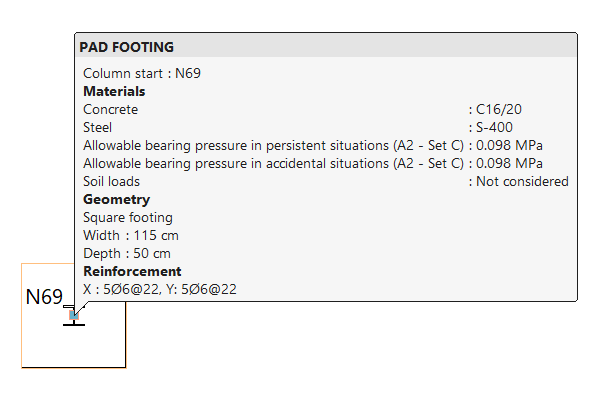
Information
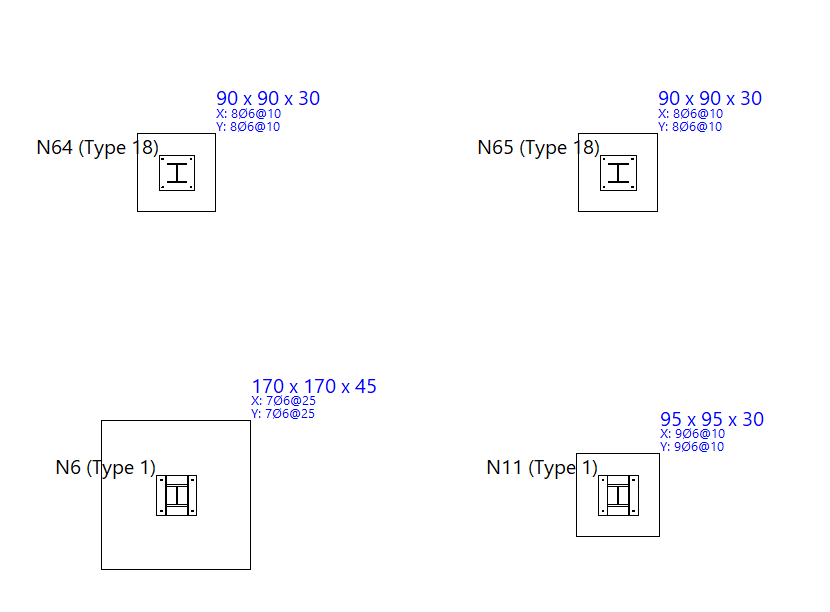
The "Information" option allows you to display an information box containing the most relevant details for each item by left-clicking on it.
To hide the information text, click the right-hand button.