Introduction
Open BIM Model Checker is a program aimed at helping users manage and verify the virtual model to avoid future errors in the built project. It has three main features: issue generation, clash detection and document checking.
Open BIM Model Checker is integrated into the Open BIM workflow, allowing users to import models from a project hosted on the BIMserver.center platform and become part of the collaborative, multi-disciplinary and multi-user workflow provided by Open BIM technology.
This tool is free of charge, except for the "Clash detection" feature, which requires the corresponding permission in the user license.
Work environment
Open BIM Model Checker works on an Open BIM project hosted on the BIMserver.center platform, which is made up of BIM models from the different disciplines involved in it.
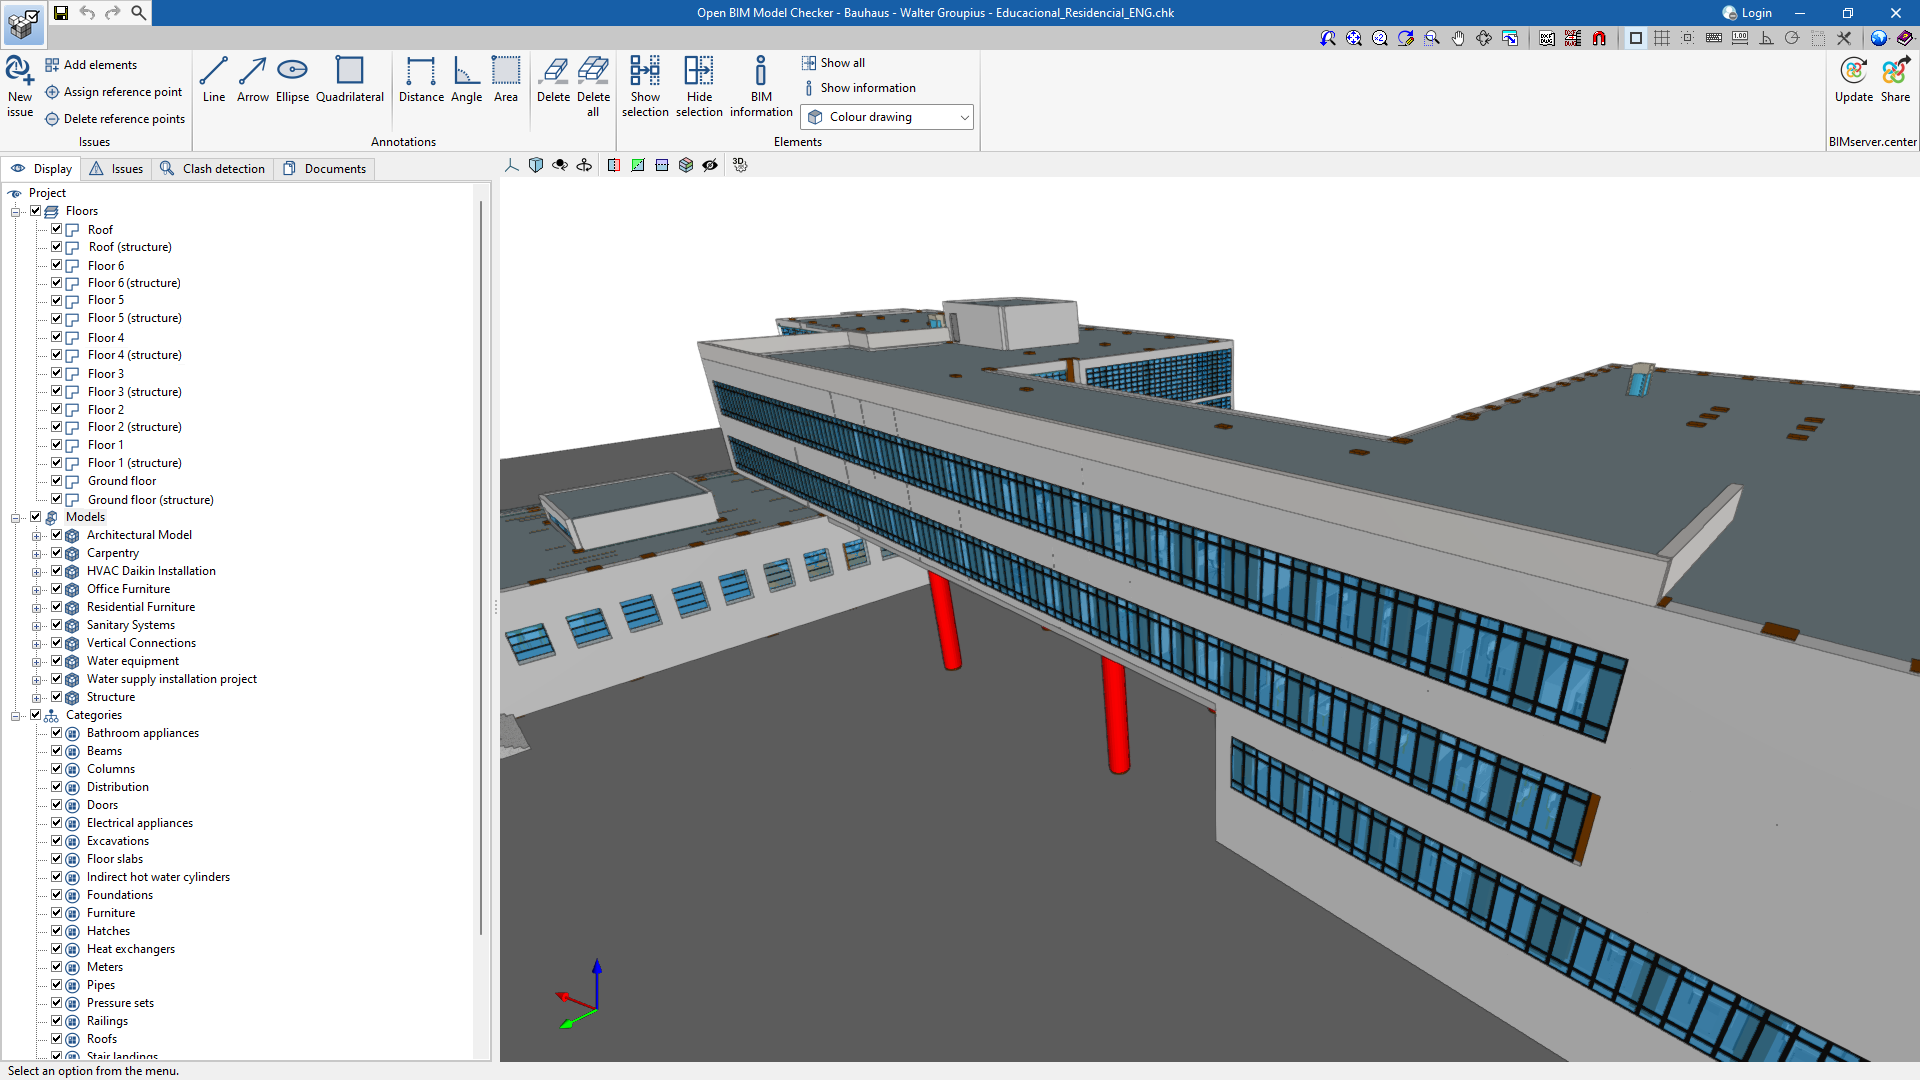
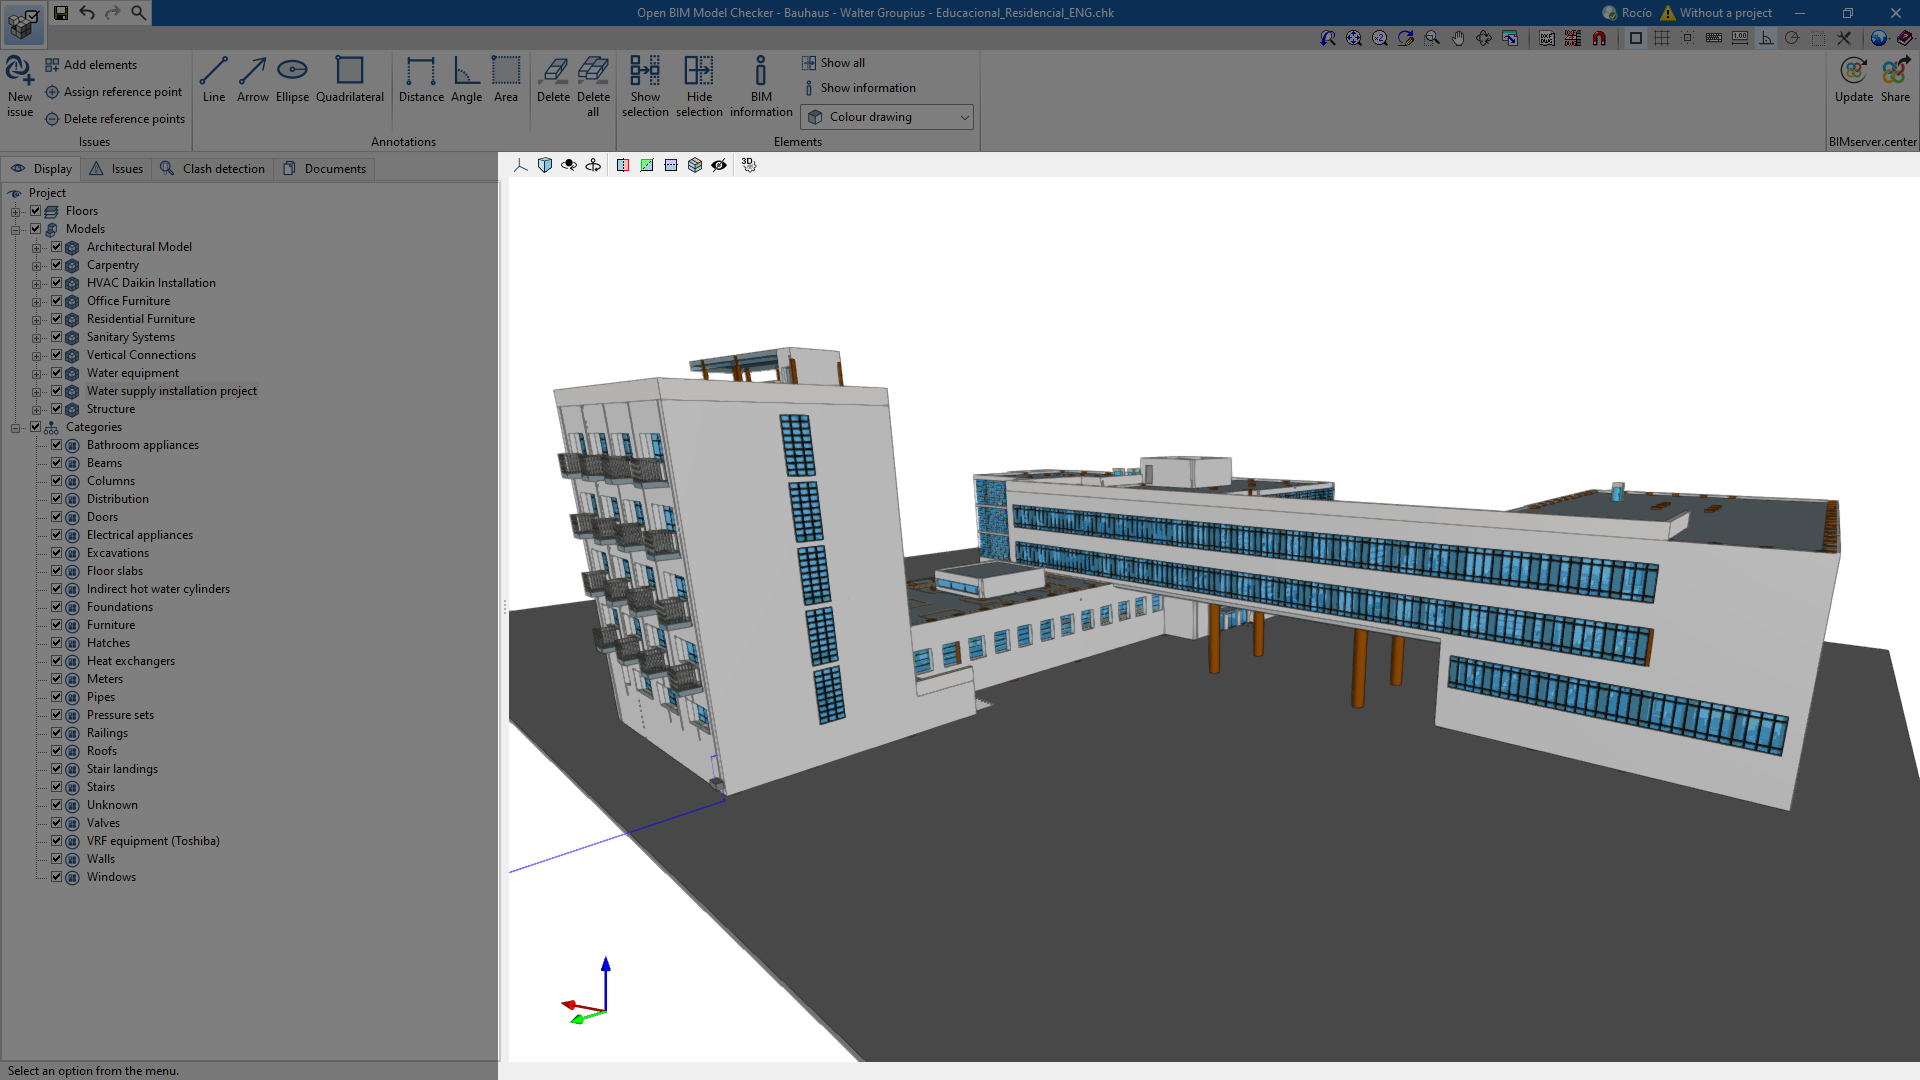
The program interface is divided into three parts:
- The toolbar at the top;
- The 3D work area on the right;
- The workbar with the "Display", "Issues", "Clash detection" and "Documents" tabs grouped together on the left.
Creating a new job and linking it to a project
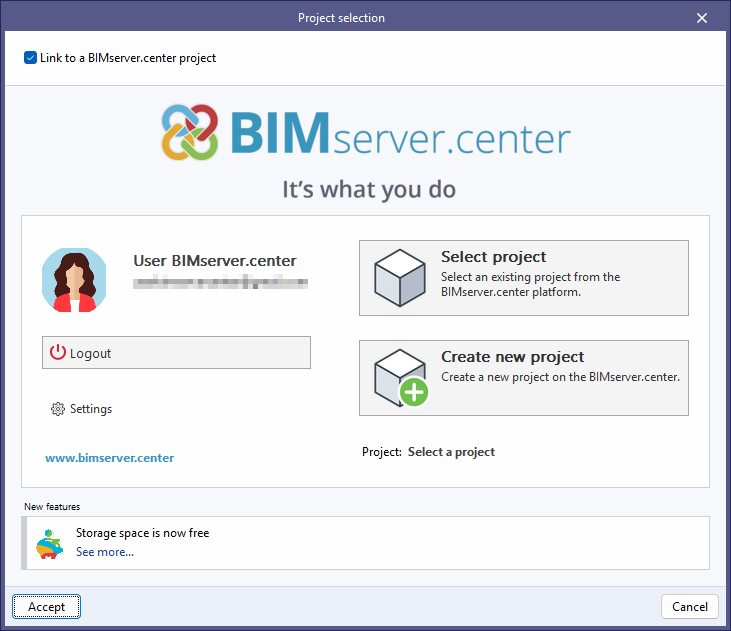
When launching the app and clicking on "New", users are given the option of creating a "New job", which can then be integrated into an existing project in BIMserver.center.
There is also the option to "Create new project". In this case, the created project will be visible from BIMserver.center from that moment on.
Once the new job has been created, users then access the interface, in which the graphic window showing the model or models that have been imported is displayed.
Users also have the option of starting the project without being linked to the BIMserver.center platform. To do this, simply uncheck the "Link to a BIMserver.center project" box in the top left-hand corner.
Files can be shared or imported at any time while the project is in progress via the BIMserver.center tab located at the top right of every program.
Importing BIM models
When creating a new job and selecting a project hosted on the BIMserver.center platform via "Select project", the "Import of BIM models" window appears, which shows the files contained in the project in IFC format.
The app offers users the option of including one or more of the existing models in the project. To do this, check the "Import" box and accept it.
When accessing the interface, the graphical window will display the imported models.

Toolbar
The toolbar has four different groups: "Issues", "Annotations", "Elements" and "BIMserver.center". The first three groups allow users to work in the 3D area; the last one allows them to export the job to the collaborative platform BIMserver.center, and also update it.
Issues

The “Issues” group has the tools needed to create an issue:
- New issue. Allows a new issue to be created, with a title, a description and the elements involved in the issue.
- Add elements. Allows elements to be added to a previously created issue.
- Assign reference point. Allows a sphere to be placed on the model, associated with a specific issue. This sphere allows the issue to be seen in the 3D model of BIMserver.center and the rest of the programs.
- Delete reference points. Allows users to delete the reference point of an issue.
Annotations

The "Annotations" group allows users to add graphical annotations to the model.
These annotations will be exported together with the reference point and can be displayed in the 3D models of BIMserver.center and the specialist programs.
- Drawing tools: "Line", "Arrow", "Ellipse" and "Quadrilateral".
- Design tools: "Distance", "Angle" and "Area".
- Erasing tools: "Delete" and "Delete all".
Elements

The "Elements" group contains the tools that complete the features of the "Visualisation" tab and help users work better when inspecting the BIM model.
- Show selection. Allows users to isolate elements of the 3D model. To do this, select the elements of the 3D model to be isolated and click on them with the right mouse button. The rest of the elements of the model will disappear.
- Hide selection. Allows users to hide the selected elements.
- Show all. Allows users to show all the hidden elements.
- BIM information. When selecting an element, it shows a table with its BIM information.
- Show information. Allows users to activate or deactivate the information box shown when hovering the mouse pointer over the elements in the 3D model.
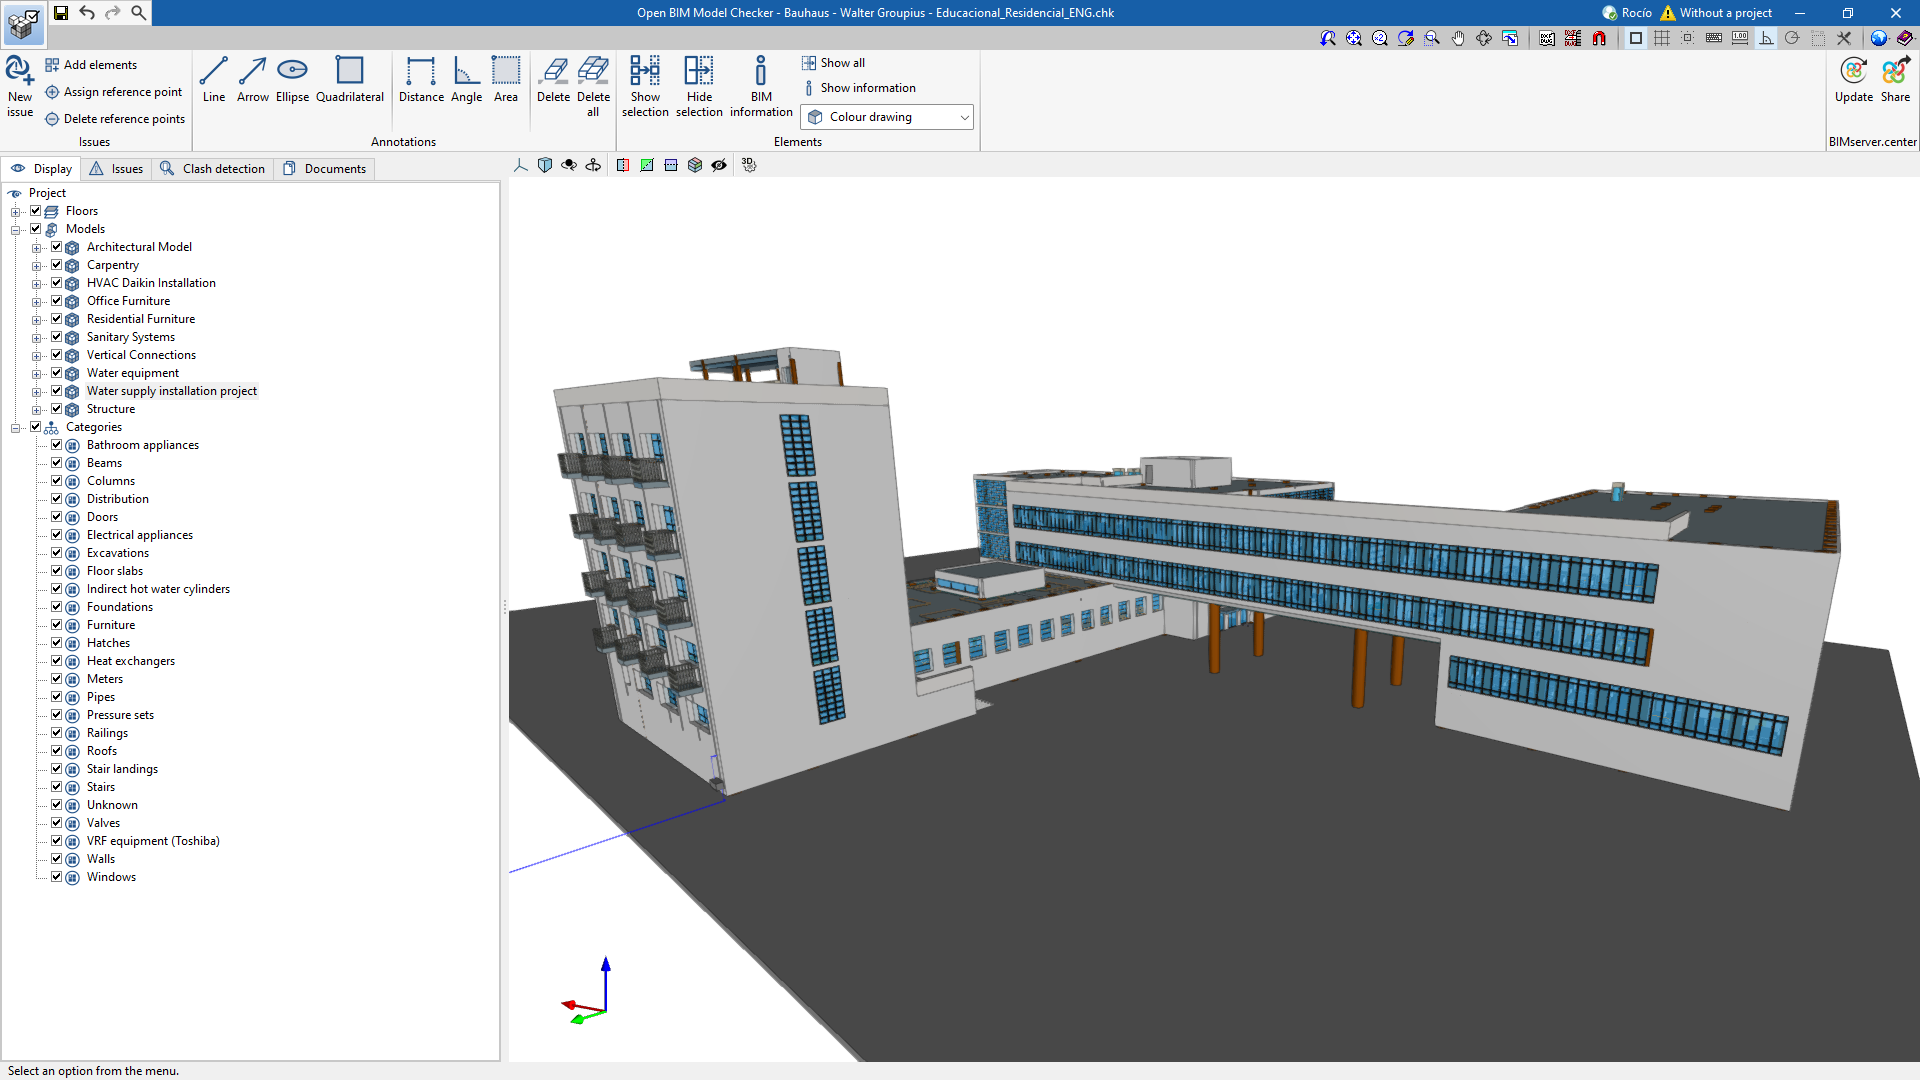
- Display options. Allows users to choose between a normal drawing or a monochrome drawing.
Managing the "Display" tab
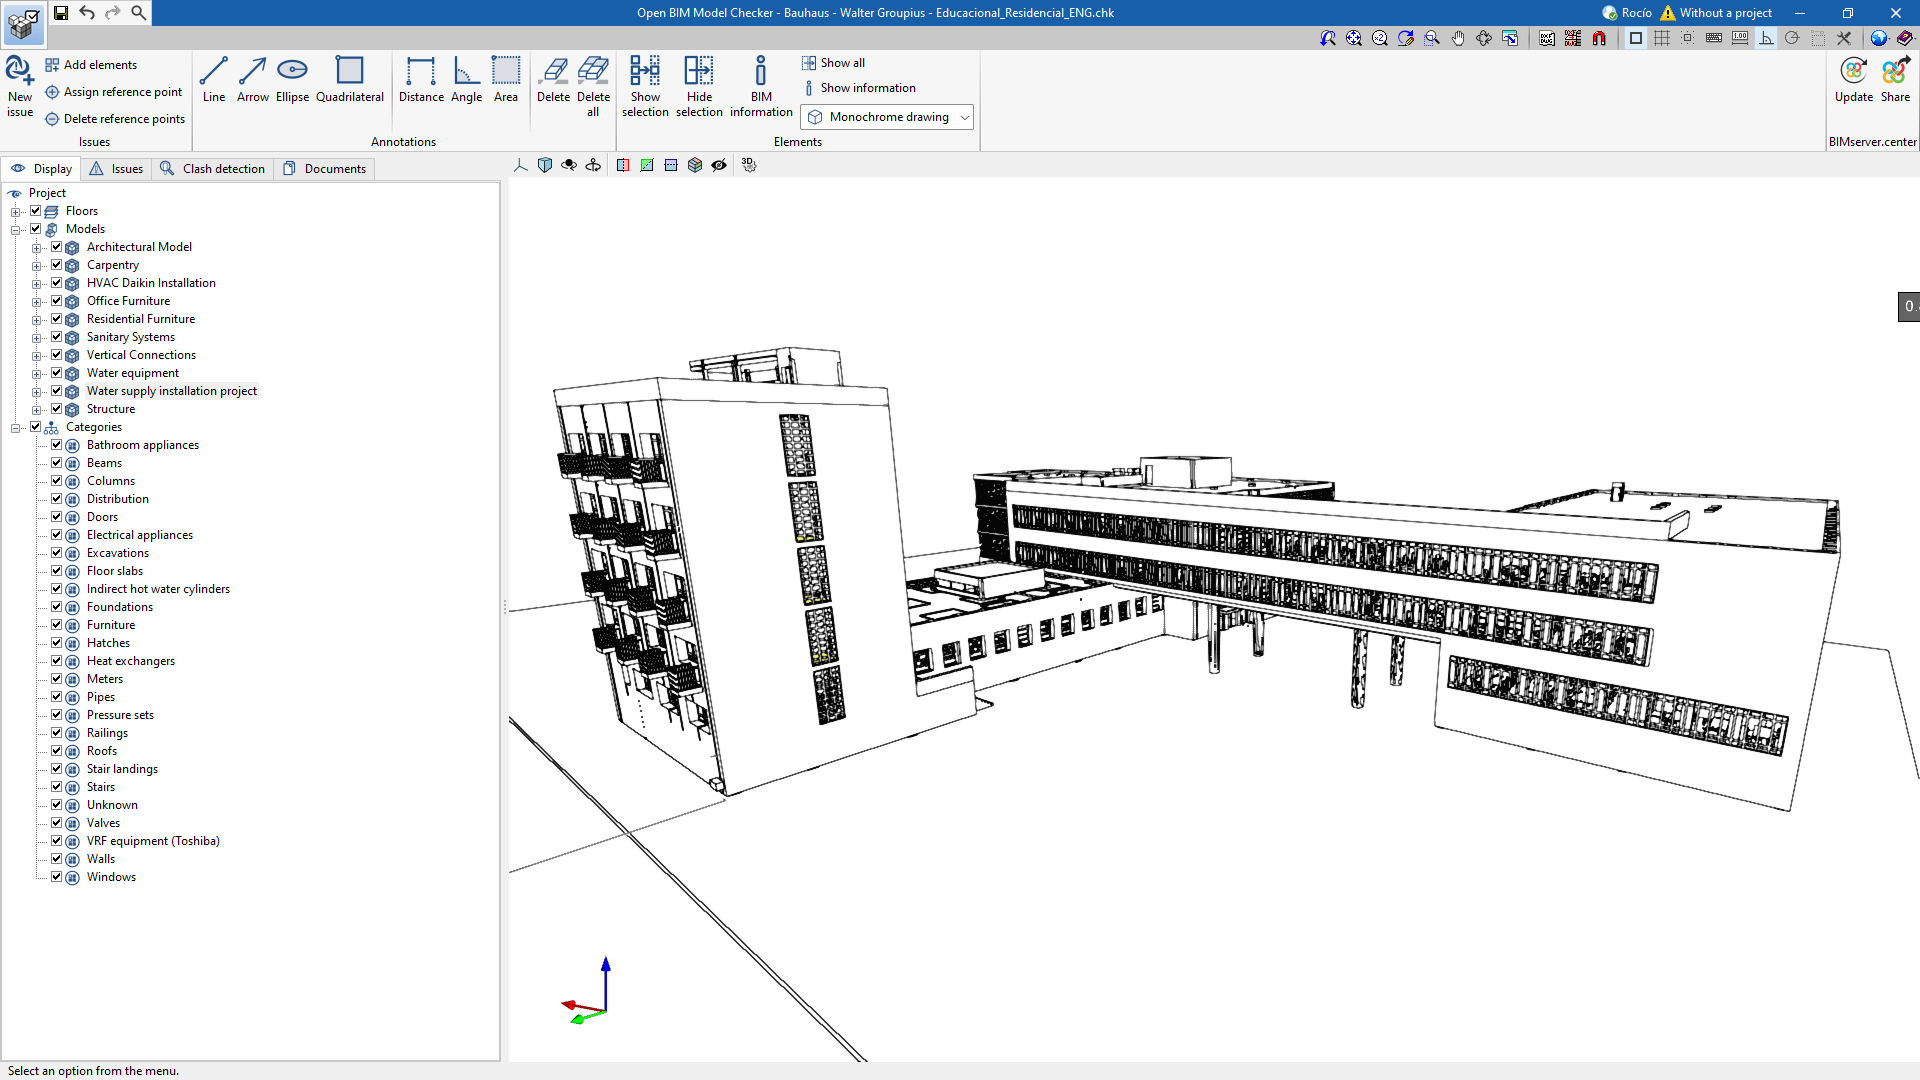
This tab presents a tree structure from which users can manage the display modes of their model. The program offers display options according to three criteria: "Floors", "Models" and "Categories". This facilitates and speeds up the model inspection process.
The display modes allow users to inspect the BIM model quickly and easily, as they help them to carry out a complex filtering of elements.
The "Models" and "Categories" branches allow users to change the display mode by selecting "Colour drawing", "Transparent drawing" or "Wire drawing".
The "Categories" branch also has a "Default drawing" mode. When selected, the elements in this category are drawn with the same status as in the "Models" branch.
Also, other options of Open BIM Model Checker include hiding or isolating elements individually and displaying the model in colour or in monochrome mode from the options located on the toolbar.
Visibility monitoring tools to support modelling
In the top left corner of the 3D display area is a toolbar that allows users to control the display of the model during the modelling process.
This bar has several options that make it easier to manipulate and display the project. Some of the options are shown in the following image.

The first section covers the options for controlling the display modes of the model:
- Projection. Opens a window that allows users to select predefined projections, such as top view, front view, isometric view, orthogonal view, etc.
- Projection type. Modifies the type of projection from axonometric to conic and vice versa.
- Rotation about a point. Activates or deactivates the rotation of the scene around a point of an object under the cursor.
- Rotation about the camera. Activates or deactivates the scene's rotation around the camera's vertical axis.
The following 5 options allow users to create sections to view the BIM model from various perspectives and to create customised views.
- Section perpendicular to the global 'X' axis: Allows users to define a section of the model perpendicular to the global x-axis.
- Section perpendicular to the global 'Y' axis: Allows users to define a section of the model perpendicular to the global y-axis.
- Section perpendicular to the global 'Z' axis: Allows users to define a section of the model perpendicular to the global "z" axis.
- Clip volume: Allows users to define a display volume using 6 clipping planes that are formed from the geometric envelope of the scene content.
- Show/Hide section planes: Allows users to manage the visibility of the lines and symbols of the sections created.

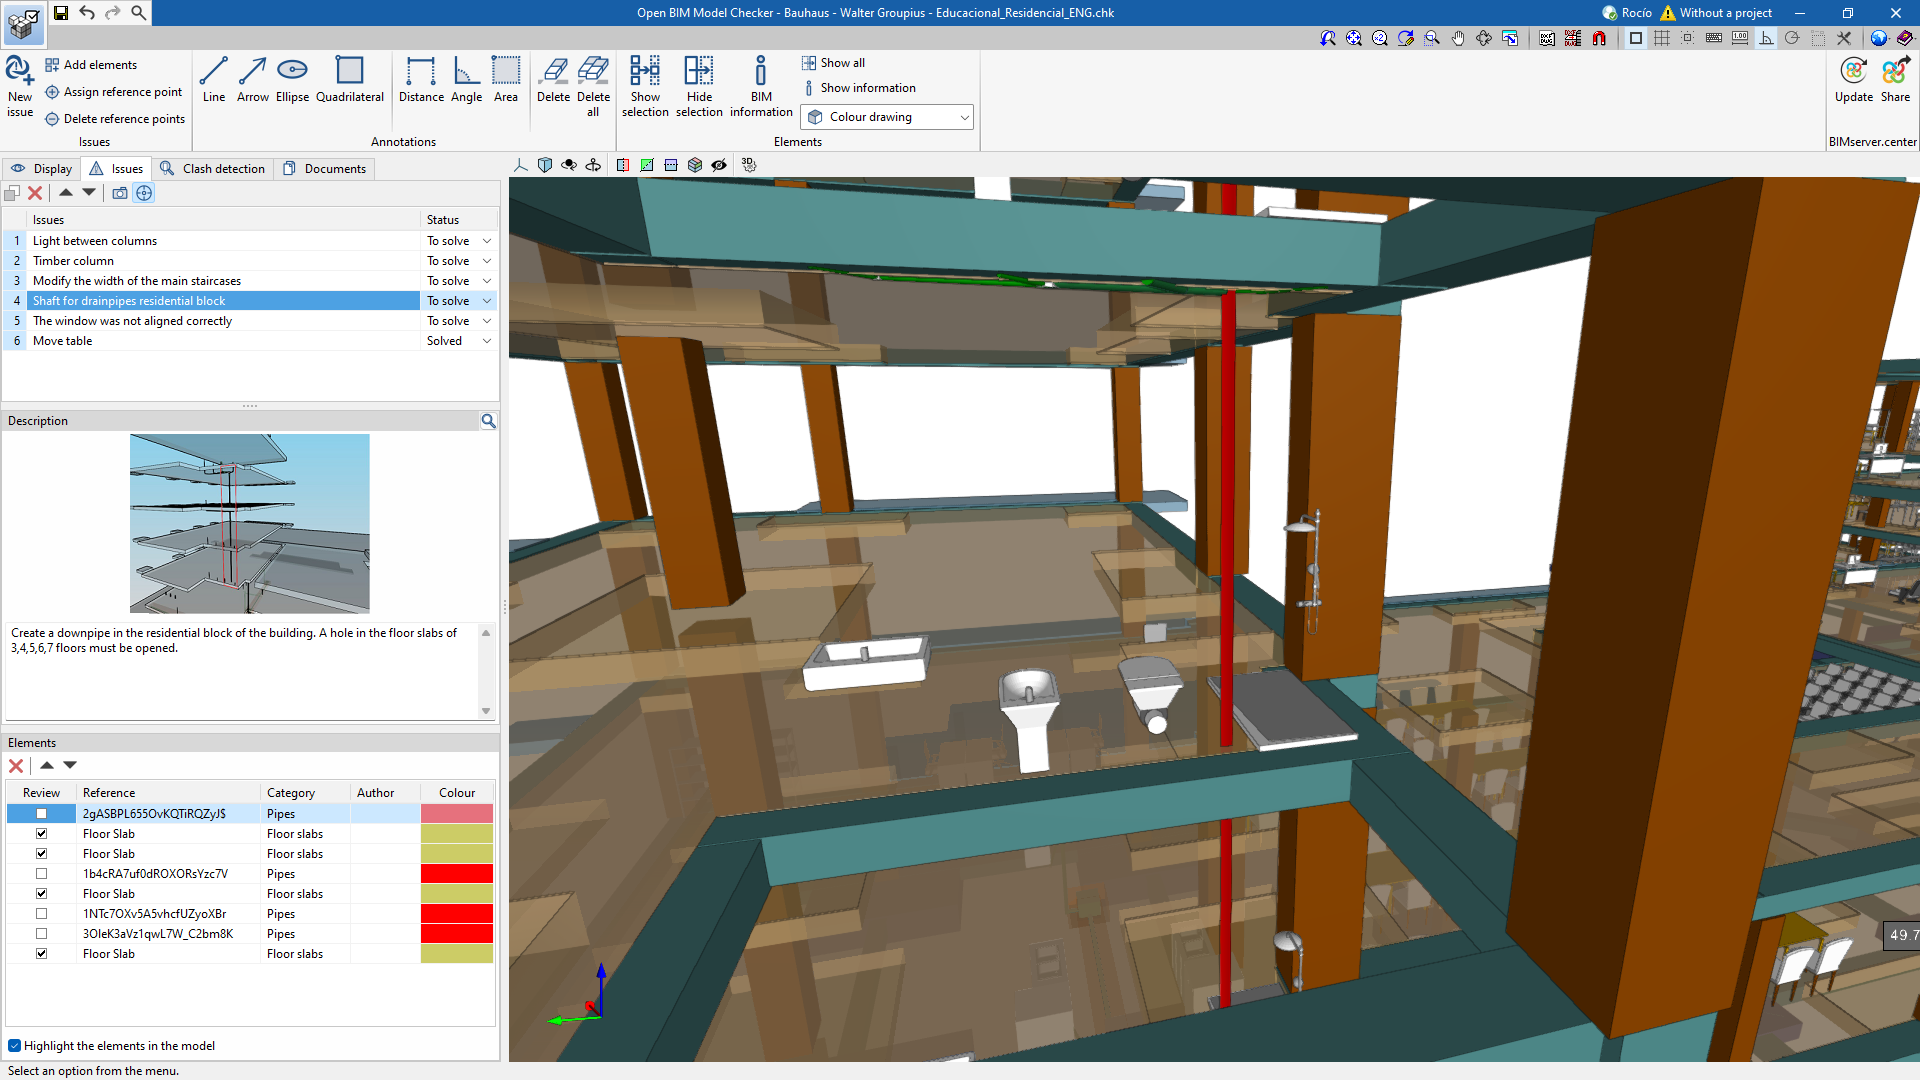
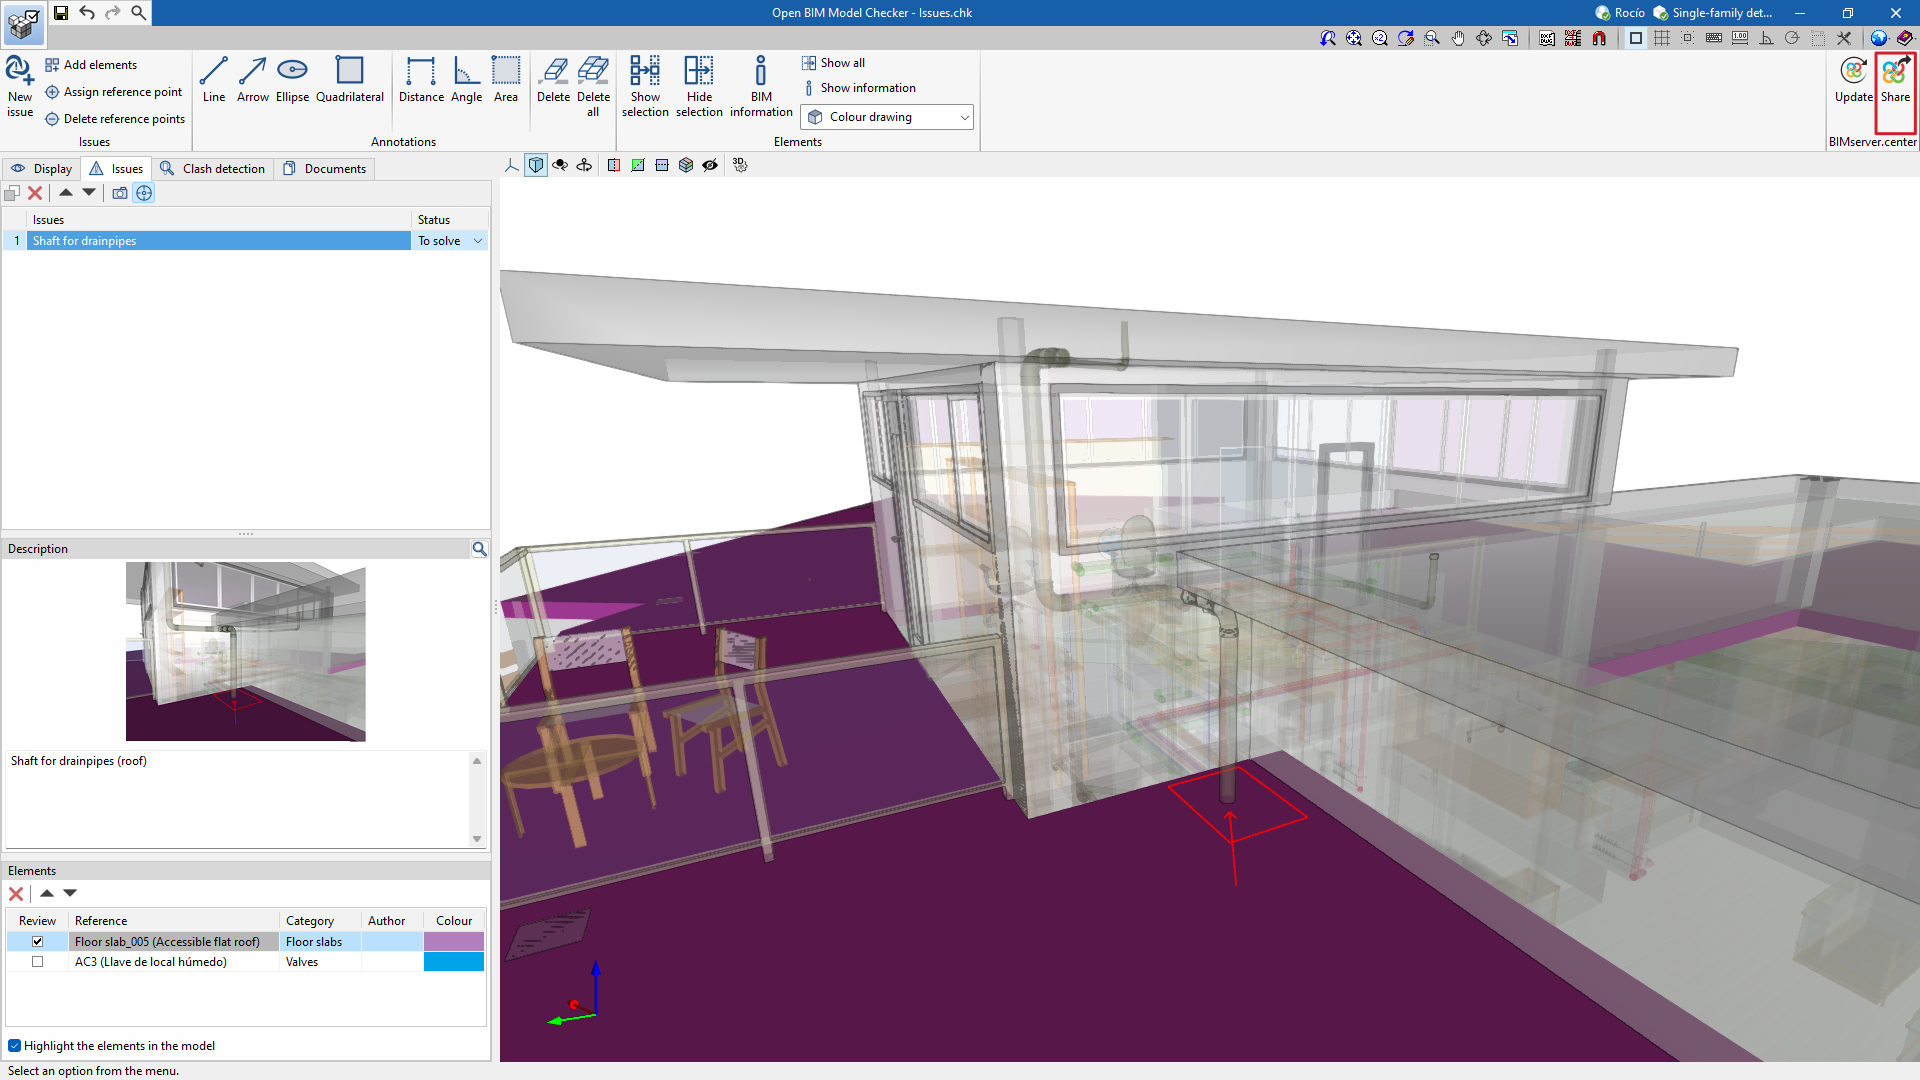
Managing the "Issues" tab
The main feature of Open BIM Model Checker is creating issues. These issues allow users to share design suggestions, detect clashes between elements and flag errors in the model with the rest of the project team.
This tab is made up of three groups that contain:
- A list of issues;
- Their description;
- The elements of the active issue in the list.
It also has a small toolbar that allows users to work with the issues that have been created. Users can do the following:
- Copy the selected element and add it to the list;
- Delete a selected element from the list;
- Move the selected element up or down one place in the list;
- Snap to the initial view;
- View the issue from the defined point.
Furthermore, issues can be displayed from the "Show/Hide issue" button within the different specialised programs for correcting each issue. This allows them to be identified in the model so that they can be solved later on.
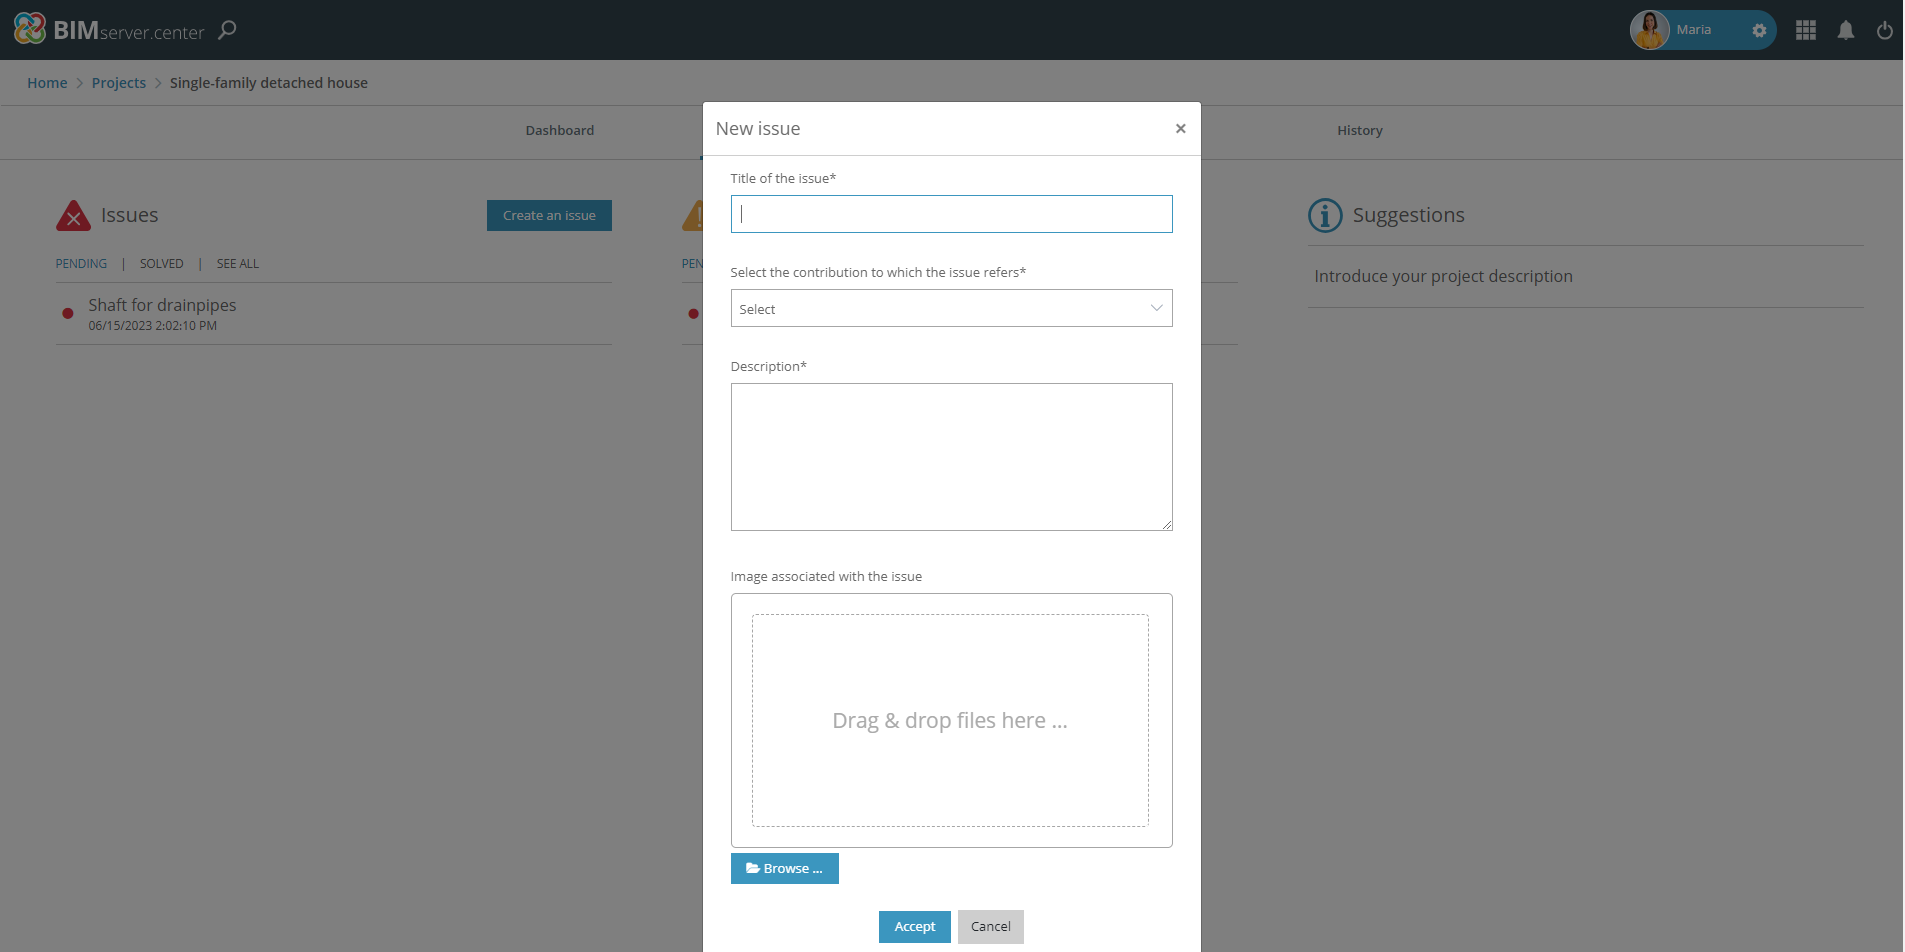
New issue
Open BIM Model Checker allows users to mark and record issues detected in the model using the "New issue" command in the toolbar.
To do this, an issue is created manually from "New issue", and, in the pop-up window, a title and description are assigned. Then, the elements involved in the issue are pointed out and a screenshot will be automatically generated with the position of the camera in the user interface.
To assign the issue to someone in the project, the issue must be assigned to one of the elements created by that person in the bottom issue box.
Once the new issue has been accepted, it will appear in the list of issues. This list can be browsed (along with its image and description), sorted, edited and deleted for each of the issues that have been created.
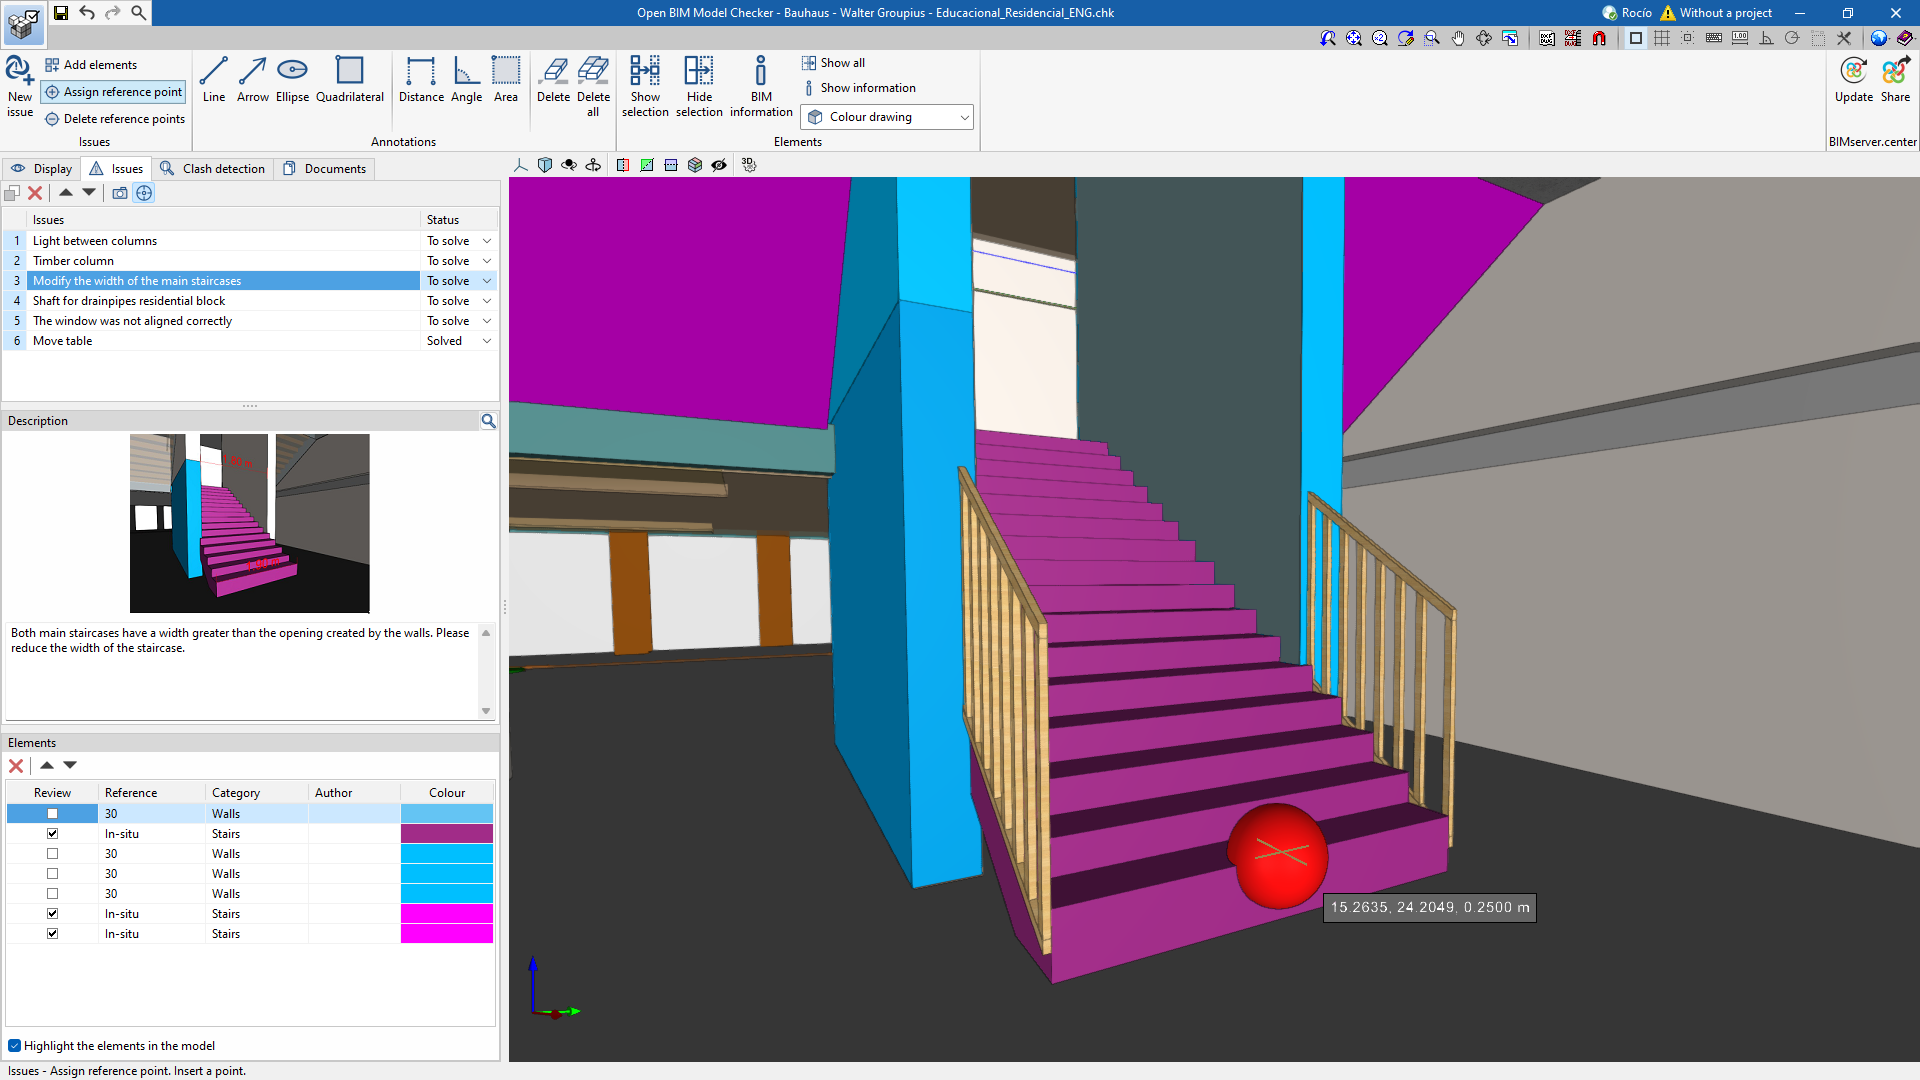
Issue reference point
Each of the issues that are created can be associated with a "reference point", a small red sphere that is placed on the 3D model.
If a reference point is added, this issue and its information can be accessed from the 3D model of the project in the BIMserver.center platform and from the 3D view of the programs involved in the issue.
Annotations
Open BIM Model Checker also offers annotation tools that allow users to draw directly on the 3D model.
Lines, arrows, ellipses or squares can be marked on the surfaces of the model and, also, thanks to the snap system, users can make annotations of distances, angles and surface measurements.
Furthermore, the desired text colour and height can be chosen for each annotation.

Managing the "Clash detection" tab
Open BIM Model Checker can automatically detect clashes between models from different disciplines. For example, the program makes it possible to detect clashes between facility systems and the structure, identifying possible layout errors in elements of these disciplines, such as the intersection of a plumbing pipe and a column.
Although Open BIM Model Checker is a free tool, clash detection requires the "Clash detection" permission in the user license.
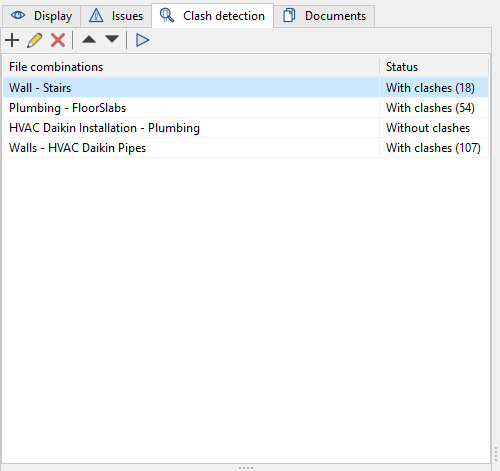
From the "Clash detection" tab, different combinations of files can be generated for analysis. It also has a toolbar that allows users to do the following:
- Create a new combination of files to generate a clash;
- Delete a combination of files;
- Edit a combination of files;
- Move a combination of files up;
- Move a combination of files down;
- Detect clashes.
Once the clashes have been analysed, a detailed examination is carried out in the 3D interface and the following tools are used to work with the clashes:
- Remove clash from the list;
- Centre the view on the elements involved in the clash;
- Show only the elements involved in the clash;
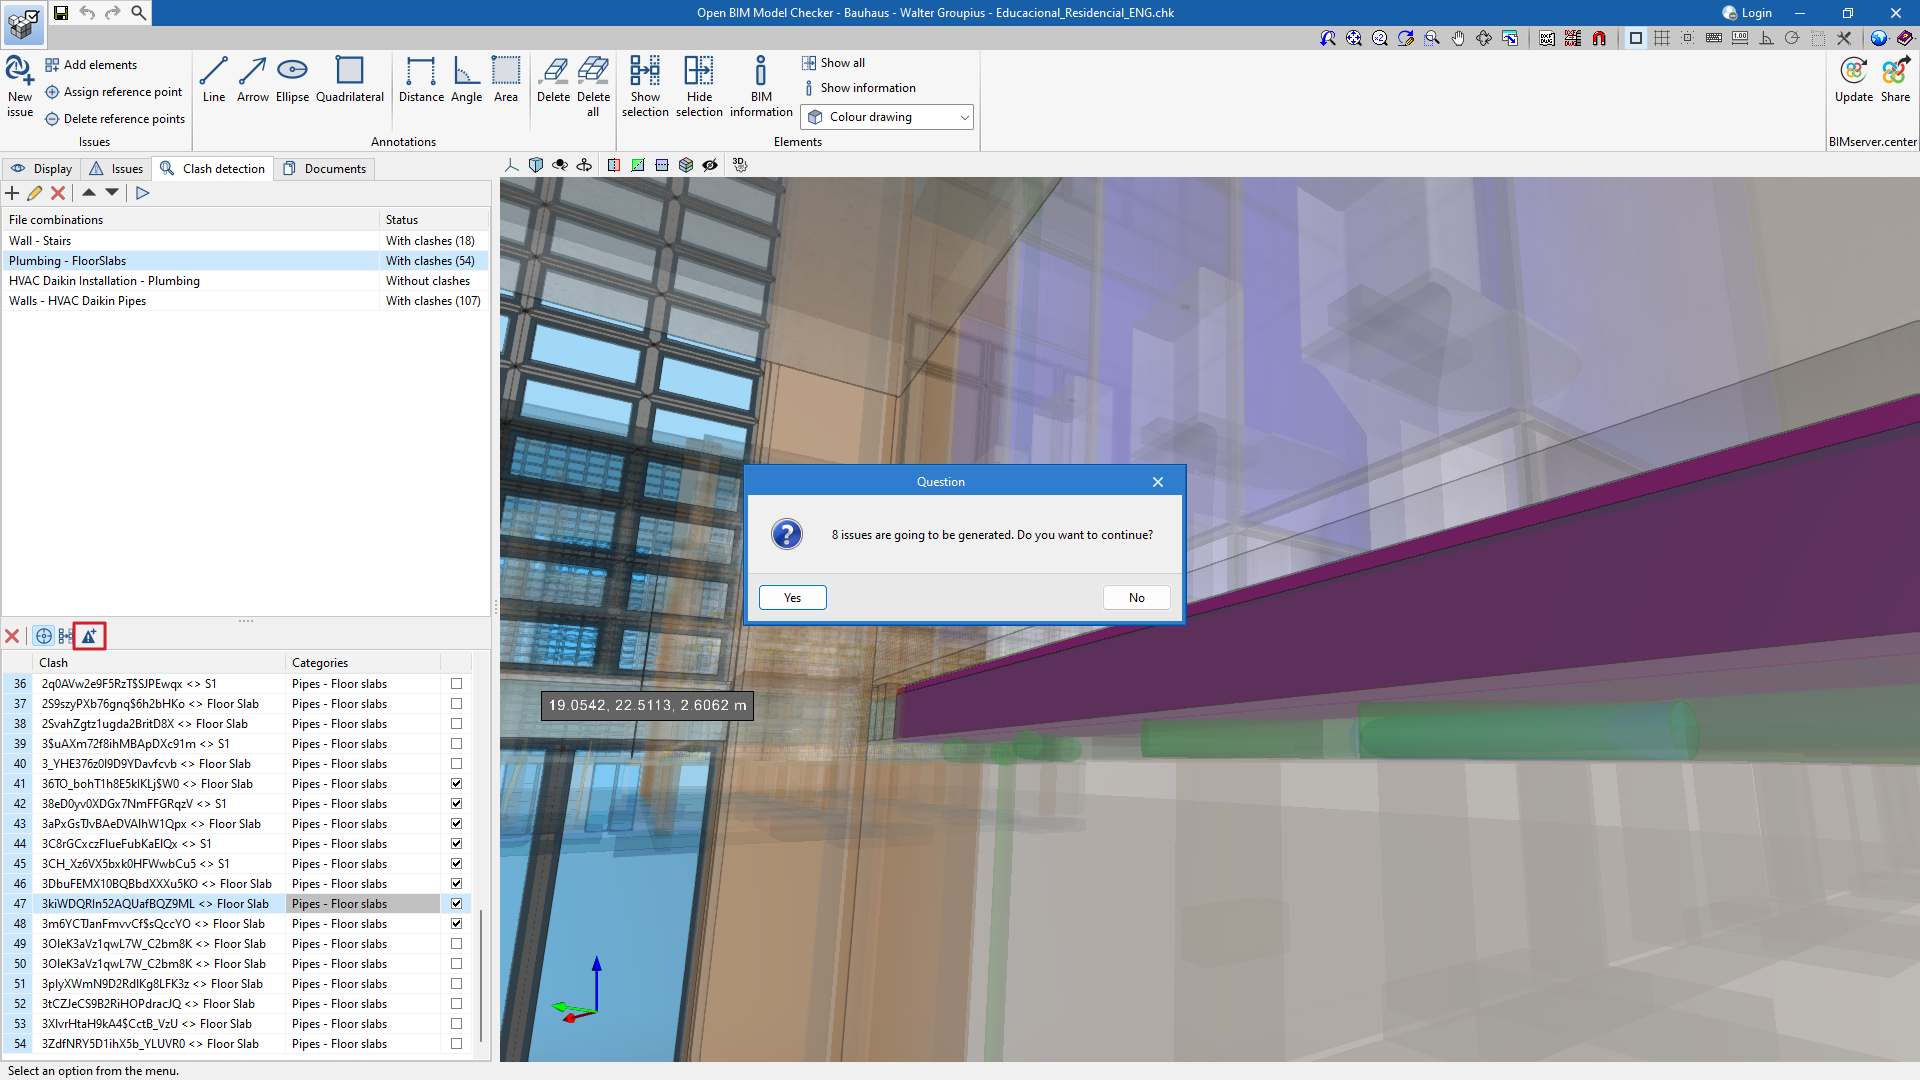
- Generate multiple issues.
Generating clashes from a combination of files
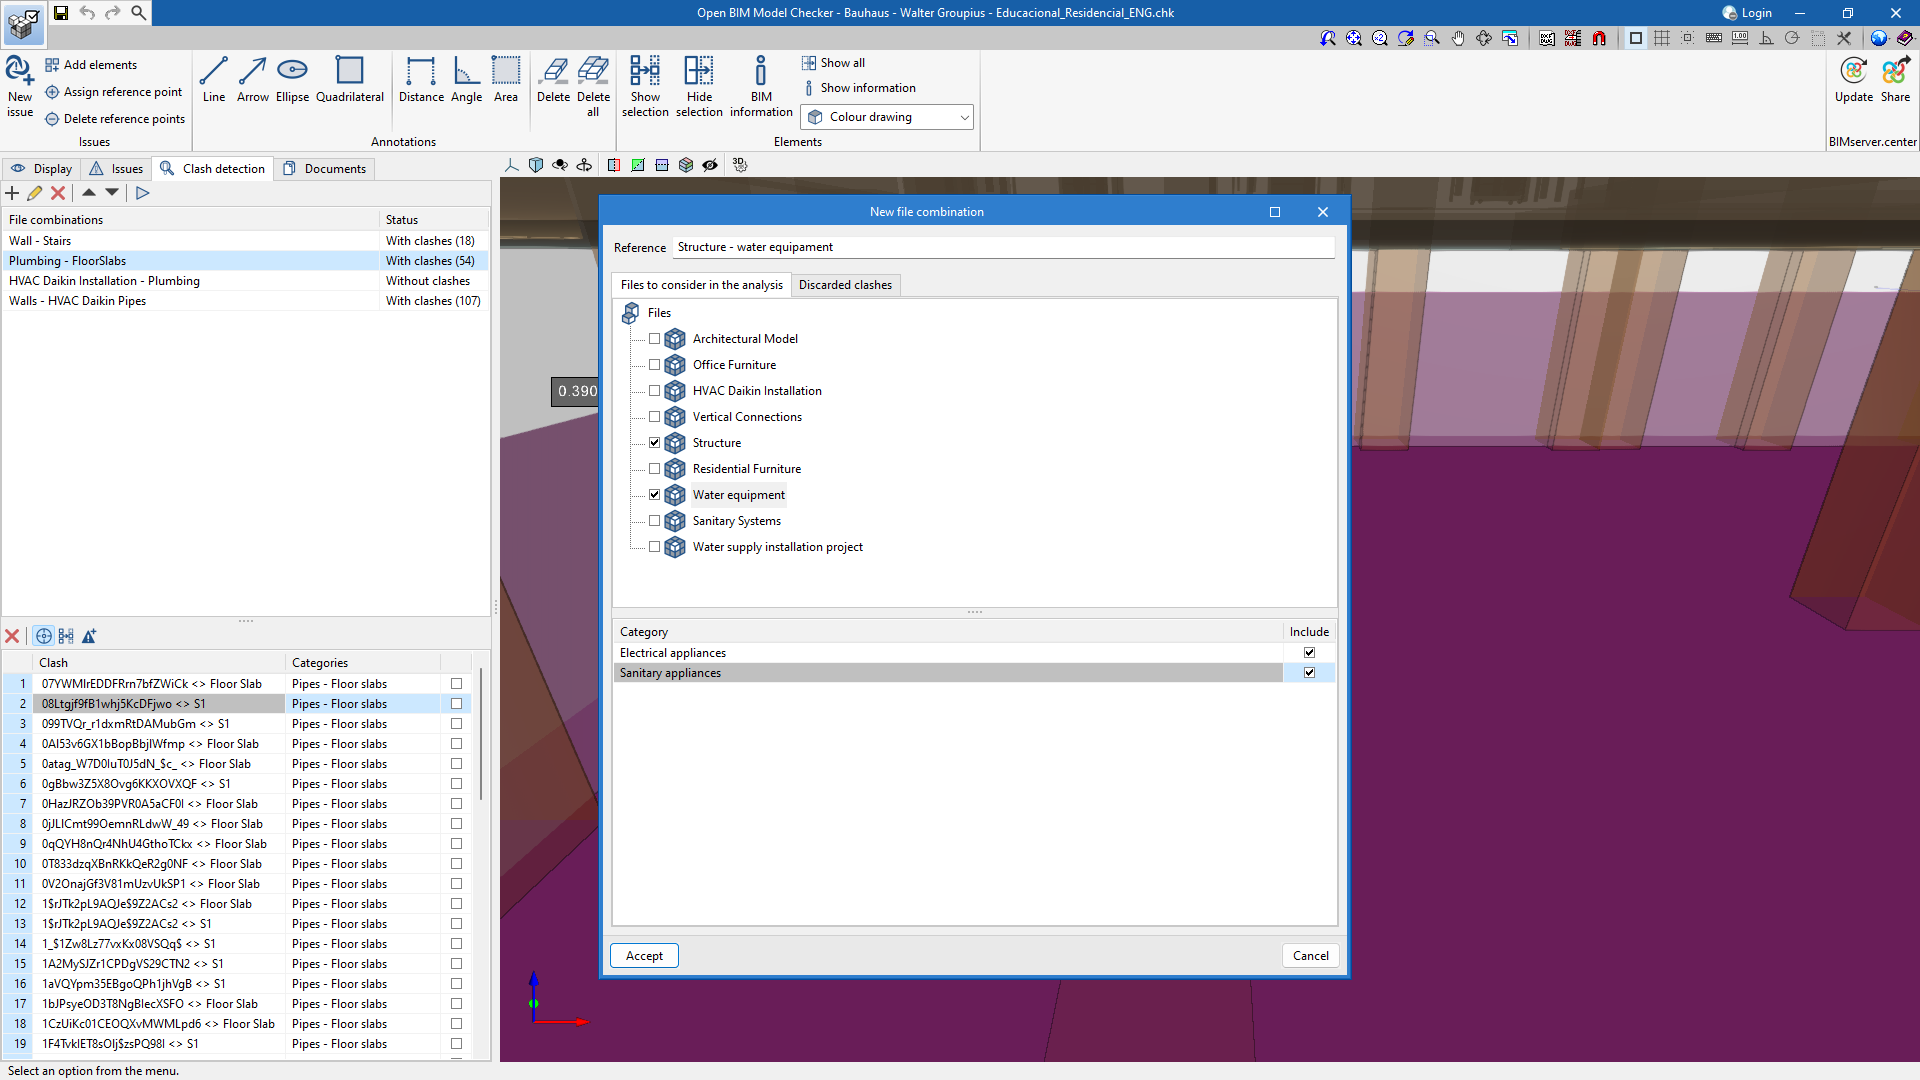
From the "Clash detection" tab, different combinations of files can be created to find possible clashes causing issues that need to be resolved.
When creating a new combination, from the "Add" option, users select the files and categories to be included in the clash detection analysis, such as structure and plumbing, for example. Within these files, the program offers the option to choose the elements to be analysed. For instance, in the structure file, users can select only the columns that clash with the pipes in the plumbing file.
The combination created is accepted and added to the list of file combinations. The "Detect clashes" option is used to detect clashes in these combinations. A list of all automatically found clashes will then be displayed.
Creating incidents from generated clashes
Once the clash detection process is finished, all clashes resulting from the combination of files will be displayed in a list. Each of them can be inspected by scrolling through the list and selecting only those of interest to create an issue.
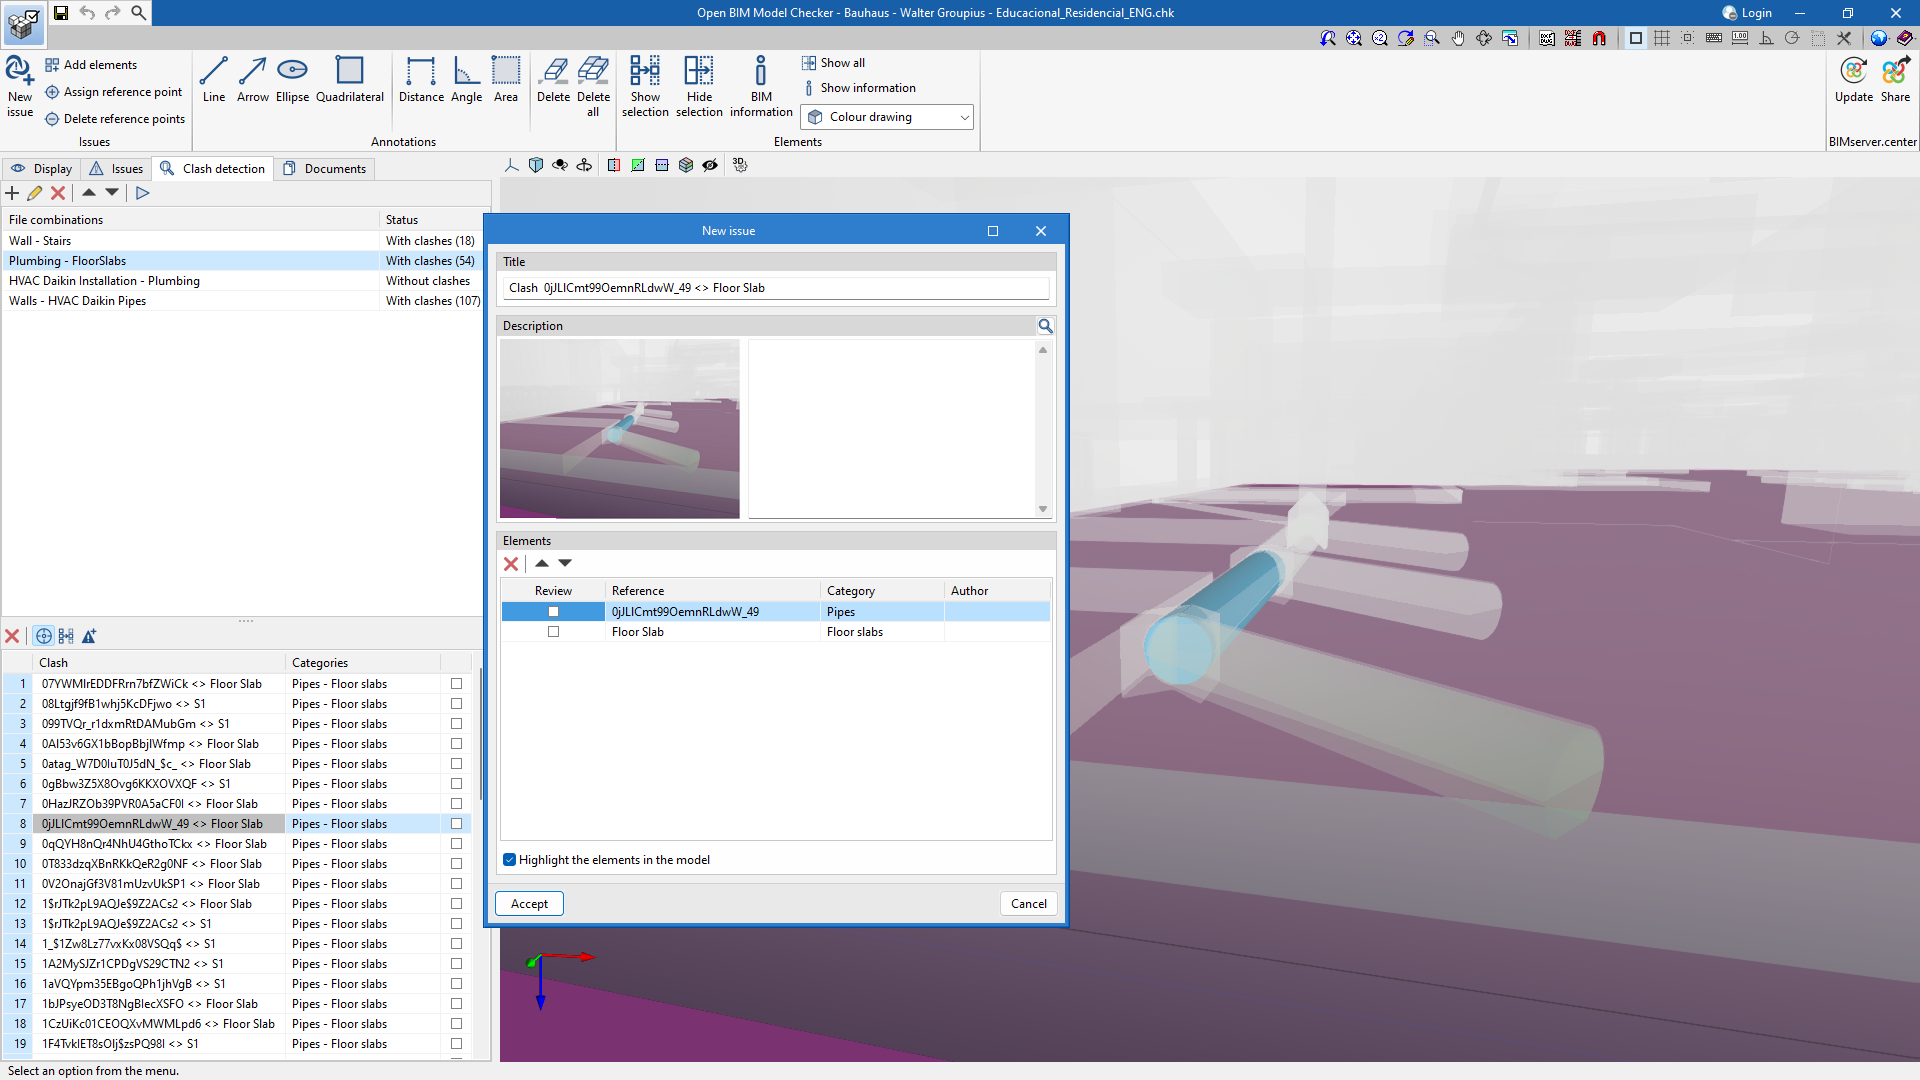
Clash issue
An issue can be created by double-clicking on a clash in the list. This creates an issue which, similar to the "New issue" option, includes a view snap and allows a title and description to be assigned when it is created.
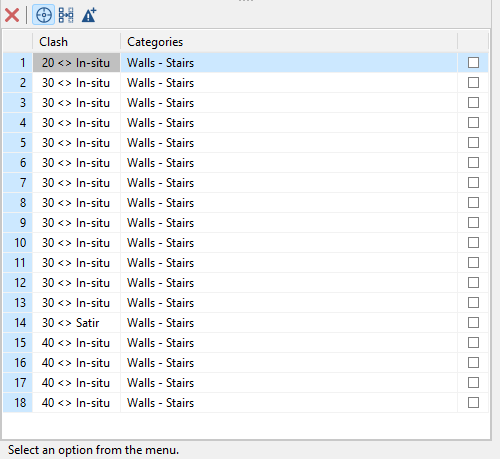
Issues in a set of clashes
Several clashes can also be selected from the list simultaneously to generate issues more quickly. Unlike the previous case, this option does not automatically snap the view, and the title assigned will be the name that appears in the list of clashes. The program offers the possibility of editing and complementing them later in the "Issues" tab.
Managing the "Documents" tab
Not all errors and issues in the job are necessarily associated with geometric errors. This is why it is important to have access not only to the geometric model but also to all the documents associated with it.
From the "Documents" tab, users can access all the information associated with the IFC files exported by each discipline to the project hosted on the BIMserver.center platform. This means greater control over all aspects of the project.
Double-clicking on the file to be consulted will open it with the program associated by default with the file type (PDF, DWG, etc.).
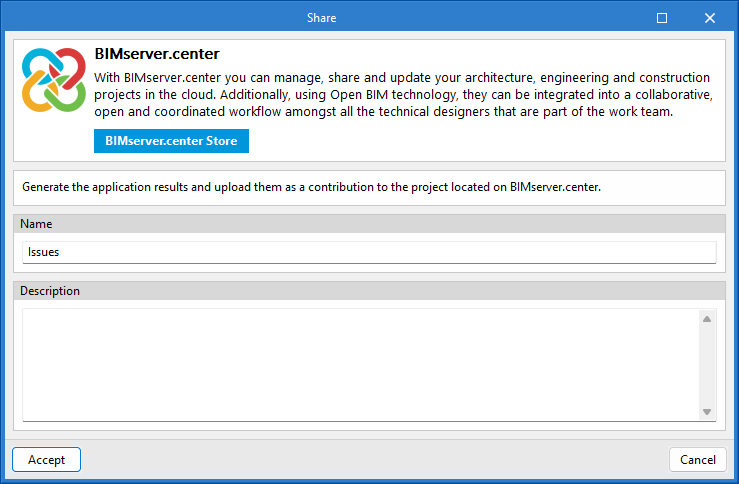
Results output
The export of the issues is carried out using the "Share" option, located in the "BIMserver.center" group.
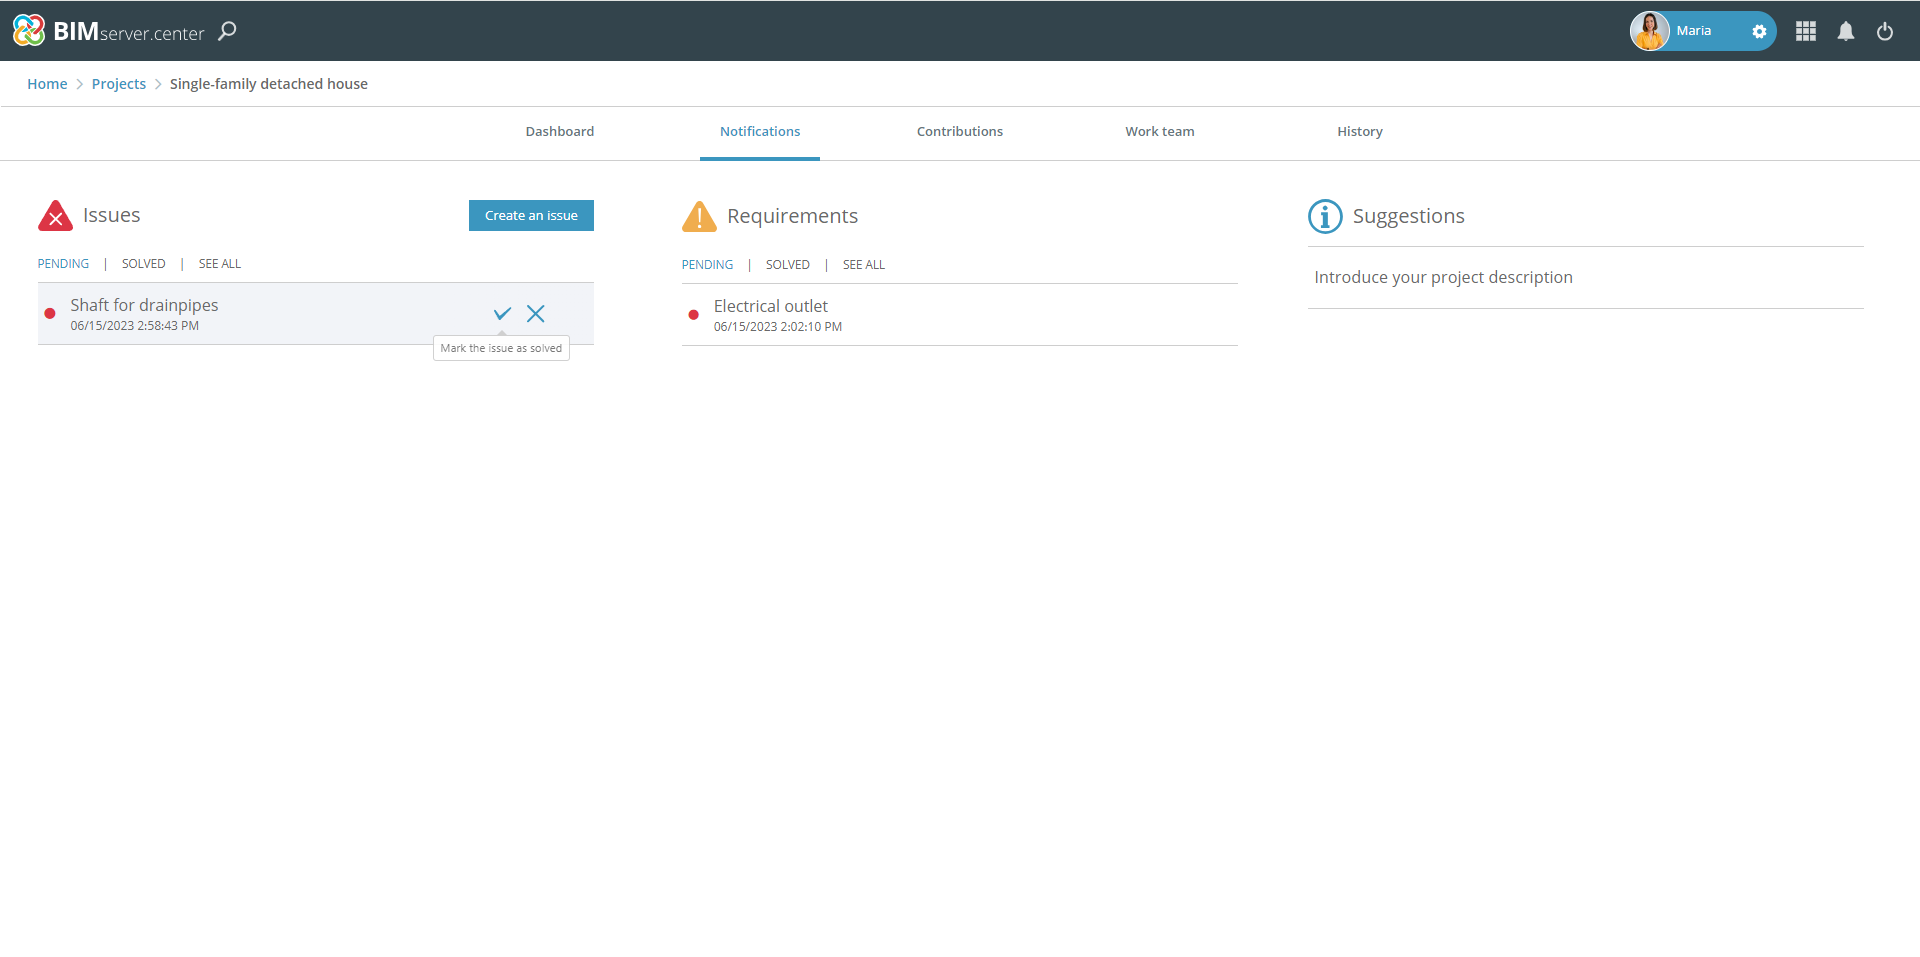
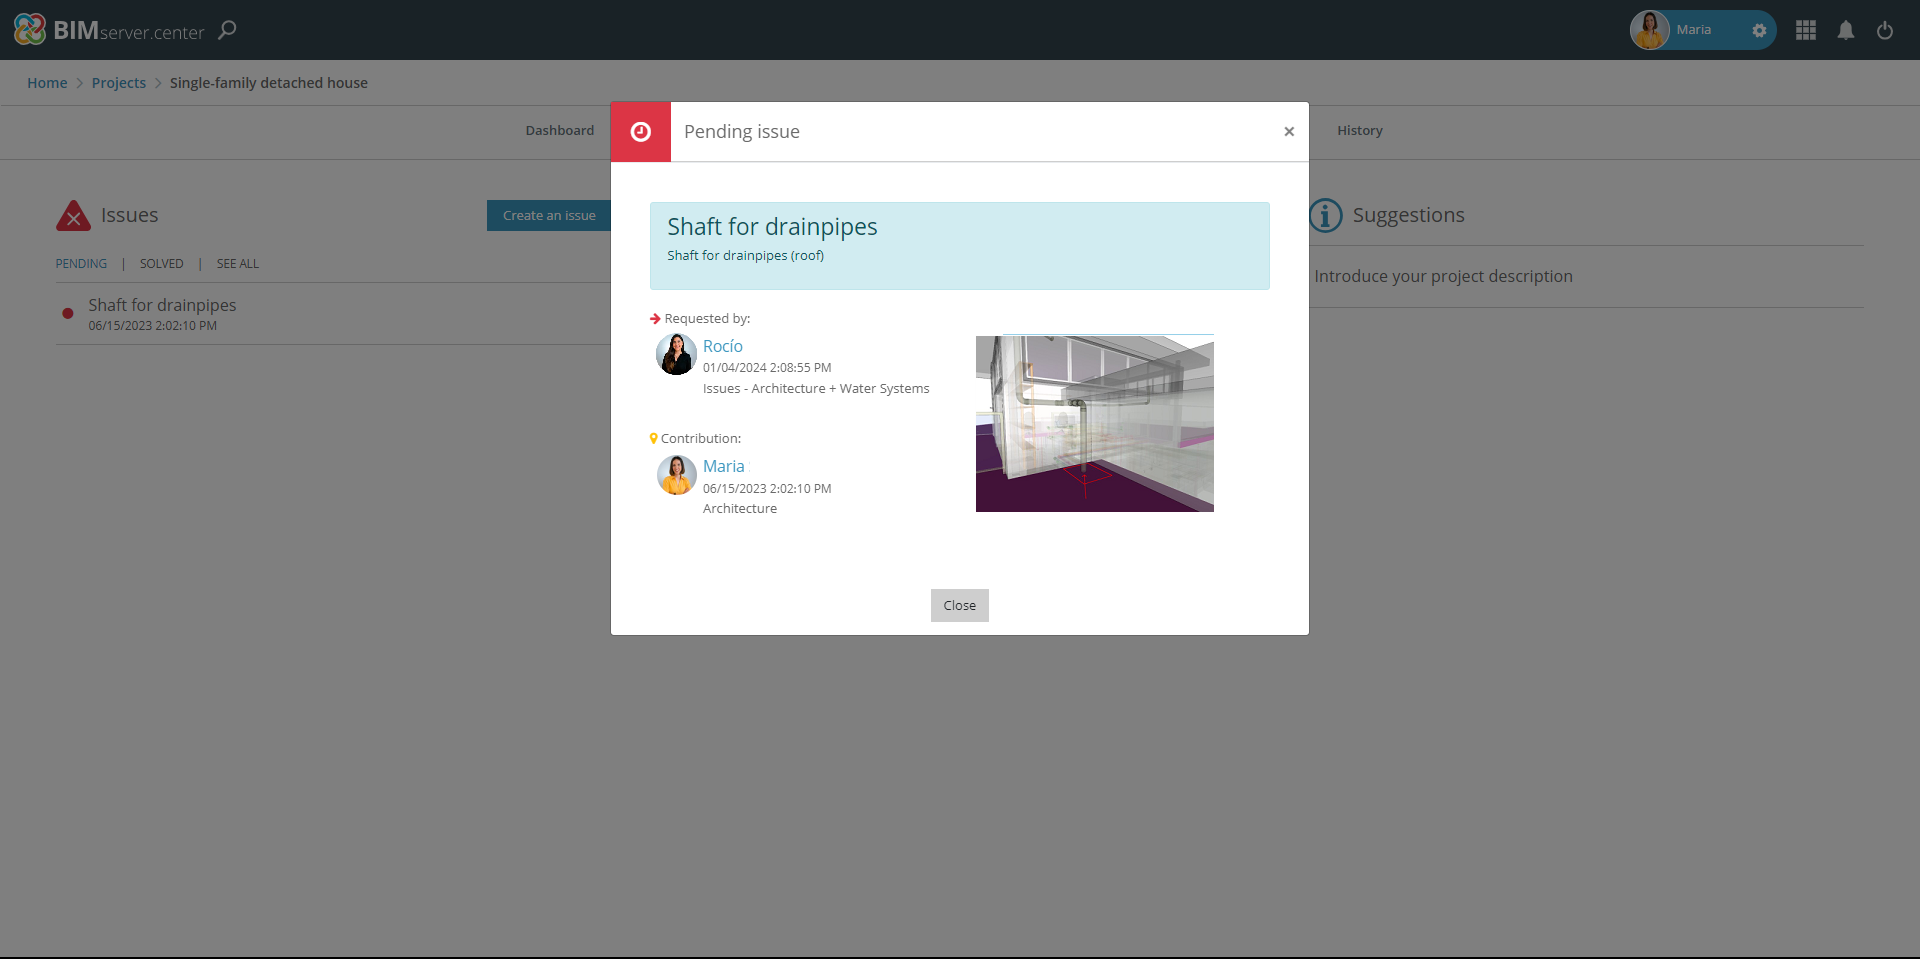
Once exported, these will be notified to each project author via their BIMserver.center profile.
Within the project, in the "Notifications" tab, all the issues are displayed. They can be filtered according to whether they are pending or resolved, or they can all be displayed.
Once an issue has been resolved by the project author, it will be marked as such.
Integration into the BIMserver.center platform
Many of CYPE's programs are connected to the BIMserver.center platform and allow collaborative work to be carried out via the exchange of files in formats based on open standards.
Please note that, to work on BIMserver.center, users can register on the platform free of charge and create a profile.
When accessing a program connected to the platform, the program connects to a project in BIMserver.center. This way, the files of the projects that have been developed collaboratively in BIMserver.center are kept up to date.

| More information: |
|---|
| For further details related to using CYPE software via the BIMserver.center platform, please click on this link. |
Options available in Open BIM Model Checker

In the top right corner of the main toolbar are the options needed to use the Open BIM Model Checker together with other BIMserver.center tools.
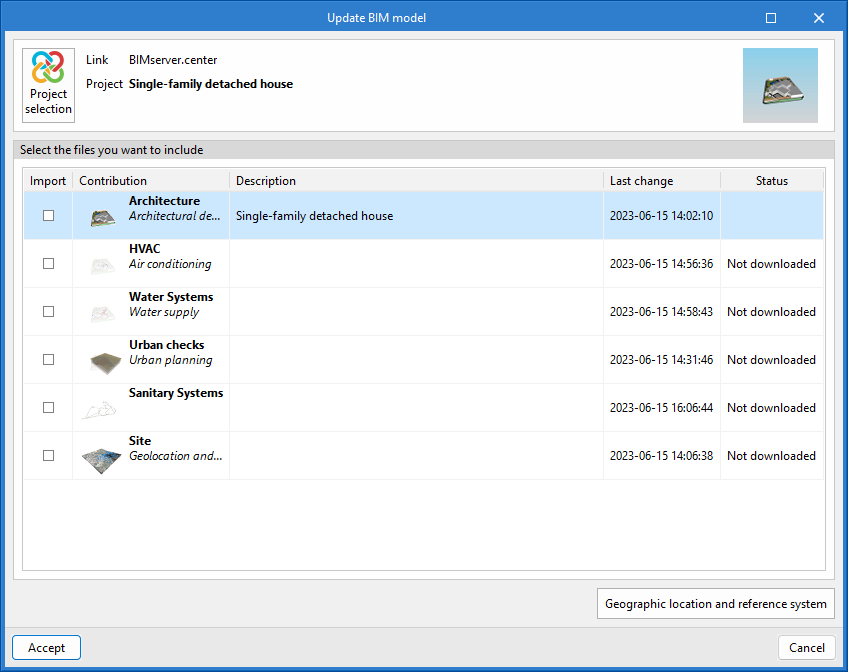
Importing and updating BIM models
The "Update" option allows users to update the information contained in the models previously imported into the project, or to import new models if desired.
In the "Update BIM model" window, the "Project selection" option can be used to select the projects to be analysed from the user's list of projects in BIMserver.center.
Using the "Geographic location and reference system" option, users can set the geographic location and the reference system of the model.
Sharing the BIM model with other users
Using the "Share" option, the information contained in the model developed in Open BIM Model Checker can be exported to the BIMserver.center platform.