Managing and creating templates
The options in the "Templates" panel, located on the top toolbar of the sheet editor, are used to create and manage templates.

A template is a set of different drawing elements, such as lines, text and images, which can be saved as a single unit and exported to and imported into other sheets within the same project or in different projects. This saves time when drawing the sheet.
There are various ways to load a template onto a sheet:
- Upload a template directly whilst creating the sheet by selecting it when using the "New sheet" option in the "Sheets" panel.
- Load a template onto an existing sheet using the "Insert" option in the "Templates" group, as described below.
| Note: |
|---|
| Among other uses, templates can be useful for creating the title block containing general project information and, by using variables (controlled via the "Replace texts" option), specific information about the sheet, such as its number or unique reference. |
The options available in this section are as follows:
Template library
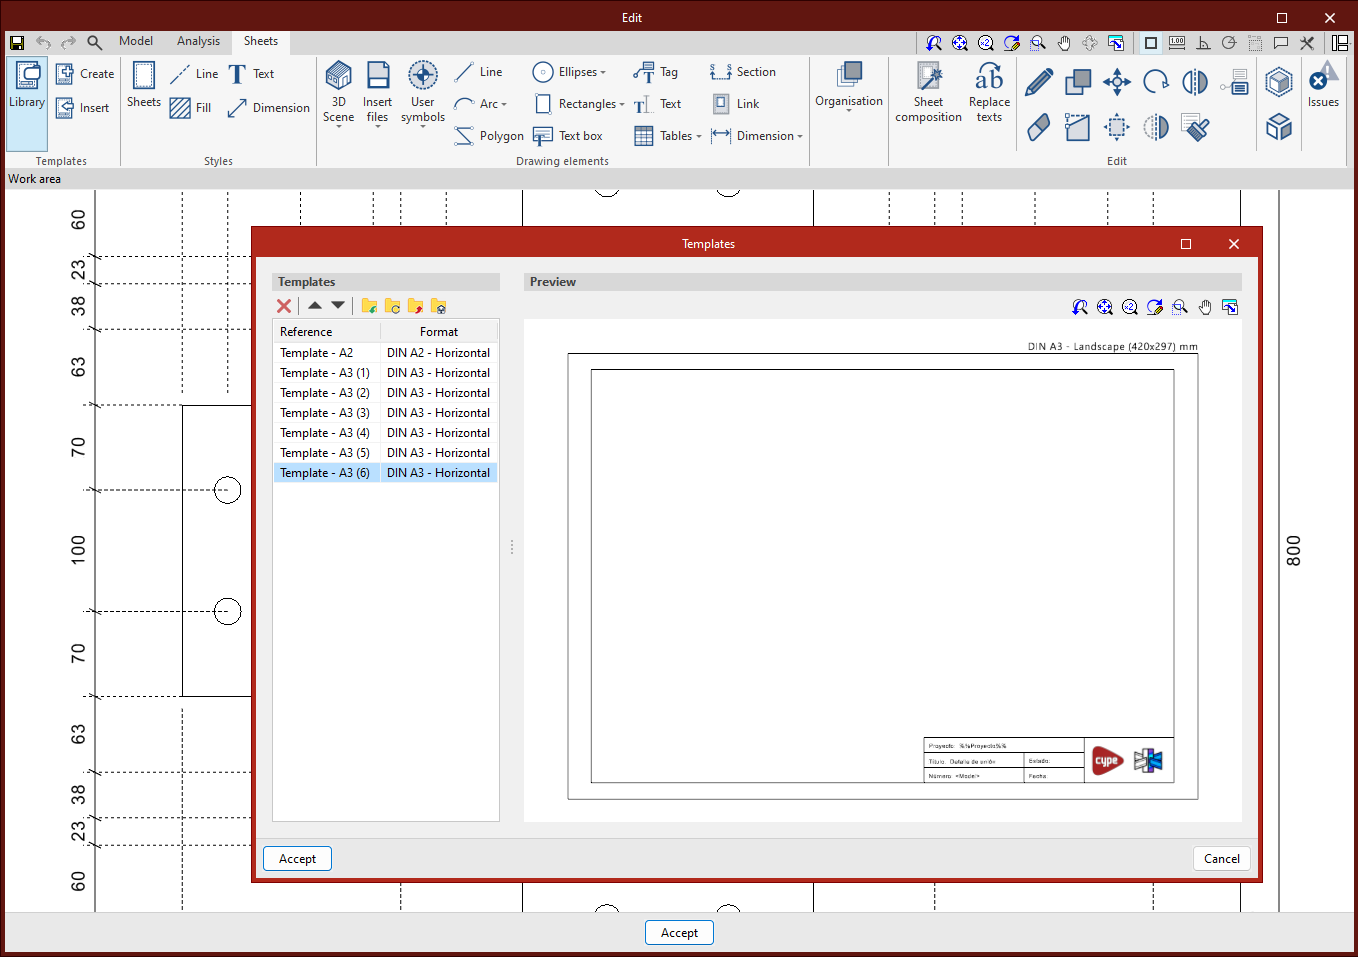
From the "Library" option, you can view and manage the templates stored in the project. These include templates created directly using the "Create" option in the same group.
On the left is a list of available "Templates", whilst on the right is a "Preview" of the selected template.
The options at the top of the list let you "Delete" and reorder templates, as well as export them to files on your hard drive and import them into other projects using the following options:
- Import the elements saved in the drive to the project
Import the templates contained in the selected .obltemplate file into the project library. - Update the elements used in the project
Update the information for the selected templates based on the information contained in the associated .obltemplate files. - Export the element to a file
Export the selected templates to an .obltemplate file on the hard drive. - File selection with initial values for the creation of a new job
Select an .obltemplate file from your hard drive. The information contained in this file will be used to automatically create the template library when creating a new project.
Create
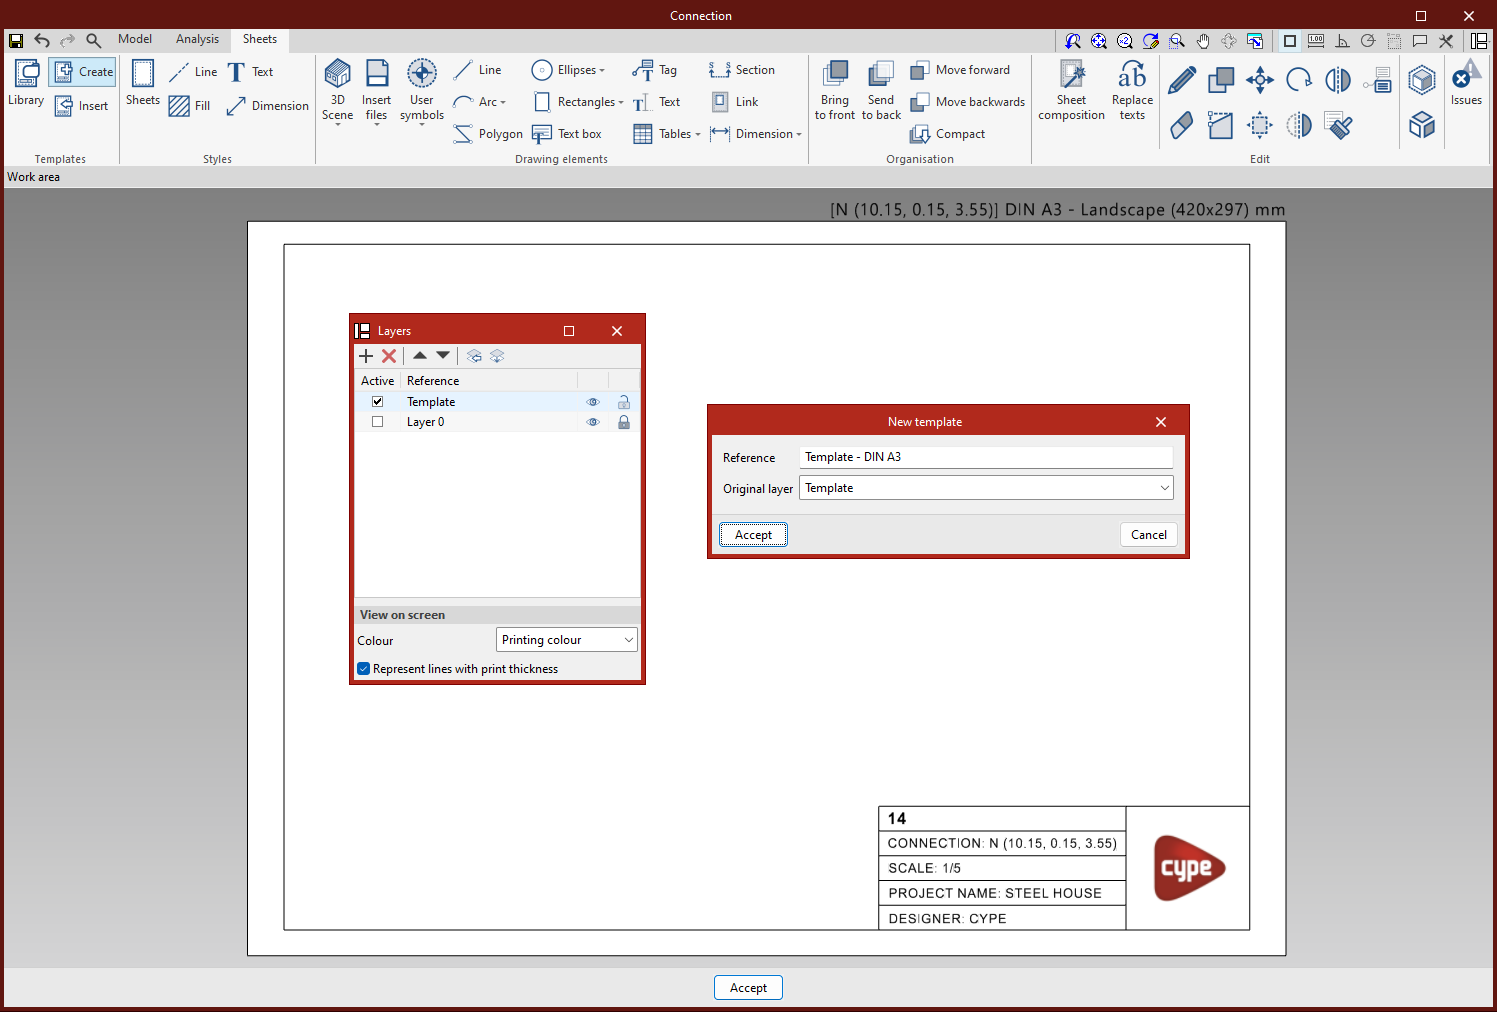
The "Create" option allows you to create templates based on the information from an existing layer in the "Layers" panel of the sidebar, as follows:
- Firstly, you need to draw the template by adding all its components (text, images, lines, etc.) one by one within the same layer. You can create this layer beforehand using the "Layers" panel on the left-hand side.
- Next, click on "Create" within the "Templates" group. Here, you must enter the "Reference" name for the template and select the "Layer" on which the template was drawn.
- When you click "Accept", the template will be saved in the template library.
Insert
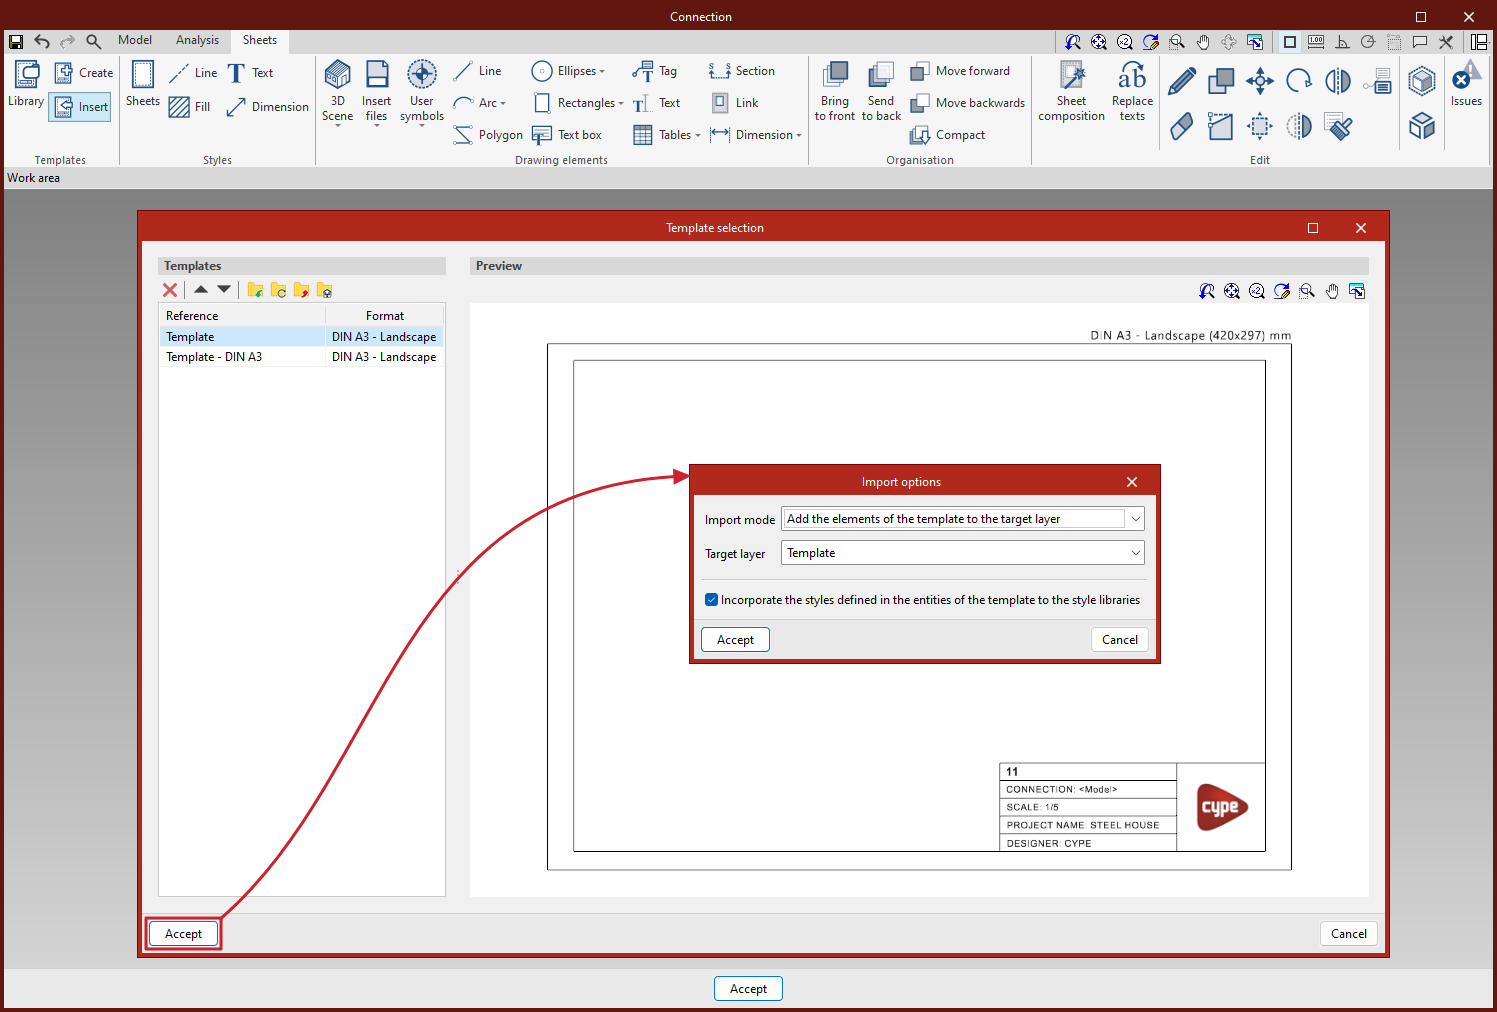
The "Insert" option allows you to load previously created templates, stored in the project’s template library, onto the sheets:
- When you click on "Insert", you must first select one of the templates from the library.
- Once you have accepted, you must specify the "Target layer" where the inserted template will be placed, and the "Import mode" (you can either "Add the template elements to the target layer" or "Empty the target layer and import the template").
By ticking the relevant box, you can "Add the styles defined in the template entities to the style libraries". - After clicking "Accept" again, the selected template will be loaded onto the specified target layer.
| Note: |
|---|
| Please note that templates are usually designed for a specific paper size, so you should insert a template that has been created for the appropriate format. |