

Assigning data to the spaces read from the IFC file
The mapping or data assignment window for the spaces read from the project’s IFC file appears during the process of creating a "New project" or when "Updating" the information for a BIMserver project. You can assign additional characteristics to the spaces imported from the BIM model, such as thermal load values or ventilation flow rates, as well as incorporate the properties required for the automatic generation of the HVAC system in CYPEHVAC.
Use cases
There are several possibilities:
- If you do not wish to carry out this mapping, you must click "Cancel" in this window. In this case, no spaces with HVAC requirements will be generated in CYPEHVAC. In this case, you can proceed by simply entering the HVAC installation and editing the parameters of the equipment it comprises directly (such as the "Required power").
- If only the geometric model file is available, this mapping can be carried out on the spaces identified within it. In this way, it is possible to estimate the heat loads and ventilation flow rates for these spaces, as well as to incorporate the spaces’ properties relating to the automatic generation of the HVAC system.
- If a file containing thermal load data is available (for example, from CYPETHERM), in addition to the geometric modelling file (such as IFC Builder), and both are imported, or a file containing all the integrated information is imported, including the geometric model and thermal loads (for example, from CYPETHERM, provided that the "3D Model" has been entered in this program), the space mapping carried out in this section can be performed solely for the purpose of defining non-imported air-conditioning requirements (such as ventilation rates) and the space properties related to the automatic generation of the air-conditioning system. The thermal load data will be read directly from the information extracted from the file, and you don't need to configure them during the mapping process.
Data editing
When creating a new project, the program will have populated a list of spaces in the allocation table based on the predefined filters.
To carry out the mapping, click on the "Edit" option to adjust the data for each entry in the table.
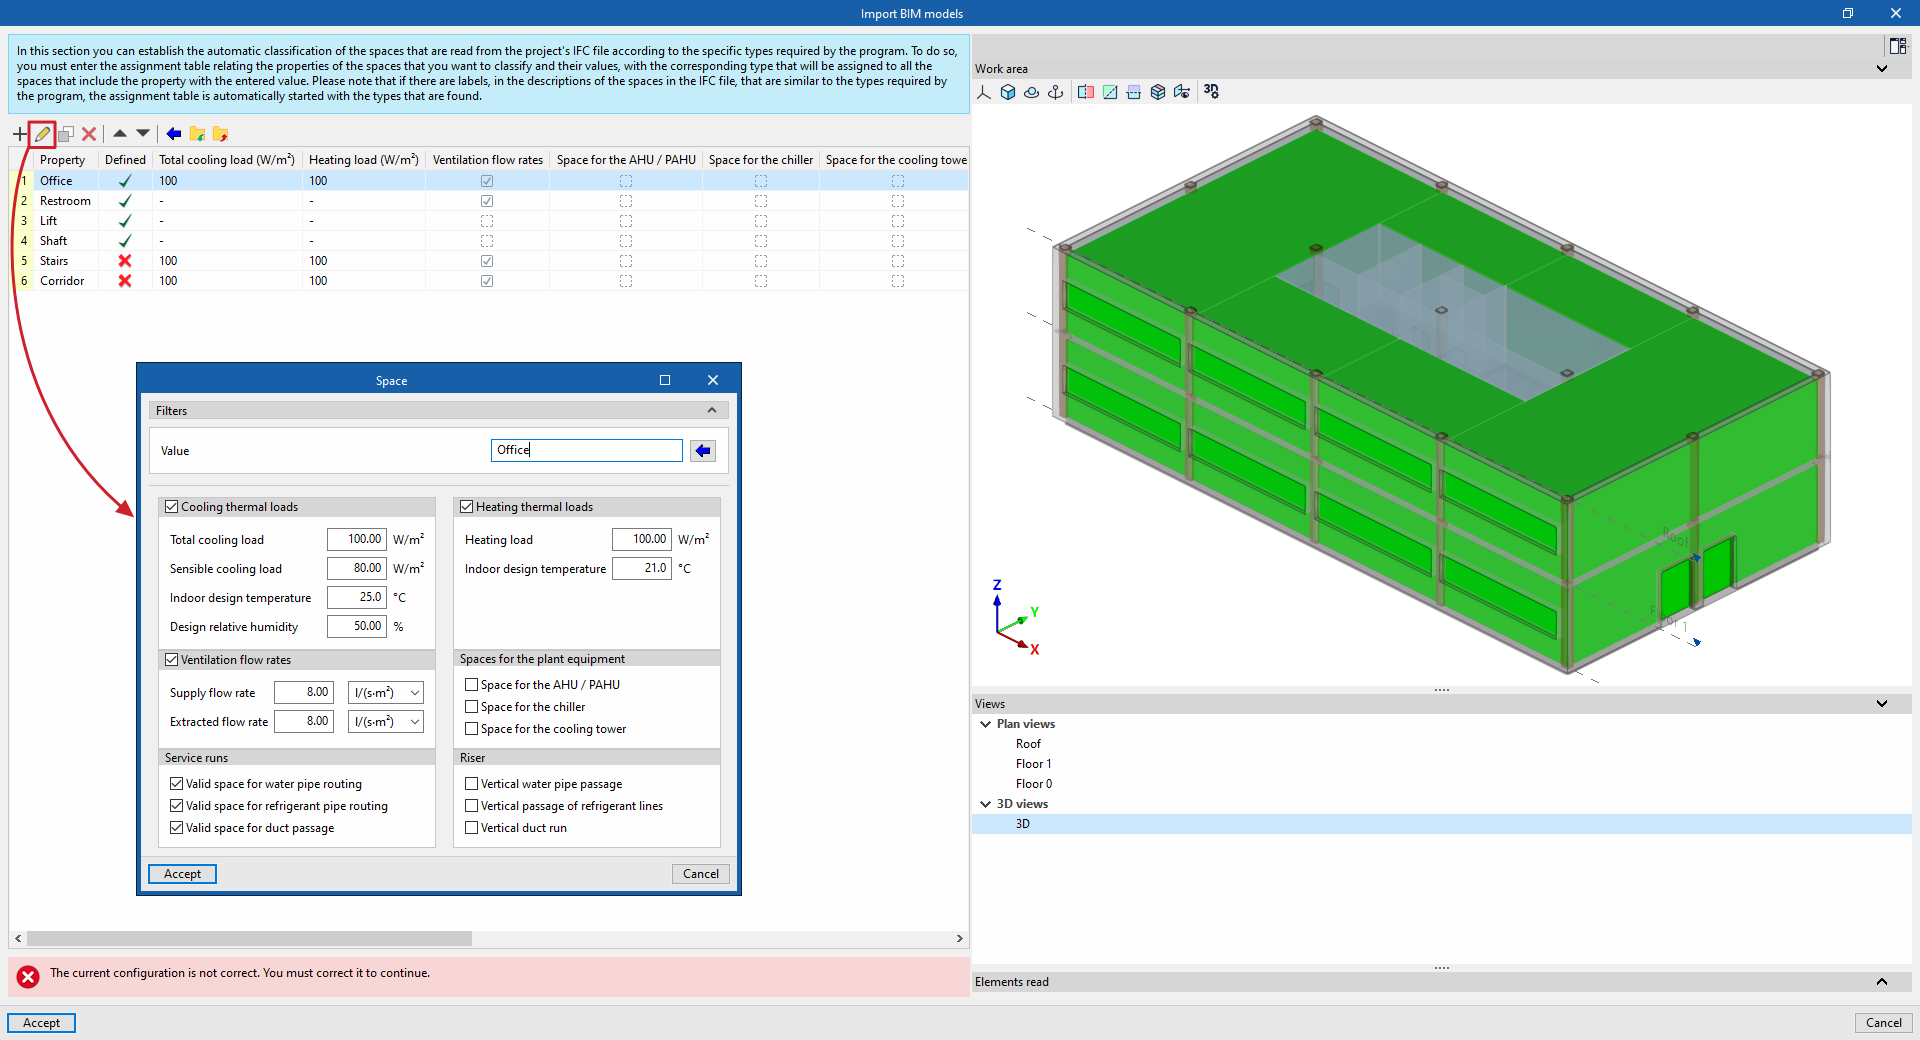
In the "Space" window that appears, under the "Filters" section, you can view or amend the "Value" of the property used for filtering. You can use the help button on the right to view the values available for this parameter in the model’s spaces and select one of them.
You can then configure the following settings:
- If "Thermal loads for cooling" is enabled, the following is displayed:
- The "Total cooling load"
- The "Required sensible cooling load"
- The "Indoor design temperature"
- The "Design relative humidity"
- If "Heating thermal loads" is enabled, the following is displayed:
- The "Total heating load"
- The "Design indoor temperature"
- If "Ventilation flow rates" is enabled, the following is displayed:
- The "Supply flow rate"
- The "Extract flow rate"
- In the "Spaces for generation equipment" section, tick the following boxes to indicate that this is:
- A "Space for the AHU / PAHU"
- A "Space for the chiller"
- A "Space for the cooling tower"
- In the "Installation routing" section, tick the following boxes to indicate that this is:
- A "Valid space for water pipe routing"
- A "Valid space for refrigerant pipe routing"
- A "Valid space for duct passage"
- In the "Vertical passage" section, tick the following boxes to indicate that this is:
- A "Vertical water pipe run"
- A "Vertical passage for refrigeration pipes"
- A "Vertical duct passage"
The information from the last three sections will be used to support the process initiated by the options in the "Automatic generation" panel, enabling the generation and routing of pipes, refrigeration lines or ducts through these spaces, or the generation of vertical passages from these spaces.
If there are entries in the table that have not yet been edited, the error message "The current configuration is not correct. You must correct it to continue." will be displayed at the bottom. If all entries have been edited and adjusted, this field will be displayed in green, indicating "All the elements have been assigned".
Updating data allocation
If the project has already been created, and the process of linking to BIMserver.center and importing the BIM model data has already been completed, you can use the "Update" option in the "BIMserver.center" section to reopen the space mapping window and add new information.
In this case, only those entries containing the information you wish to overwrite should be added to the list (for example, ventilation flow rate data for a specific type of room only). Data not included in this process, but which has been included in previous mappings, will not be modified.
To do this, there are options for adding entries to the list or allocation table. This can be done in two ways:
- Manually, using the "Add" button on the top toolbar of the list. To extract a group of areas from the model, follow these steps:
- In the "Space" window that appears when you click the "Add" button, in the "Filters" section, you must select the "Value" of the parameter used for filtering ("TypeName" or the name of the room type). You can use the help button on the right to view the available values for this parameter in the rooms within the model and select one of them.
- The room properties in CYPEHVAC are configured at the bottom of the panel, in the same way as via the "Edit" button.
- When you click "Accept", a single entry will be added to the list for the group of spaces in the BIM model that have that value for that property.
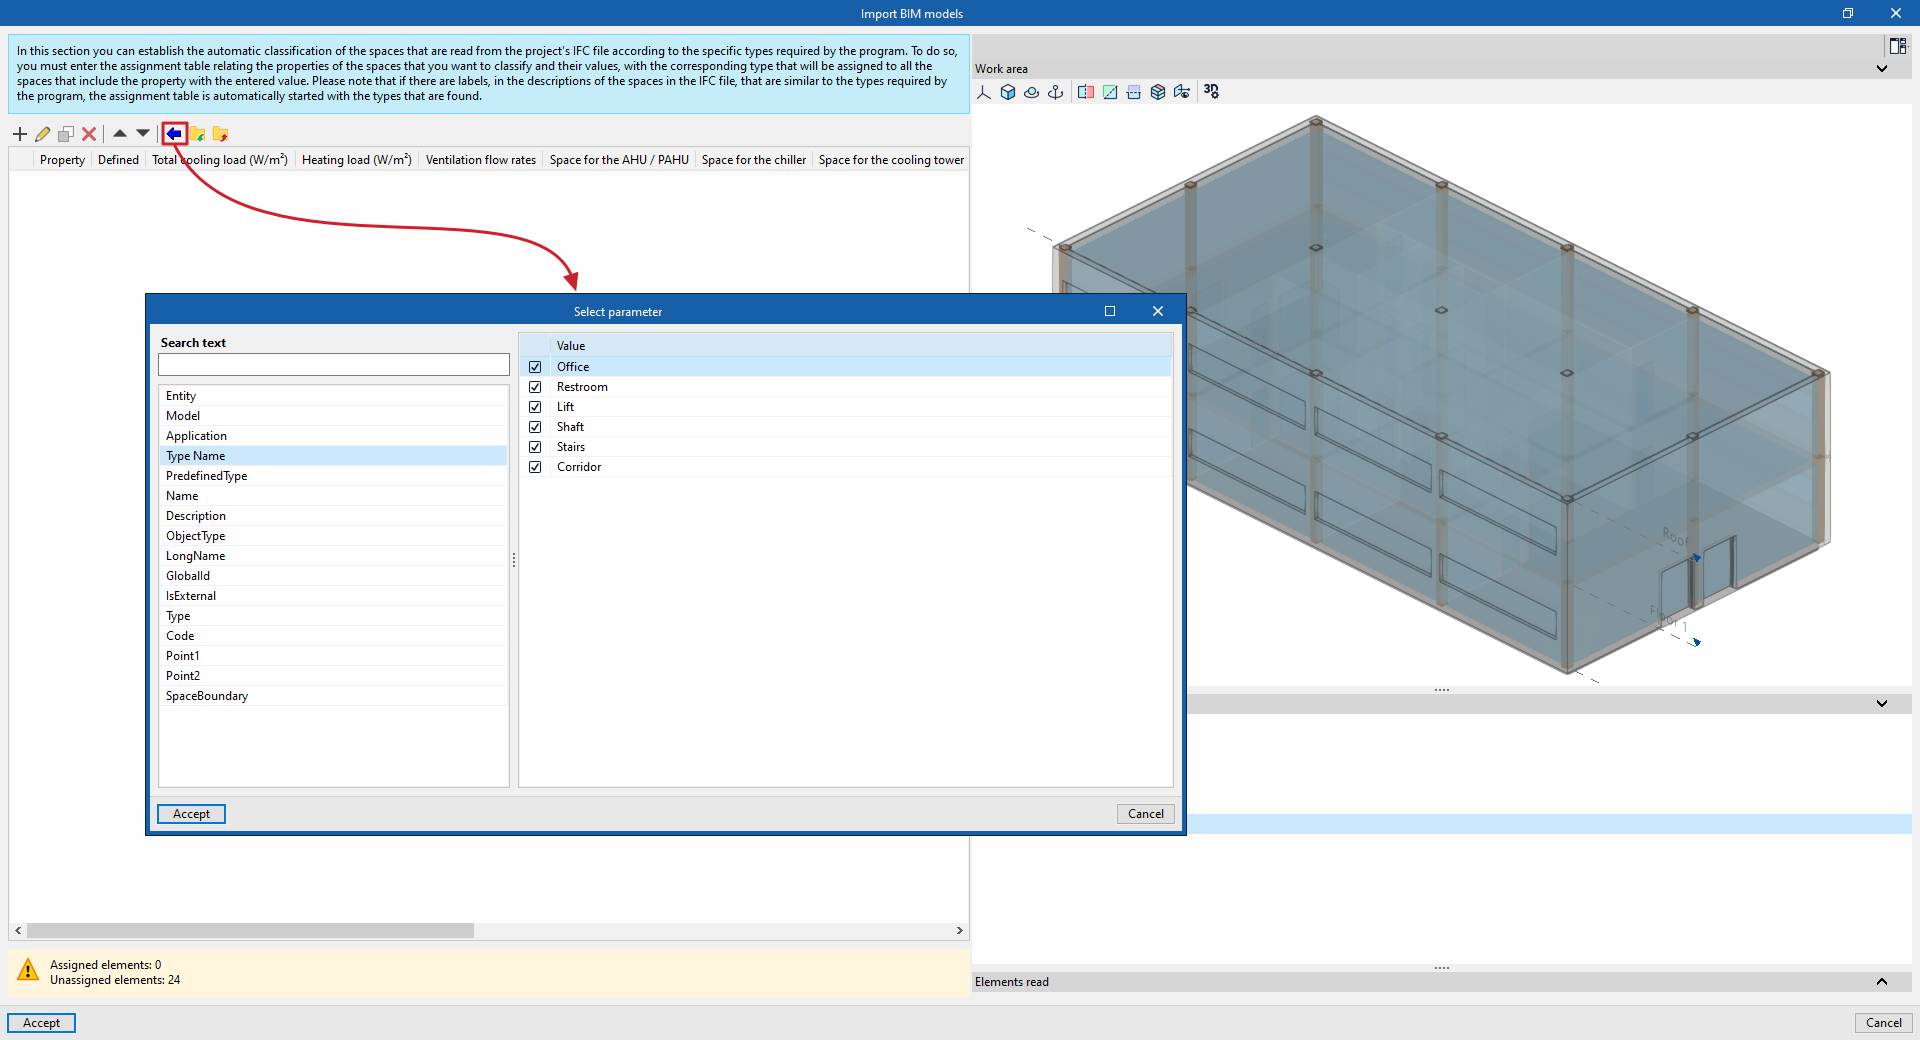
- Automatically, using the wizard (the blue arrow button on the top toolbar of the list). This lets you import all the spaces read from the IFC file in a single operation, based on the desired property. To do this:
- In the "Select parameter" window that appears when you click on the wizard, select the desired property on the left-hand side (for example, "TypeName" or the type name, or "Name", the name of the specific element).
- On the right, a list will appear showing the "Value" of the model’s areas for the selected property. Here, tick the boxes next to the elements you wish to import.
- When you click "Accept", a record will be created in the table for each group of spaces that has each selected value for that property.
- Finally, each of these entries can be "Edited" to enter the required details.