Update history​

CYPEURBAN

Changes to the applications available from the menu

The following modifications have been made to the availability of the applications from the CYPE Menu.

New:

  • CYPEHVAC Schematics

  • ELODIE by CYPE (Only in the CYPE Menu in French)

Deleted:

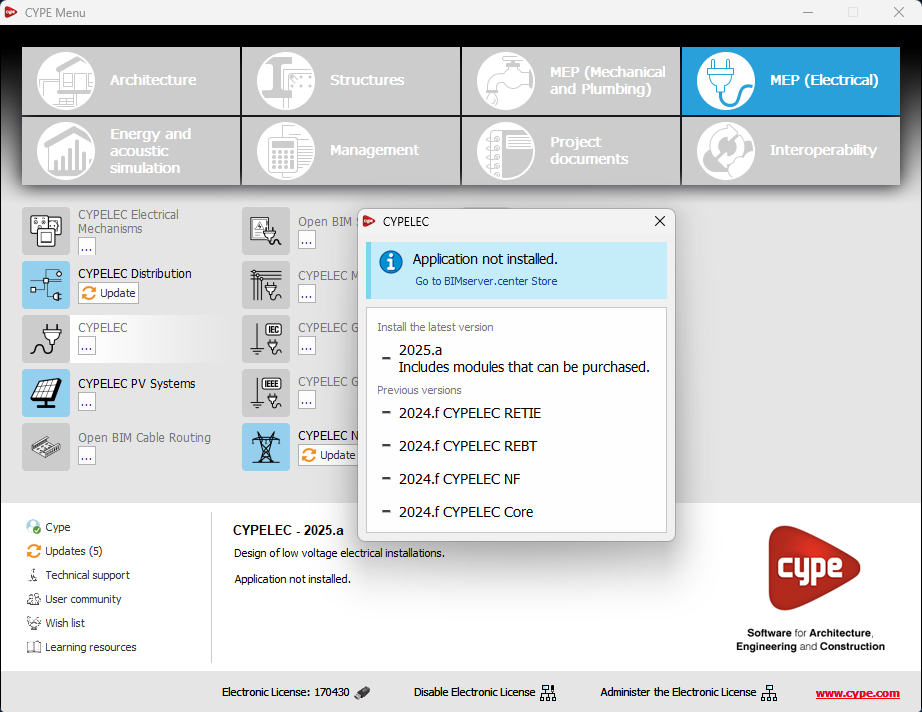
  • CYPELEC Core, CYPELEC REBT, CYPELEC NF and CYPELEC RETIE. They are joined together in a single program called CYPELEC.

  • CYPESOUND CTE, CYPESOUND NRA, CYPESOUND RRAE, CYPESOUND DRAPDE. They are integrated into CYPESOUND.

  • CYPEURBAN. Available for download and installation from the BIMserver.center platform.

  • IFC Uploader. New contributions can now be created directly from the project page on the BIMserver.center platform.

  • CYPEFIRE FDS Viewer. CYPEFIRE FDS can be used to view FDS simulations.

Space import assistant

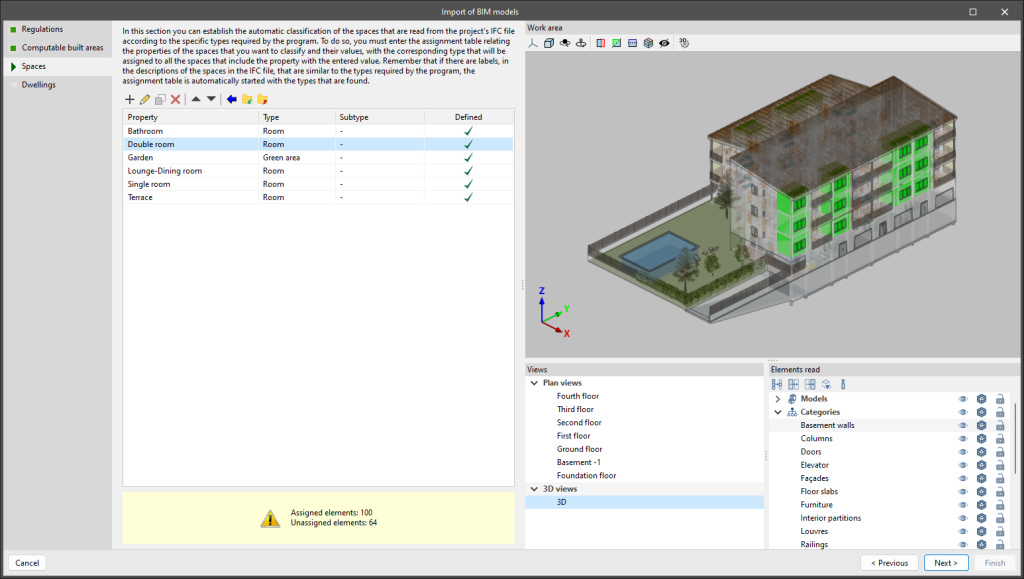
The space import assistant allows users to classify the spaces in the project's IFC file according to the specific types in each program.

If values similar to the specific types in the program are found in the space descriptions in the IFC file, the assignment table is automatically completed with the types found.

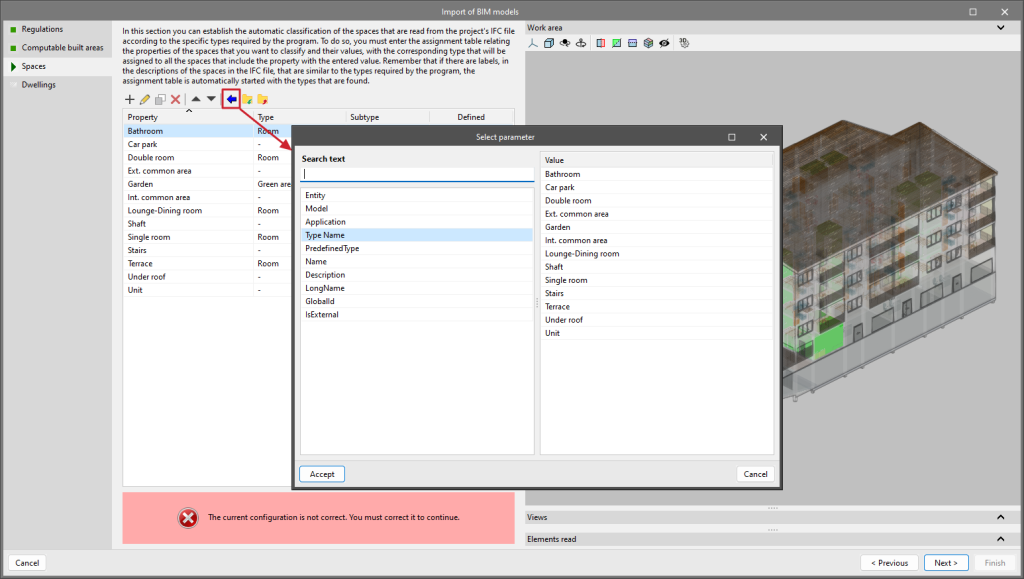
Furthermore, this assignment can be done manually through the parameters and values of the IFC. Once the values in the assignment table have been imported, a specific type from the program must be indicated for each of the values.

  • Importing spaces via an IFC parameter
    Using the blue arrow available in the toolbar, users can manually import the spaces according to the parameters available in the IFC: Name, TypeName, LongName, PSET, etc. Selecting the parameter will import all the values associated with that parameter in the mapping table.
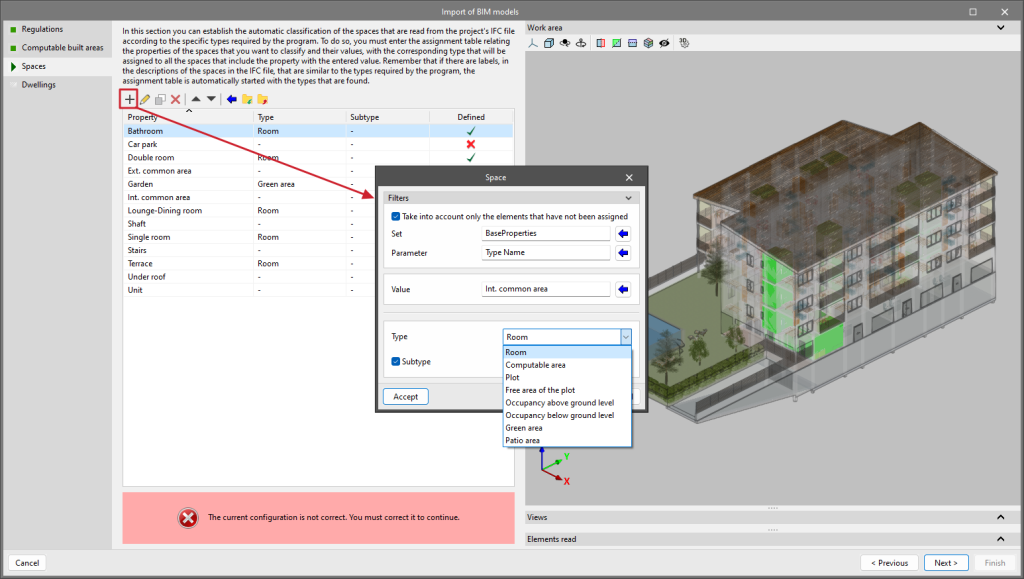
  • Importing a space via an IFC value
    Using the "+" button available on the toolbar, users can import a space individually. The process is similar to the one described above but in this case, instead of importing all parameter values, users can select a specific value to be imported.

Improved space import assistant and dwellings import assistant

In CYPEURBAN version 2025.a, the operation of these two assistants has been optimised:

Space import assistant
The improvements of this assistant are described in detail in this version's new feature Space import assistant.

Dwellings import assistant
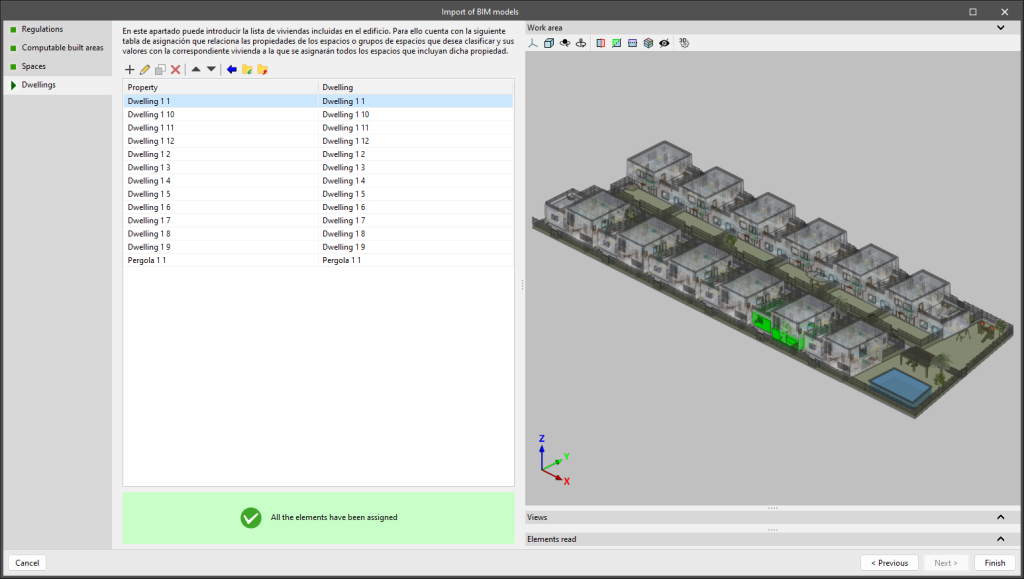
The dwellings import assistant allows users to import the dwellings defined in the IFC file of the project by means of spaces (IFCSpace) or groups of spaces (IFCGroup). This assignment is done manually through the parameters and values of the IFC.

Link to the project owner's public profile on BIMserver.center

Now, from the BIMserver.center project information window (displayed by clicking on the project name visible in the top right bar of the application), the owner's public profile page can be accessed on the BIMserver.center platform via the link inserted in the text representing the owner's name.

Improved options bar for entering elements in the work area

The following changes have been made to the options bar for entering elements in the work area:

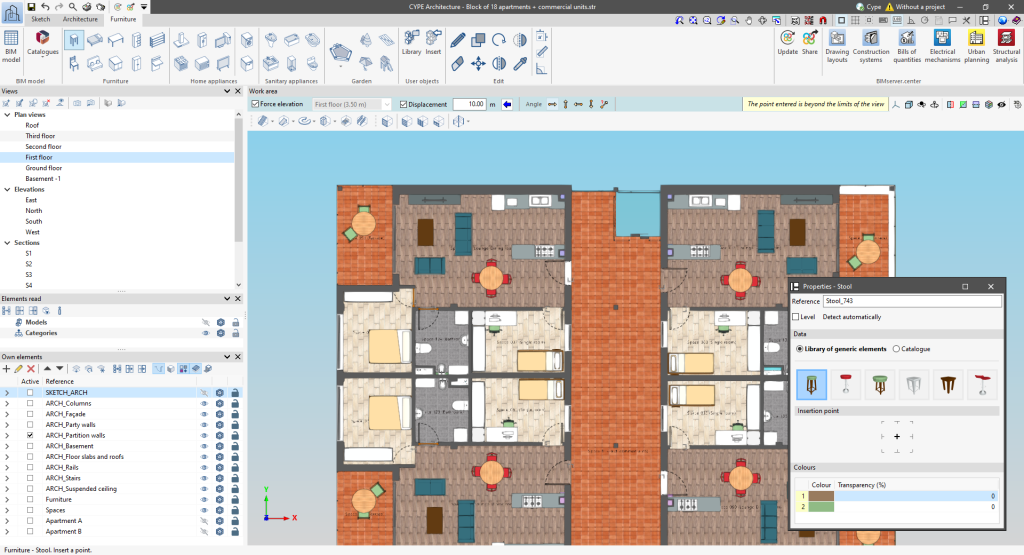
  • New “Force elevation” feature
    The "2D Mode" and "3D Mode" options have been replaced by the "Force elevation" option. When the "Force dimension" option is activated, when snapping a model component, its position will be projected onto the work plane, where the new element will be inserted.
    Alternatively, when snapping a model component, the new element will be inserted at the exact position of that component, even if it is outside the working plane.

  • Viewing limits warning
    If, when entering an element in a model view, it lies beyond the visible range, a warning is now displayed in the options bar. This warning, "The point entered is beyond the limits of the view", alerts users about the position of the element beyond the visible area on the screen, allowing for a quick and accurate correction.

Quick access toolbar

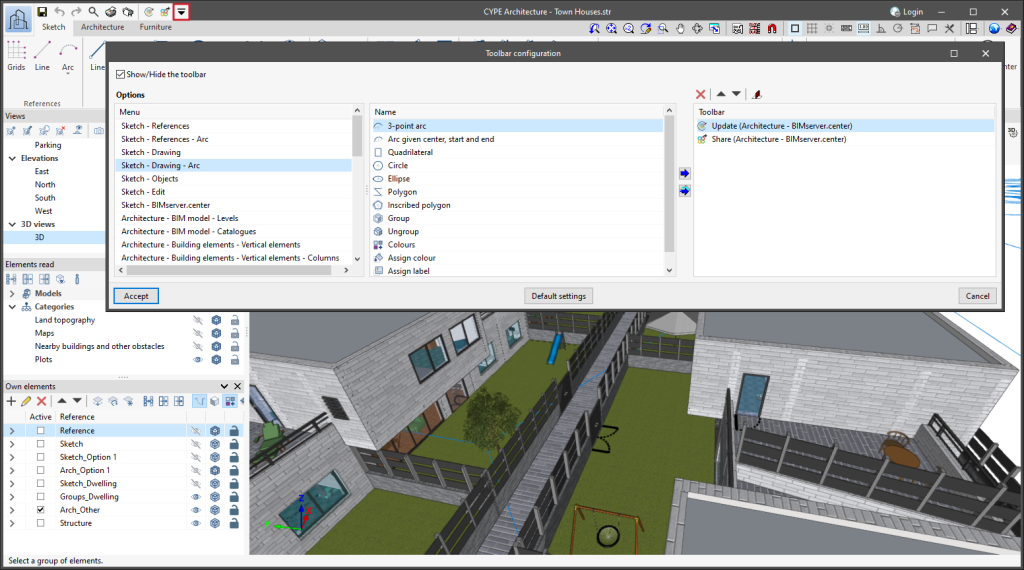
As of version 2025.a, CYPE applications with a "Ribbon" have a customisable quick access toolbar (QAT), located in the top left corner of the program. This bar contains a set of commands that are separate from the active ribbon tab.

To add or remove a command from the quick access toolbar, a button has been included to access the configuration of the toolbar. Clicking it displays a window where users can add commands from the application's menus. Specific commands can be selected or all the commands found in a menu can be added using the "Assign all" button.

The list of commands added to the quick access toolbar provides options to perform the following actions:

  • Move up (move to the left) or move down (move to the right) commands in the toolbar.
  • Add a dividing line to the right of the button.
  • Remove a command or dividing line from the toolbar.

Each application can include several commands in the initial settings of the quick access toolbar and can be restored using the "Default settings" option. Furthermore, applications that are connected to the BIMserver.center platform include the "Update" and "Share" options in their default settings.

Shortcuts for all applications

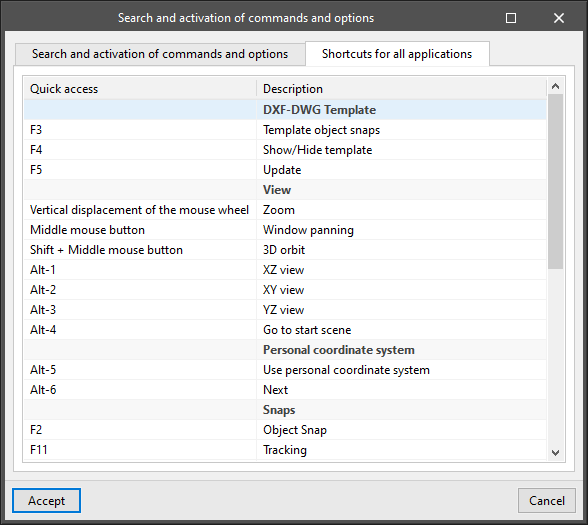
CYPE apps have keyboard shortcuts common to all programs. In versions before 2024.e, each program displayed the keyboard shortcuts for each app via the "Search and activation of commands and options" in the top left-hand corner of the programs.

As of version 2024.e, the "Shortcuts for all applications" tab has been implemented in the dialogue box displayed when selecting this option and it shows all the keyboard shortcuts common to CYPE apps.

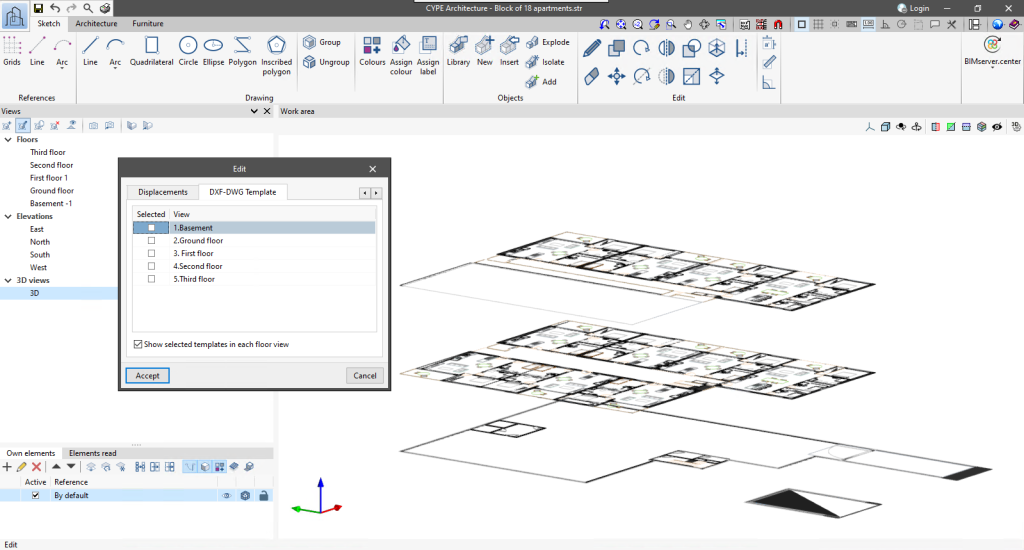
Display floor view templates in the 3D view

For 3D views defined within applications with a 3D working environment, the "Show selected templates in each floor view" option has been added. When activated, the templates visible in each of the floor views will be displayed in the 3D view in the dimension corresponding to these views.

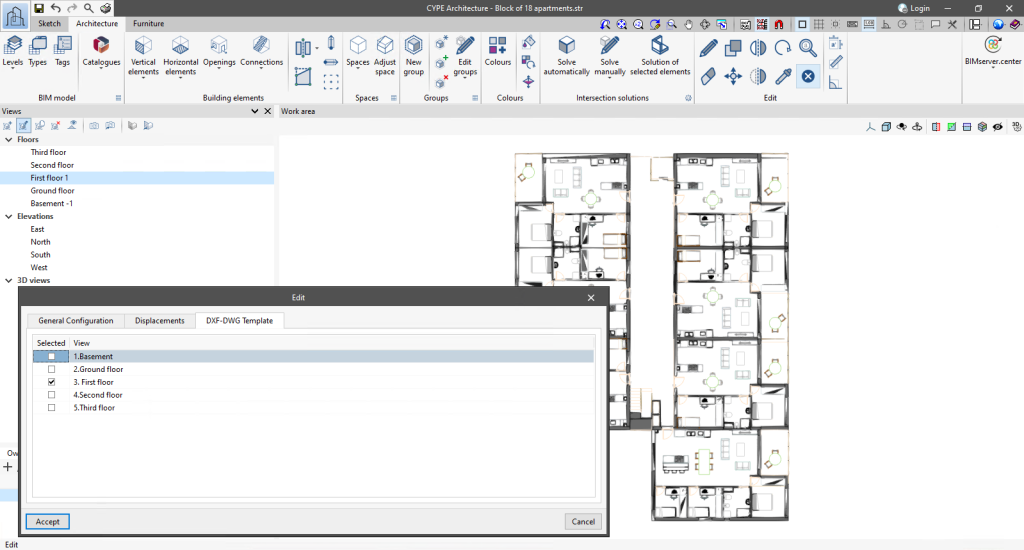
Managing the visibility of templates in the view configuration window

As of version 2024.c, applications with a 3D working environment can manage the visibility of templates from the view configuration panel. For this purpose, the "DXF-DWG templates" tab has been added, where a list of all the templates imported into the project is displayed together with a checkbox to indicate which ones should be shown in the view.

Installation modes (professional, campus, evaluation, temporary license)

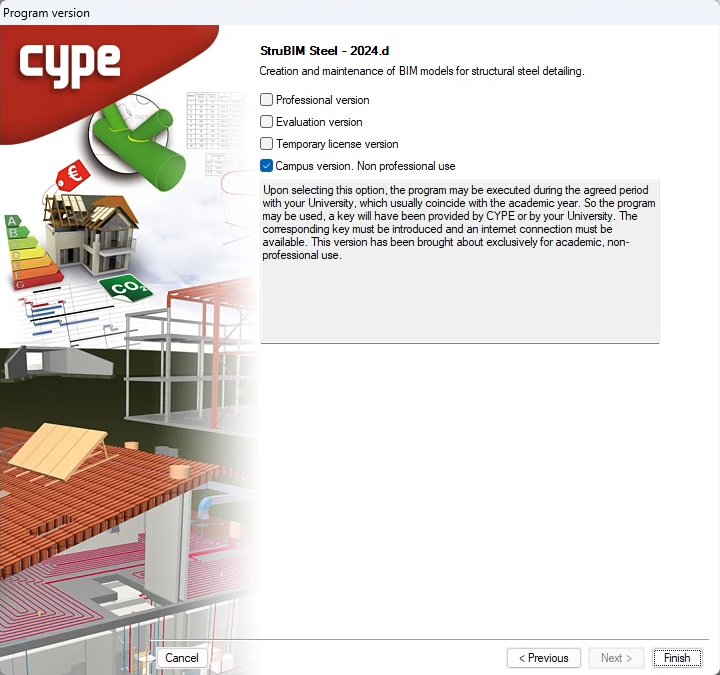
All CYPE programs can be installed in their different versions (Professional Version, Evaluation Version, Campus Version, Temporary License). In previous versions, users could only choose the type of version to be installed from the classic CYPE menu.

As of version 2024.a, the selection of version types has been implemented in all CYPE programs on the BIMserver.center platform.

As of version 2024.d, this selection can be made during the installation of all CYPE programs, regardless of where they are downloaded.

Improvements in the checking of the "Maximum buildable area, depending on use"

To make it easier for users to view the "Maximum buildable area, depending on use", two improvements have been implemented in its check:

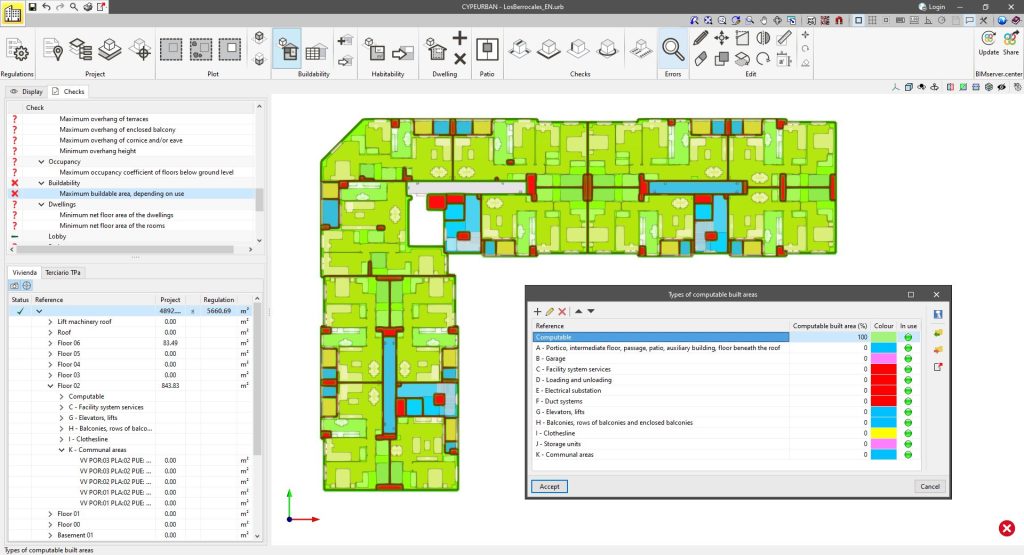
  1. New arrangement in the tree structure by floor and type
    In previous versions, each computable built area was shown separately in a table. This made it more difficult to review the check due to the large number of areas that a building could contain.

    As of version 2024.b of the program, the table of computable built areas is arranged in a tree structure that shows which floors have the types of computable built areas that exist on that floor. This makes it much easier to check by floor and by type of area.

  2. Highlighting computable built areas according to type
    In previous versions of the program, the check would highlight all areas in green if they met the check and in red if they did not.

    The purpose of the check, as well as finding out whether an area is compliant or not, is to quickly and easily view the computable built areas, depending on use. For this purpose, as of version 2024.b, the lighting of the area is carried out according to the colour assigned to the type.

Both improvements allow for a highly intuitive and fast viewing of all types of computable built areas that exist on a floor.

Moving elements with the arrow keys

As of version 2024.b, applications with the "Element selection tool" (this tool was implemented in version 2021.e) have the ability to move the selected model components with the arrow keys on the keyboard. The elements shall be moved on the work plane of the active view in the direction of the arrow key. Whenever the arrow is pressed, the distance that is displaced is constant, so zooming will make it larger or smaller.