Generating and updating the bill of quantities
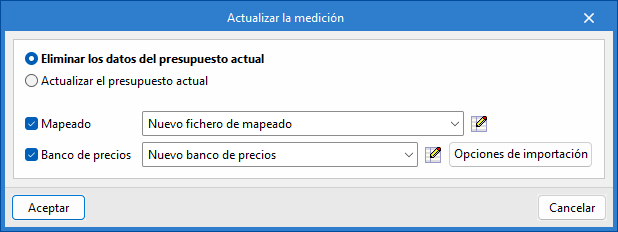
After creating the price database and the mapping file, you must update the estimate by clicking on the "Update the quantities" button in the "Update" group of the top toolbar.
To do this, you must select the "Delete the data of the current bill of quantities" option, activate and select the mapping and cost database created, and click accept. A pop-up window will then appear to link the items in the "Installation" tab and the work units in the cost database.
Mapping window
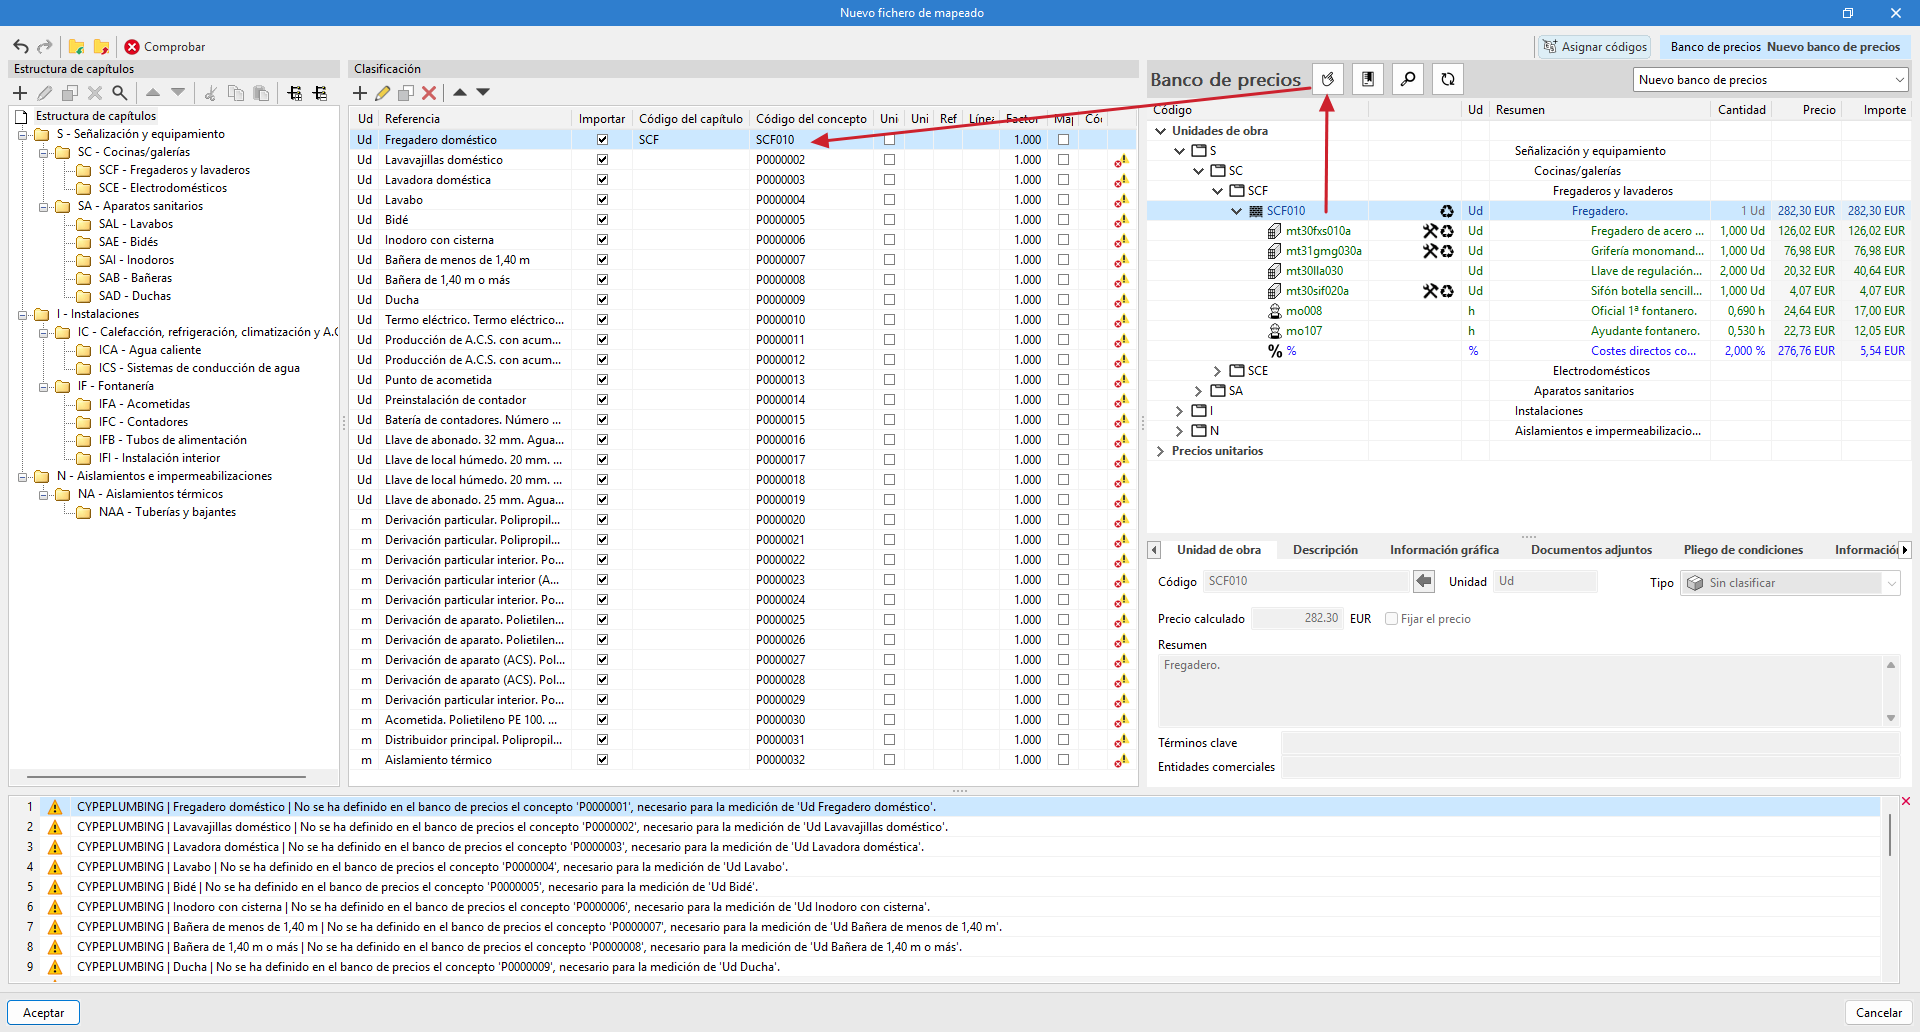
The pop-up window is divided into four panels:
- "Work section structure" panel
Displays the work section structure defined in the mapping file. - Classification panel
Displays a table with the items modelled in the "Installation tab", with the following columns: Unit, Reference, Import, Work section code, Concept code, Concept unit (check box), Concept unit (text field), "Concept reference", "Detail line", "Factor", "Mapped to a unit price", "Unit price code" and another column which, if applicable, displays an incident icon(*). - "Assign codes" panel
Displays the reference cost database. The following tools are included at the top of this panel:- Assign. Replace the values of "Work section code" and "Item code" in the mapping file with those of the work unit selected in the cost database.
- Work sections. Captures the work section structure from the cost database and assigns it to the mapping file.
- Search. Allows you to locate concepts in the cost database by text, summary, code or keyword.
- Synchronise. Activating this option allows you to locate any of the work units selected in the "Classification" panel in the price database.
- Selection of the reference cost database. Using a drop-down list, you can select a cost database from among those available.
- Incidents panel
Displays incidents detected in the mapping file.
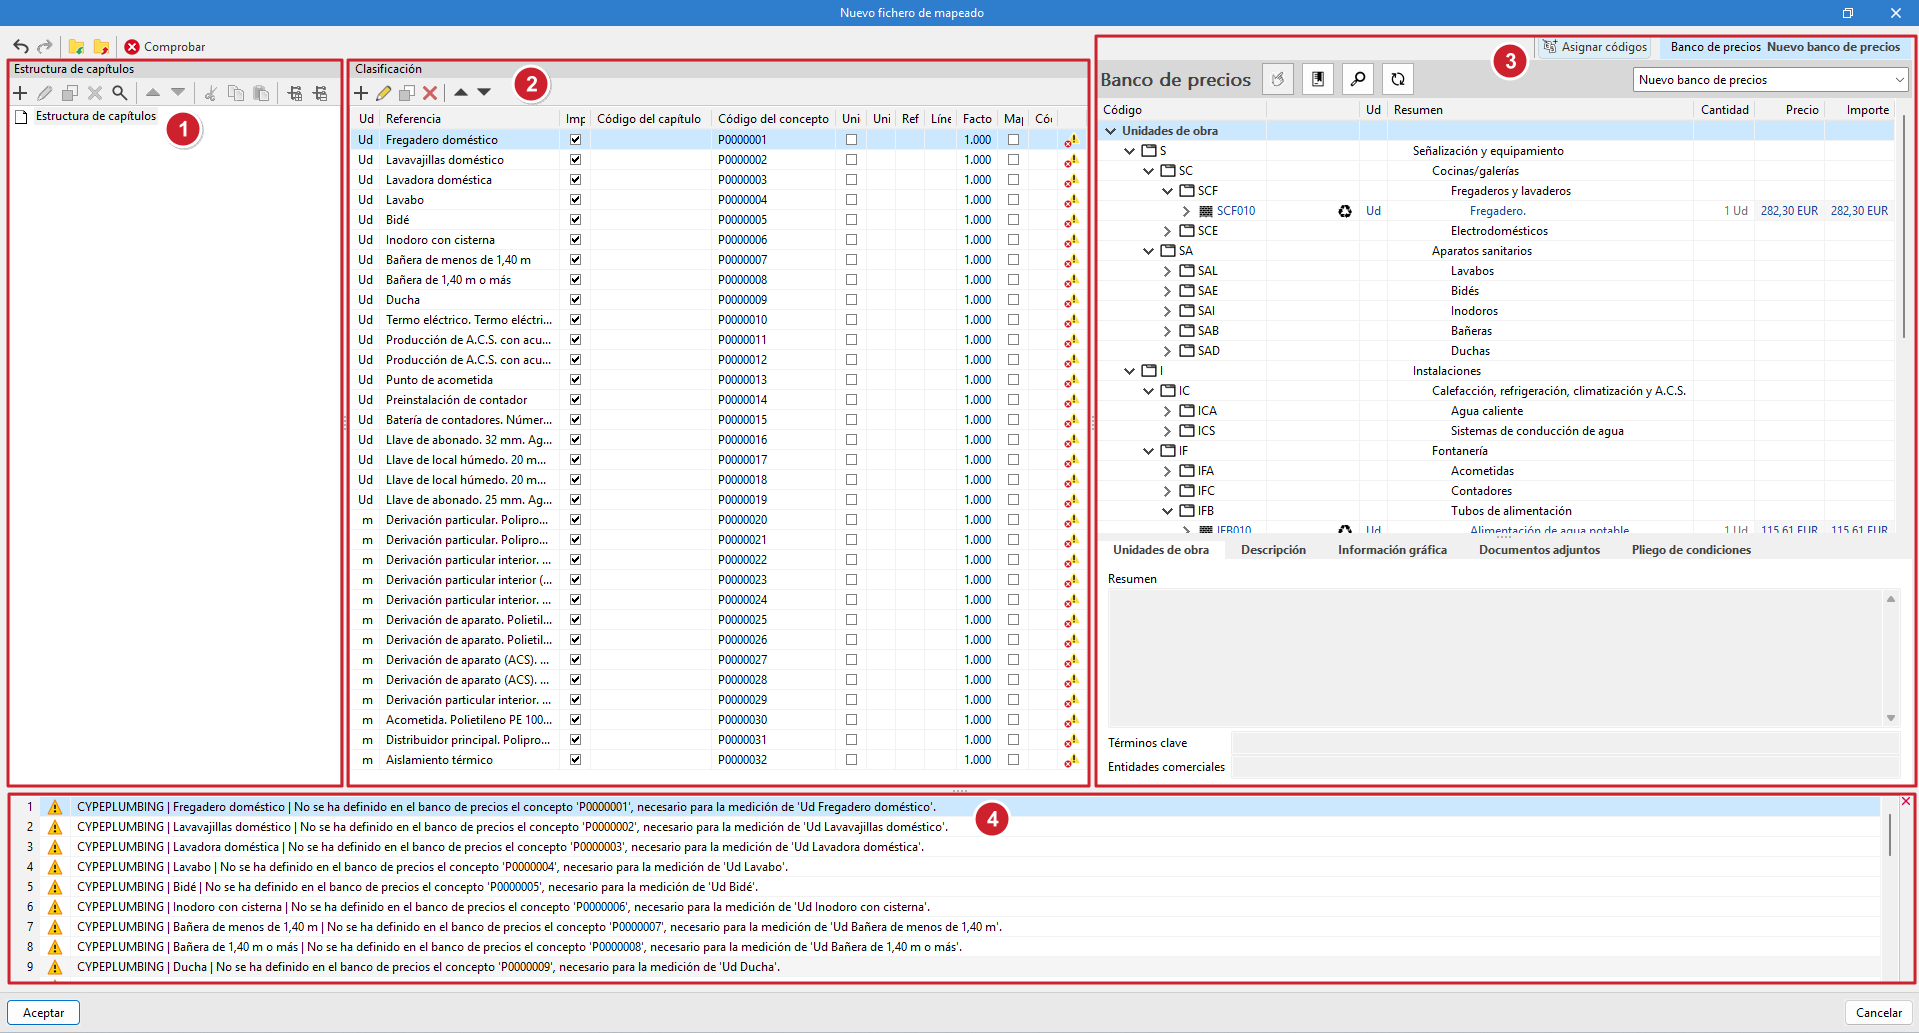
| Note (*): |
|---|
| If the cost database concept codes have not been assigned to the mapping file, the items in the "Classification" panel will display an incident icon in the last column, indicating that the concept has not been defined in thecost database and that it is necessary for measuring the unit. |
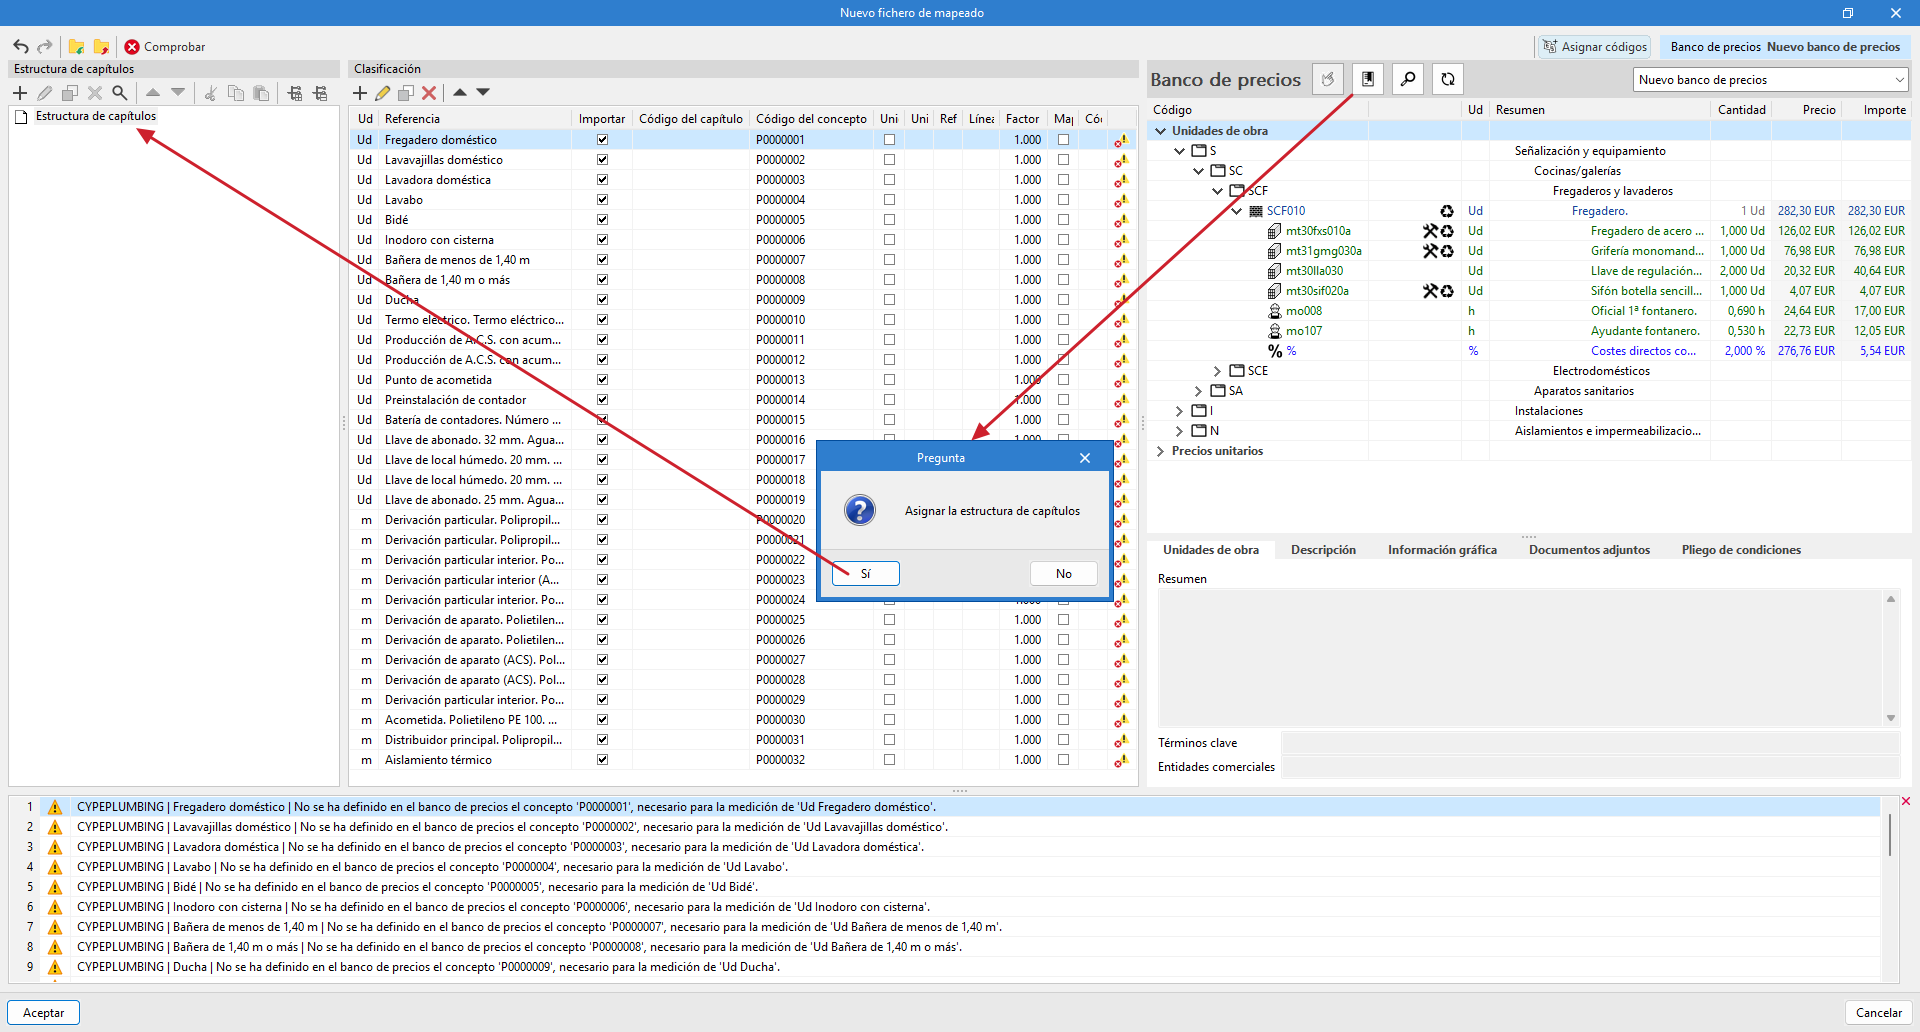
Mapping by code assignment
One way to map the elements of the model is by assigning codes, one by one, from the reference cost database to the mapping file. The process is as follows:
- Assign work section structure
Using the "Work sections" option in the "Assign codes" panel, the mapping file is automatically assigned the same work section structure as the reference price database. It is also possible to create the structure manually using the tools in the "Work section structure" panel, defining a code and a reference.
| Note: |
|---|
| The "Concept code" assigned to the elements in the "Classification" panel must correspond to the one established in the "Work section structure". Otherwise, an error message will appear indicating that the work section with the corresponding code has not been defined. |
- Assign cost database codes
Select a work unit in the cost database and the corresponding item in the "Classification" panel, then click the "Assign" button in the "Assign codes" panel. This process must be repeated for each item you wish to link. - Once the assignments have been completed, you must accept the pop-up window to apply the changes.
| Note: |
|---|
| If you subsequently wish to review or modify the mapping file, you can access it from the "Mapping" option in the "Project" group. |
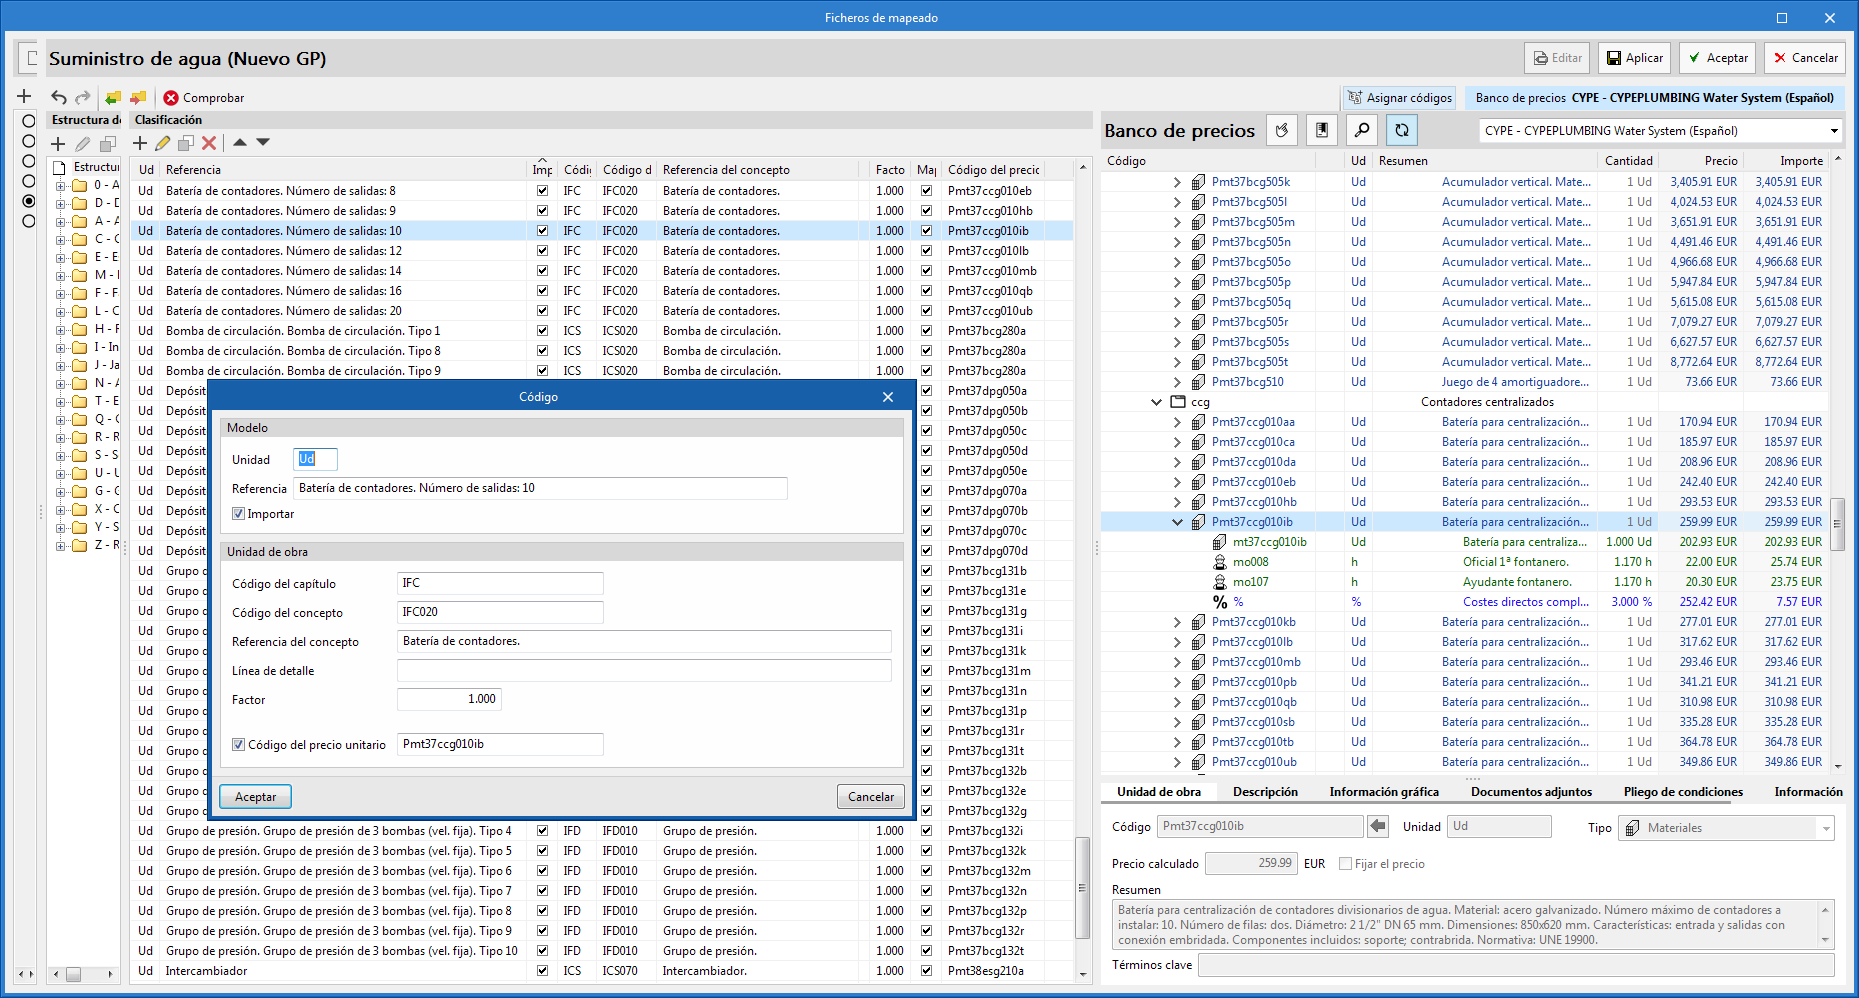
Mapping at unit prices
Another way to map the elements of the model is by assigning unit prices.
When editing an item in the "Classification" panel, you can activate the "Resource code" option and indicate the unit price code to which the quantity of the model item will be mapped.
In this case, it is not necessary to indicate the "Work section code" or "Concept code", as the program automatically establishes the correspondence with the relevant work section.
If the resource specified in the mapping file is a cost breakdown in the associated cost database, only the unit components of this breakdown shall be assigned to the concept.