
Downloading and installing CYPE software
There are several ways to download and install CYPE software. We recommend using option "A", as it allows you to manage all the apps from a single location in a practical, efficient and versatile way.
- Downloading and installing CYPE Menu (recommended)
From the CYPE Menu interface, you can easily download, install, uninstall and update the necessary apps. This option provides centralised management, giving you quick access to the apps included in the licence. - Downloading and installing CYPE Menu. Full installation
This option lets you install CYPE Menu. Full installation and, at the same time, a set of pre-selected CYPE programs. This is useful if you need to install the software on multiple workstations or when users don't have installation permissions, such as in a university computer lab (using, for example, a campus licence) or in companies with multiple employees and computers, as well as if you wish to carry out an unattended installation.
Note: The version of CYPE Menu. Full installation available on BIMserver.center is usually an older version than the one currently available on CYPE Menu. - Downloading and installing apps individually
Each app can be downloaded directly from the BIMserver.center platform, without needing to use CYPE Menu. This option is suitable when you only wish to install one or a few specific programs.
Downloading and installing software from the CYPE Menu
The steps required to download and install CYPE software from CYPE Menu are indicated below.
1. Registering on BIMserver.center
Firstly, you need to register on the BIMserver.center platform. To do this, follow the steps below:
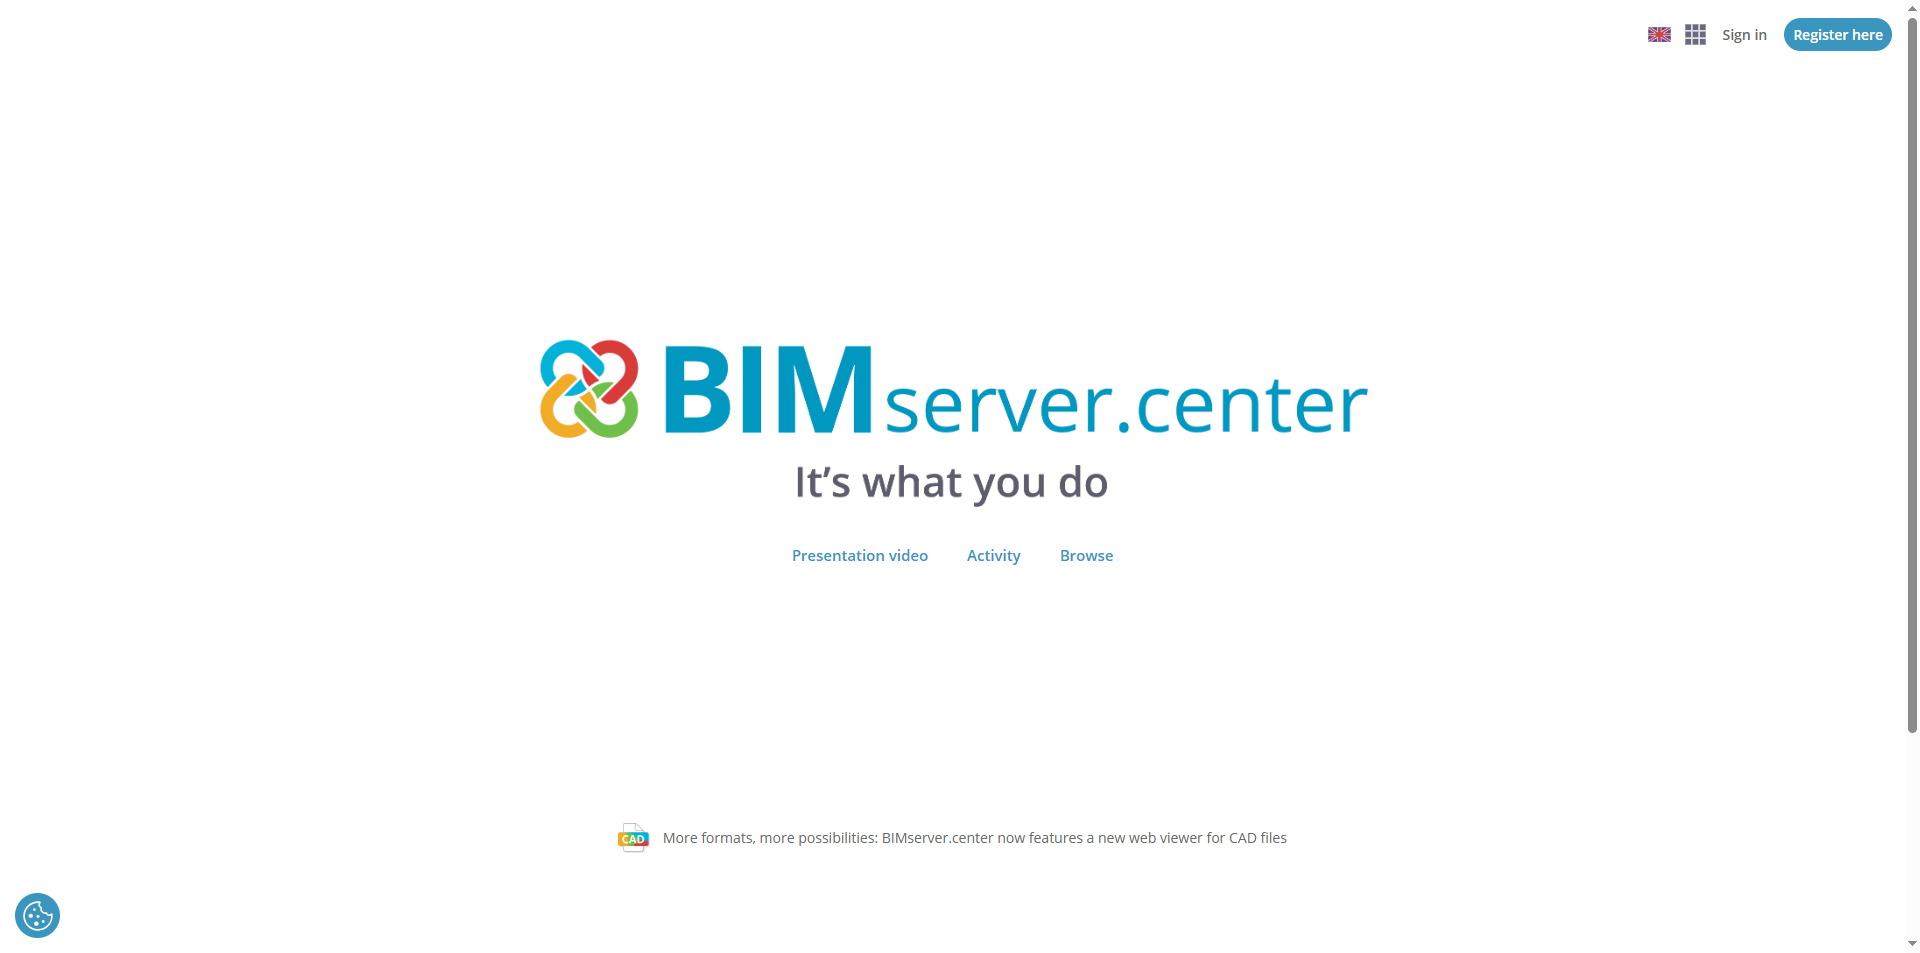
- Go to BIMserver.center in your web browser and click on the "Register here" button in the top right-hand corner.
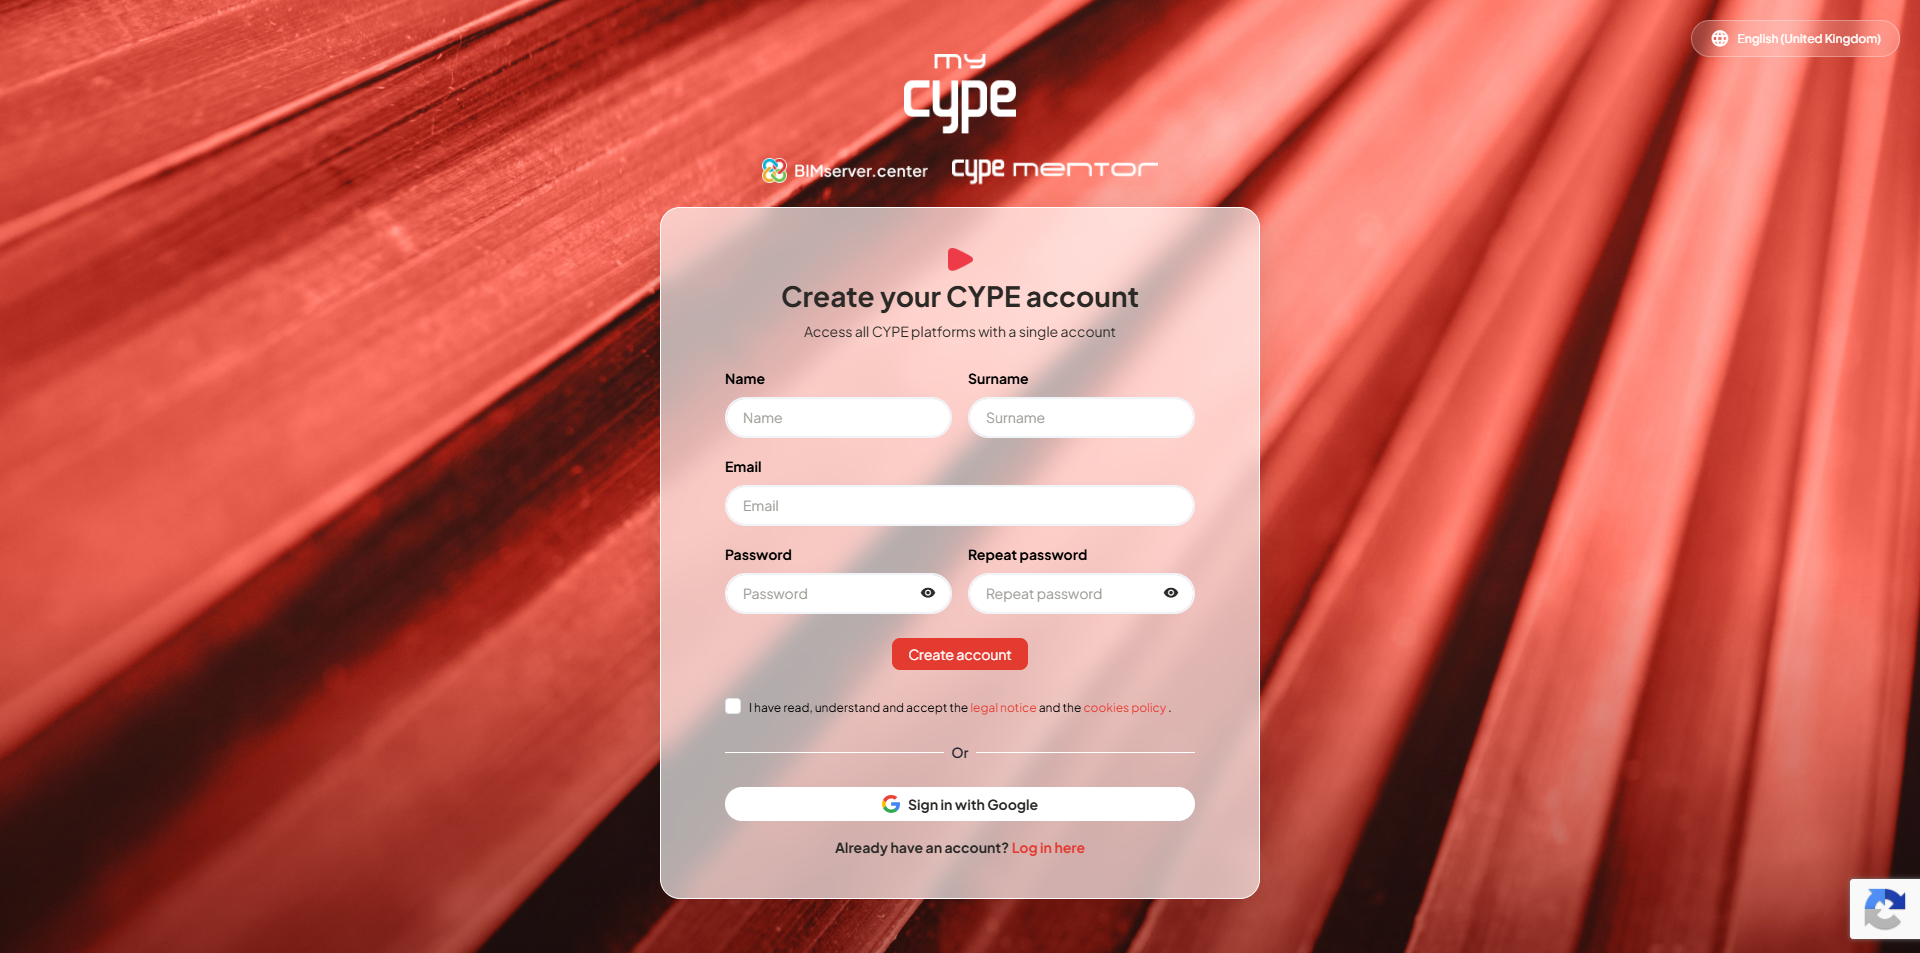
- Once you are on the registration page, enter your "Name", "Surname", "Email" and "Password". Then click on "Create account".
- Next, click on the verification link in the email you will receive. If you don't receive it, check whether it has been marked as spam.
2. Signing in to BIMserver.center
Once the registration process is complete, you must sign in to BIMserver.center using your account, as follows:
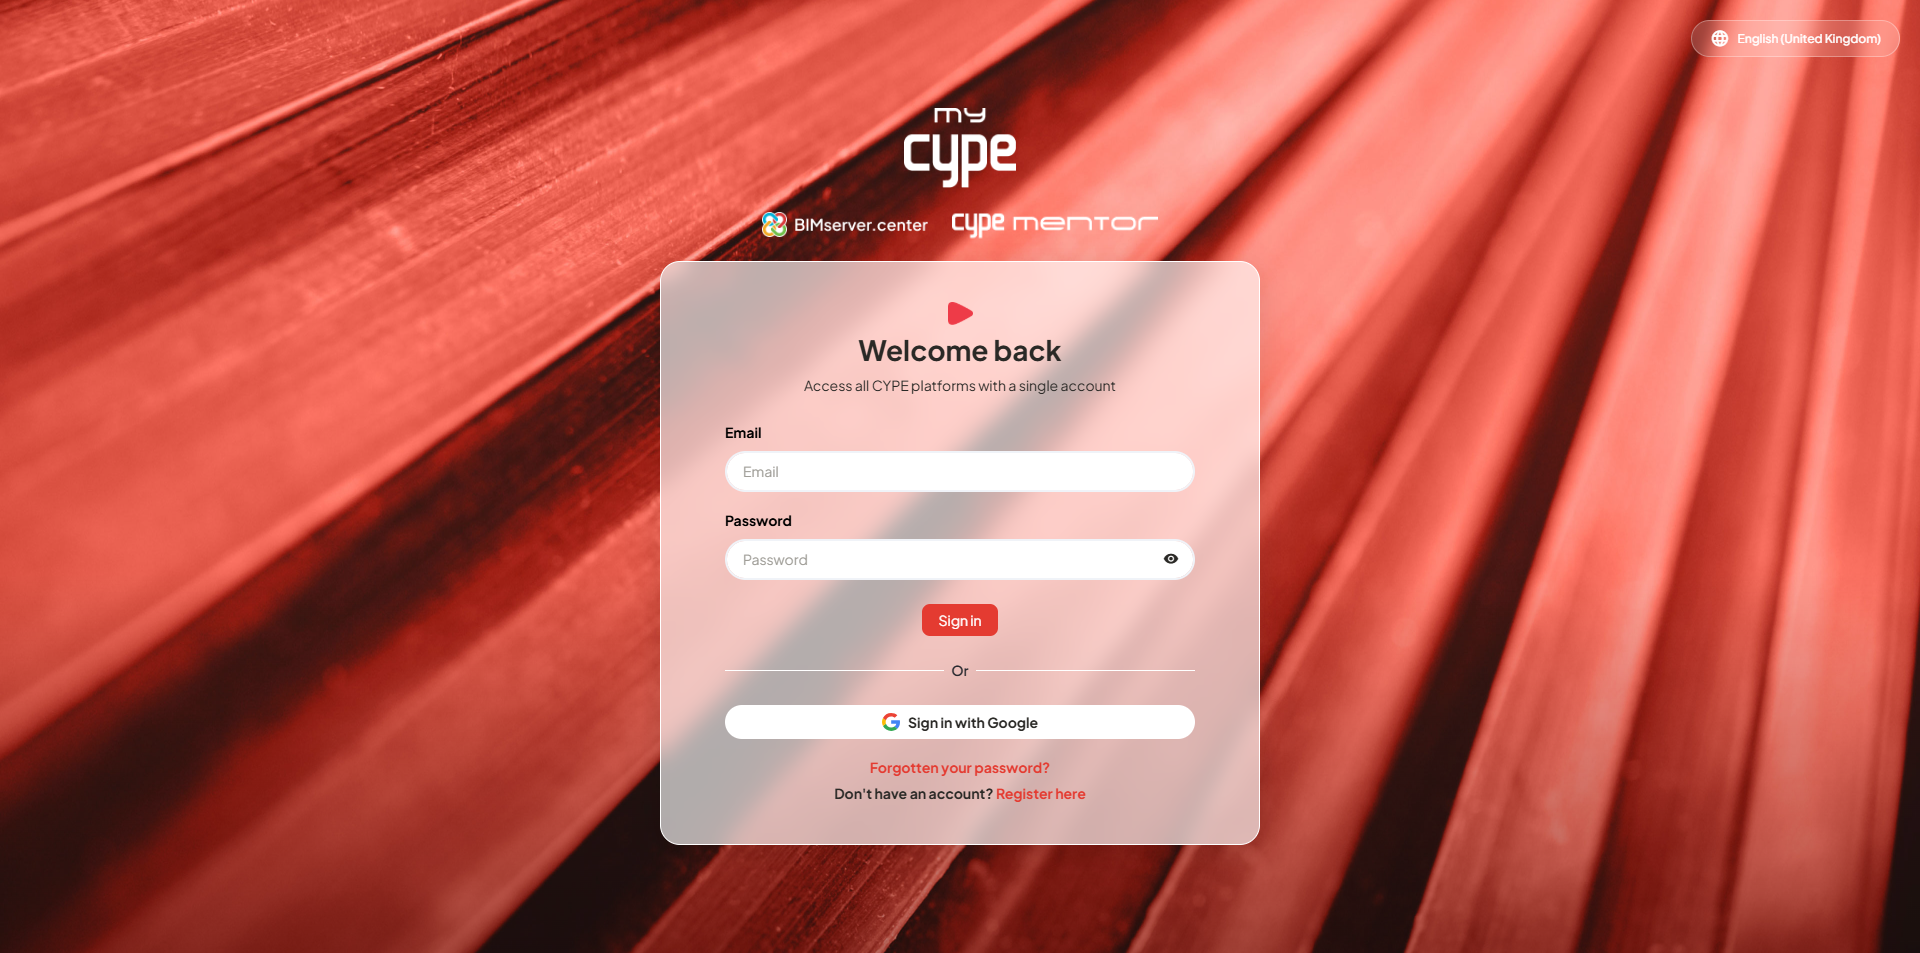
- Go back to BIMserver.center in your web browser and click on "Sign in" in the top right-hand corner. In the sign-in window, enter your account’s "Email" and "Password", then click "Sign in".
3. Downloading CYPE Menu from BIMserver.center
On BIMserver.center, you can search for the app you want, for example CYPE Menu, and download it:
- The "Store" option takes you to the app catalogue. In the top left-hand corner, you can search for apps by name, category or tag.
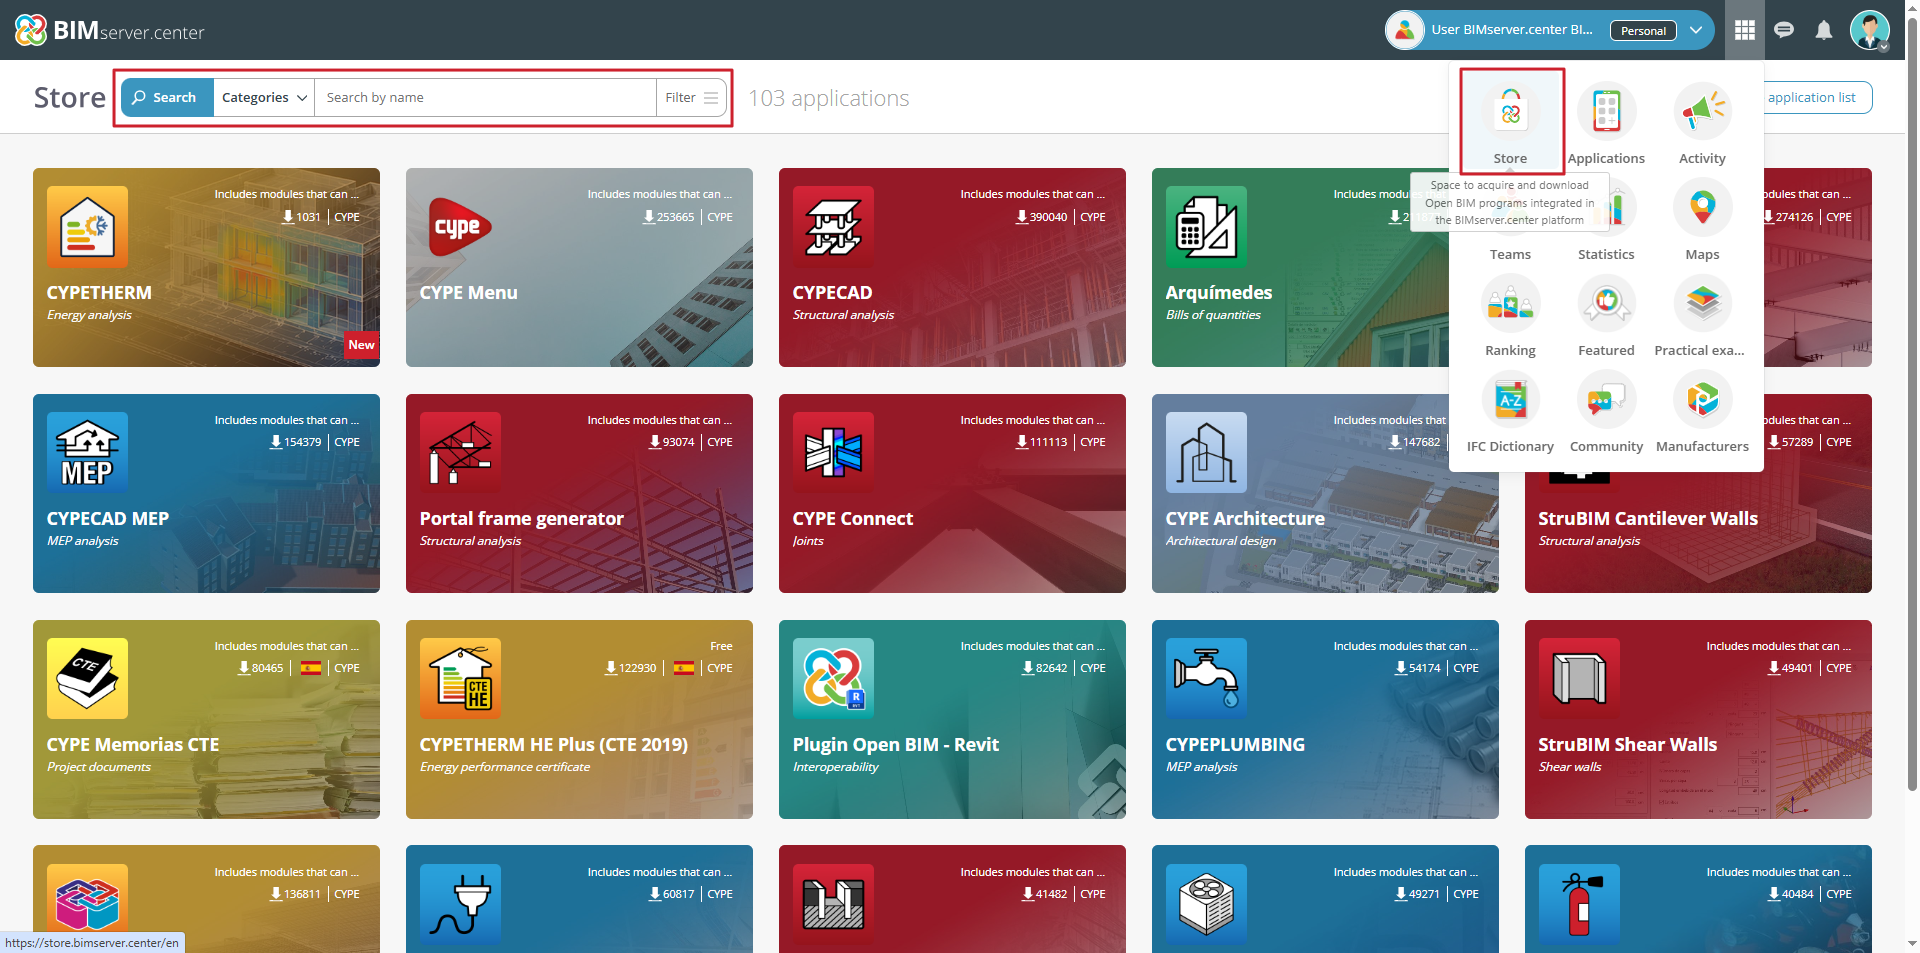
- When you select the desired app, its details page opens, where you will find the "Download" button in the top right-hand corner. Clicking this button will download an executable file to the specified location.
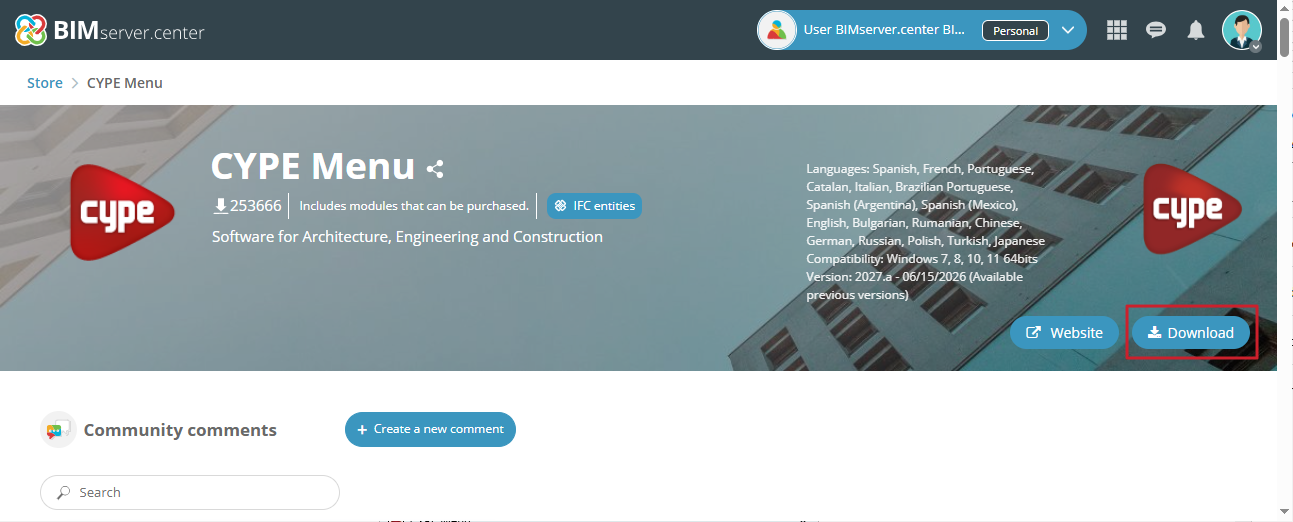
4. Installing CYPE Menu
The file you downloaded earlier contains everything you need to download and install the application. To do this, you must do the following:
- Run the downloaded file from your downloads folder and select the installation language from those available.
Note: For versions before 2026.a, during installation you must select the licence type for the program: professional, evaluation, temporary or campus.

- The path where the complete app will be downloaded will be displayed. Tick "Install automatically after downloading", if desired, and click "Start download". If the directory does not exist, the program will ask for confirmation to create it. In that case, select "Yes".
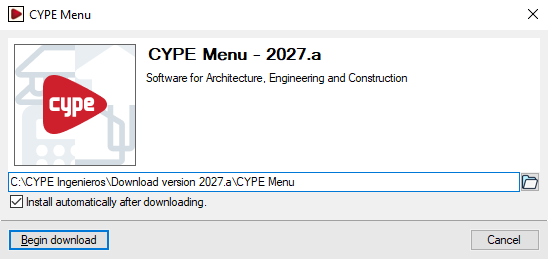
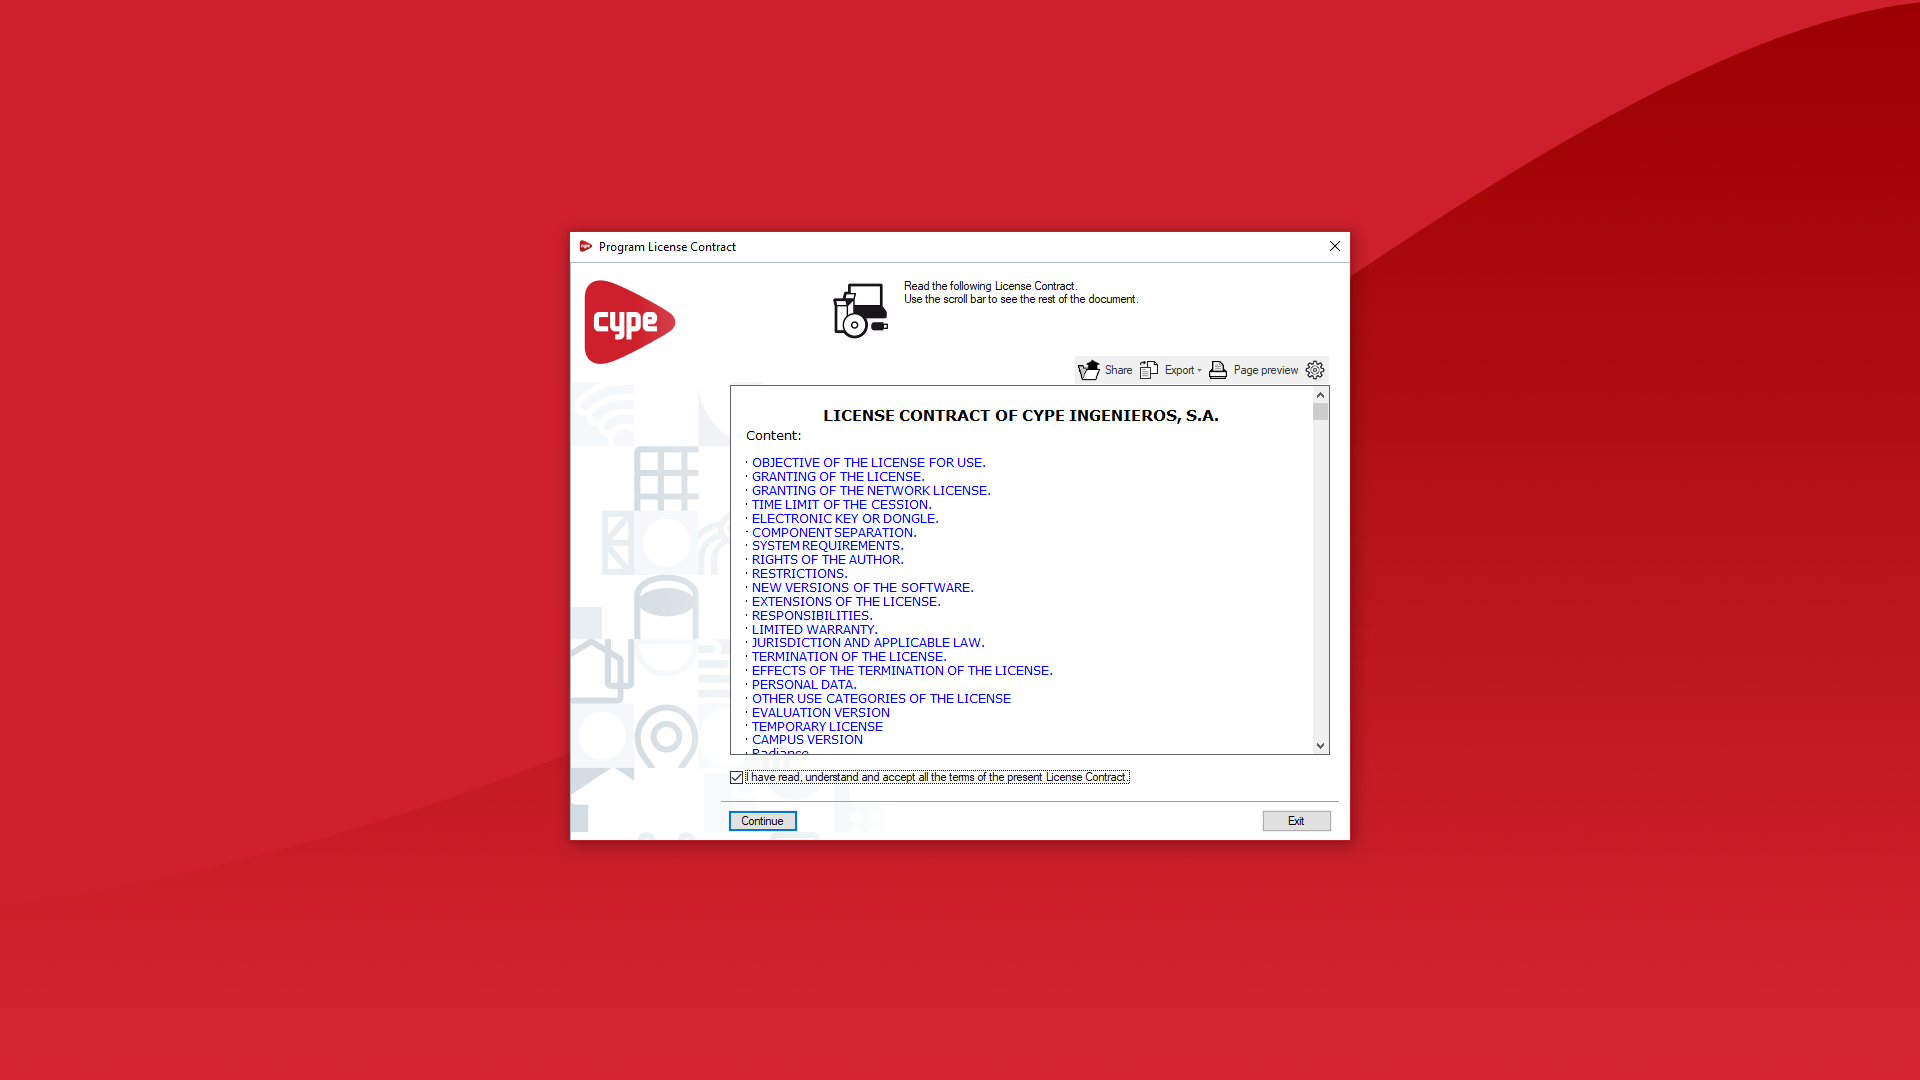
- If you ticked “Install automatically after downloading” in the previous step, the installation wizard will launch automatically. If not, you will need to locate and open the installation executable file in the relevant language within the designated folder, for example, C:\CYPE Ingenieros\Download version 2027.a\CYPE Menu\Installation in English\Install CYPE Menu.exe. In the installation wizard, you must accept the Licence Agreement and the Liability Clause.
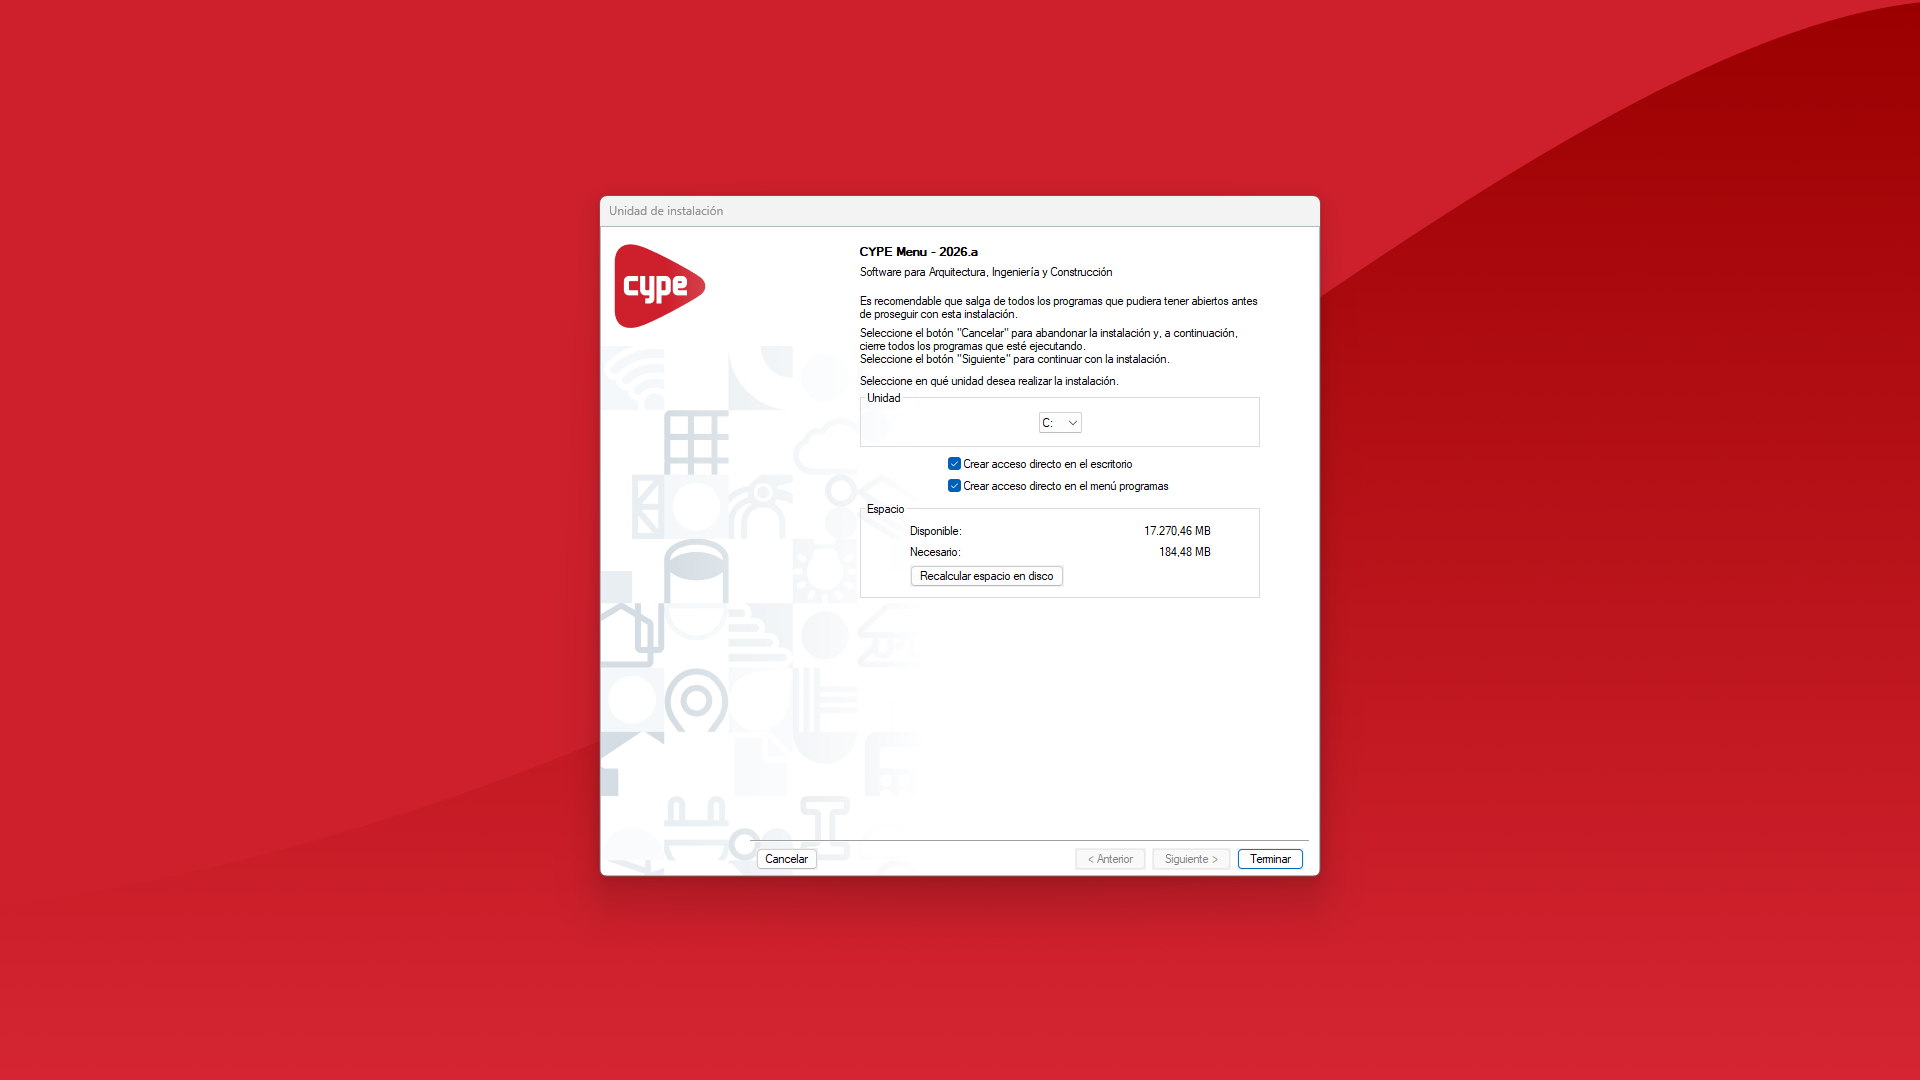
- Select the drive where you wish to install the program. This will determine the installation path. For example, the installation path for CYPE Menu 2027 is as follows: C:\CYPE Ingenieros\Version 2027\CYPE Menu. You can tick the boxes to create shortcuts on the desktop and in the "Programs" menu, if desired. Finally, click on "Finish".
- The program installation process will then start automatically. This may take a few seconds, depending on your computer. Once complete, the app will open automatically. You can then run it using the shortcuts created during installation.
5. Signing in via the CYPE Menu
In CYPE Menu, you must sign in with your BIMserver.center account to install the programs from the platform. This means that CYPE Menu will display the name of your BIMserver.center account instead of "Sign in". Furthermore, the downloaded apps will also appear in your user profile on the BIMserver.center platform. The steps to sign in are as follows:
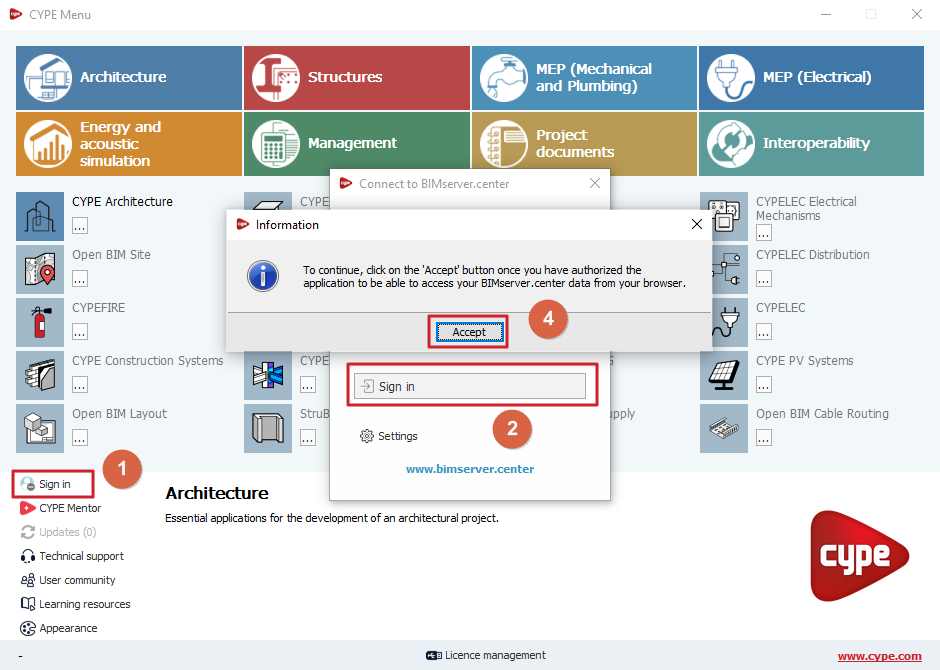
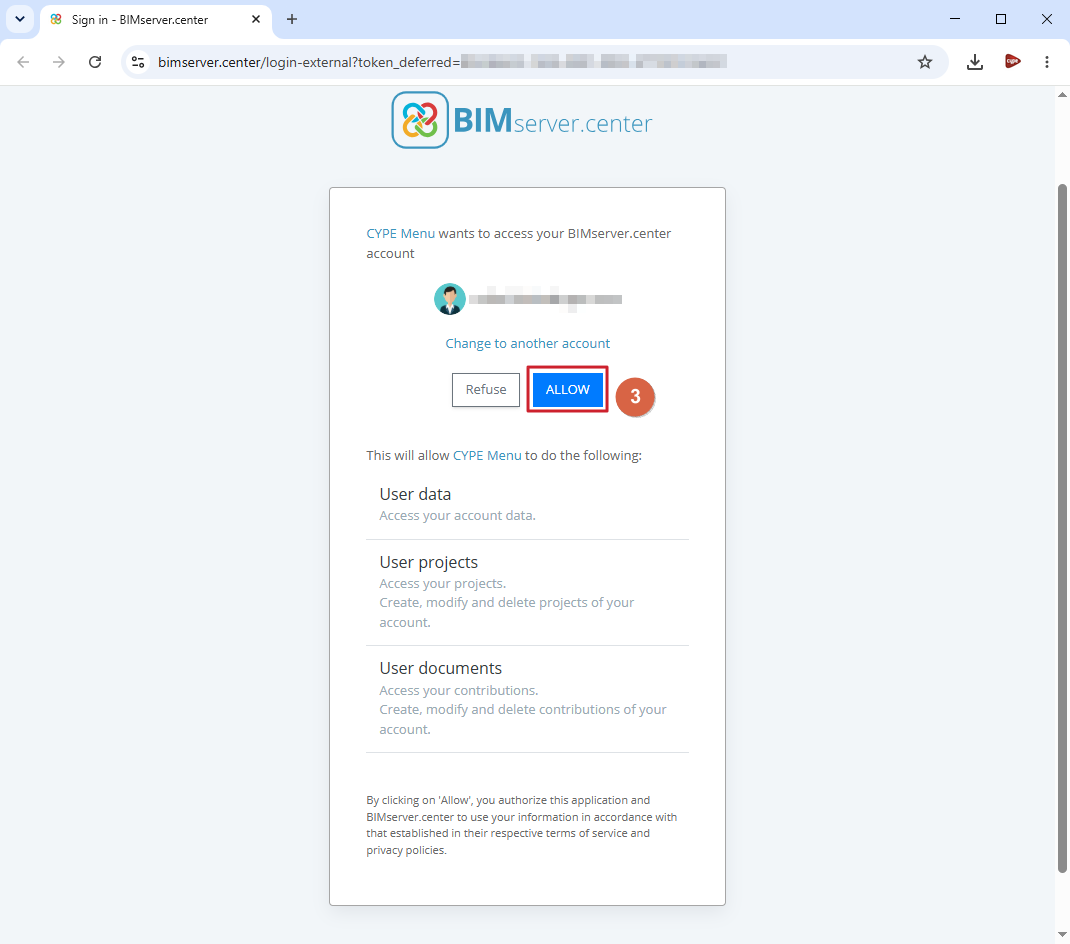
- Click on the "Sign in" option in the bottom left-hand corner (1) and then on the button of the same name in the pop-up window (2). A new tab will open in your web browser with the message "CYPE Menu wants to access your BIMserver.center account". Here, click on “ALLOW” (3) and then on the "Accept" button (4) in the "Information" window.
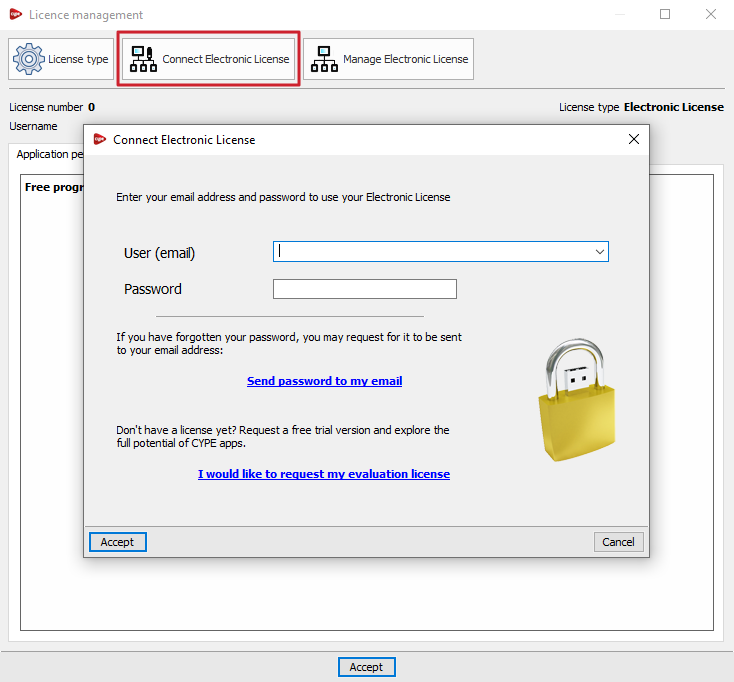
6. Using an electronic license in CYPE Menu
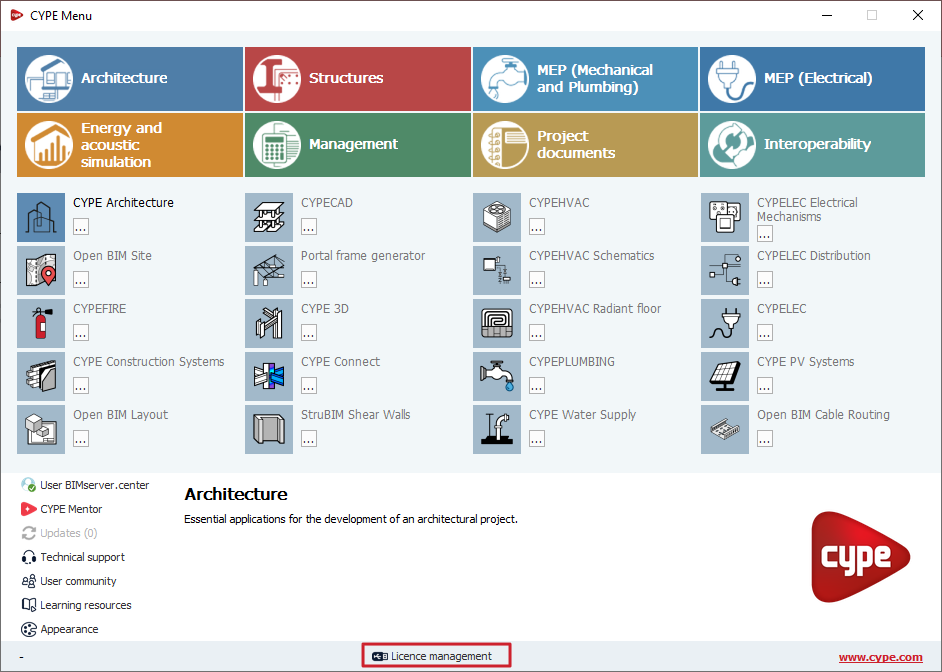
Next, still within the CYPE Menu, you must enter the email address and password associated with your CYPE license by selecting the "License management" option at the bottom.
Note: As of version 2026.a, this step allows you to enter your credentials for any license type for the program, whether it is a professional license, an evaluation license or a campus license.
7. Installing programs in CYPE Menu
To install a specific program in CYPE Menu, for example CYPECAD, follow these steps:
- First, select the group of programs at the top, and locate the programme you wish to install in the central section. Next, click on the button located beneath the name of each program. This opens a window indicating whether the app is already installed or not. If the app is not installed, you can select and install the latest version or a previous version, if available.
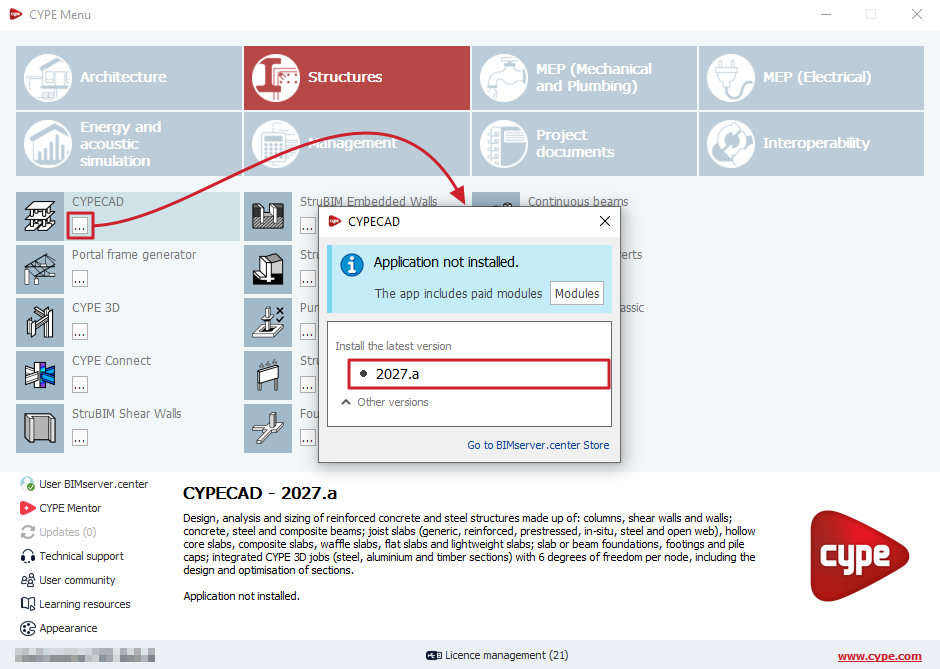
- In the window that appears, you must select the language for installing the program. Once you have done this, the download and installation process will begin. Once the installation process is complete, the program will open.

8. Running programs in CYPE Menu
Once installed, the program icon will appear in colour in the CYPE Menu:
- If you click on the button
 located below the program name, you can "Run" the installed version of the program by clicking on the corresponding button.
Doing so will open the app's main interface, where you can start working.
 located below the program name, you can "Run" the installed version of the program by clicking on the corresponding button.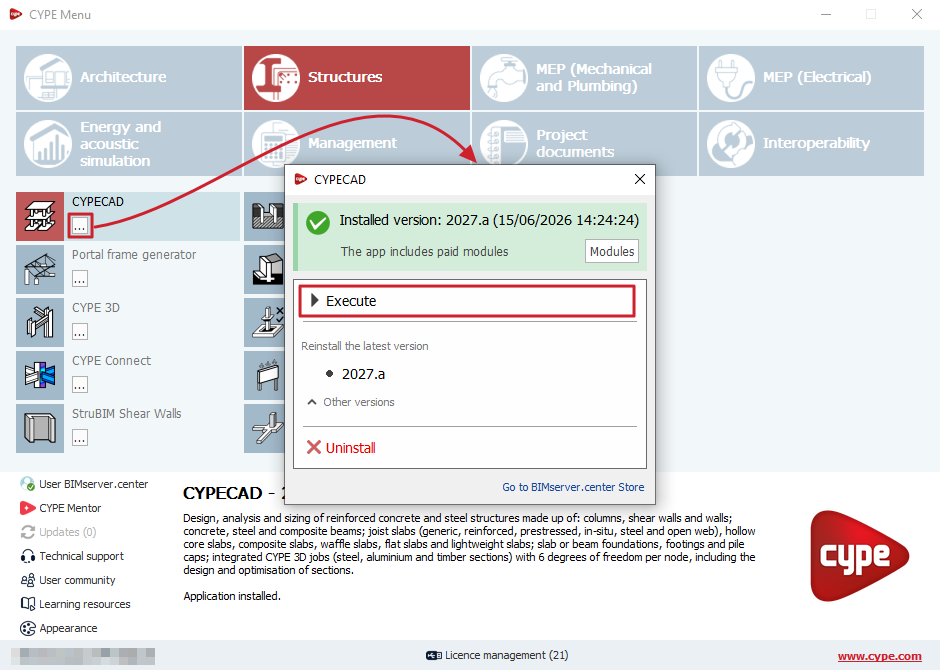
Downloading and installing CYPE Menu. Full installation
The steps required to download and install CYPE Menu. Full installation are described below.
1. Register with BIMserver.center
First, you need to register on the BIMserver.center platform. To do this, follow the steps below:
- Go to BIMserver.center in your web browser and click on the "Register here" button in the top right-hand corner.
- Once you are on the registration page, enter your "First name", "Surname", "Email address" and "Password". Then click on "Create account".
- You will then need to confirm the validation email that will be sent to your email address. If you do not receive it, please check whether it has been marked as spam.
2. Sign in to BIMserver.center
Once registration is complete, you must sign in to BIMserver.center using your account, as follows:
- Go back to BIMserver.center using your web browser and click on "Sign in" in the top right-hand corner. In the sign-in window, enter your account's "Email" and "Password" and click on "Sign in".
3. Download CYPE Menu. Full installation from BIMserver.center
On BIMserver.center, you can search for "CYPE Menu. Full Installation" and download it:
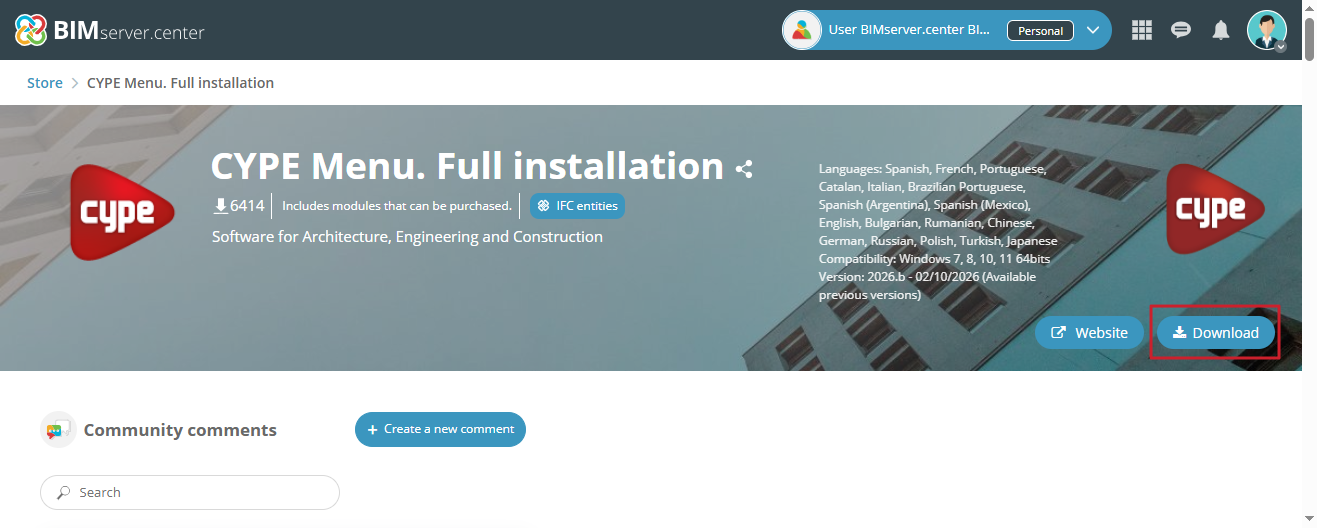
- The "Store" option takes you to the app catalogue. In the top left-hand corner, you can search for apps by name, category or tag.
- When you select the desired app, its details page opens, where you will find the "Download" button in the top right-hand corner. Clicking this button will download an executable file to the specified location.
4. Install CYPE Menu. Full Installation
The file downloaded above can be used to download the complete app and install it. To do this, you must follow these steps:
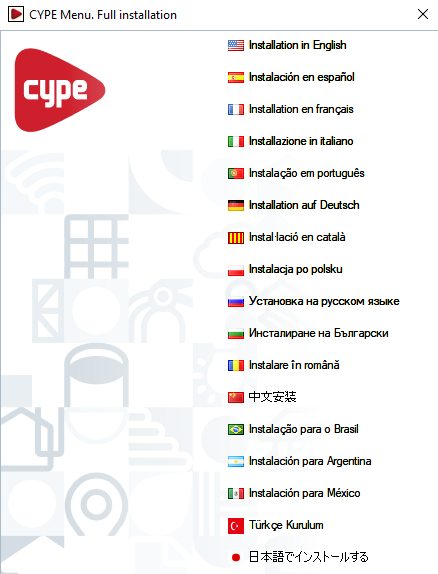
- Run the downloaded file from your downloads folder and select your preferred installation language from the available options.
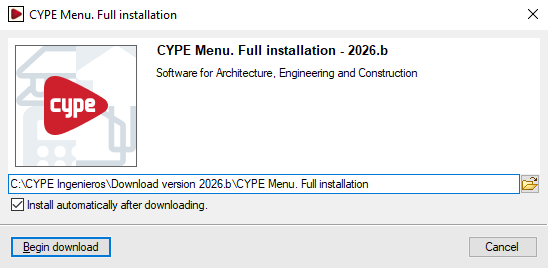
- The path where the full app will be downloaded will be displayed. Tick "Install automatically after downloading" if desired, and click "Start download". If the directory does not exist, the program will ask for confirmation to create it. In that case, select "Yes".
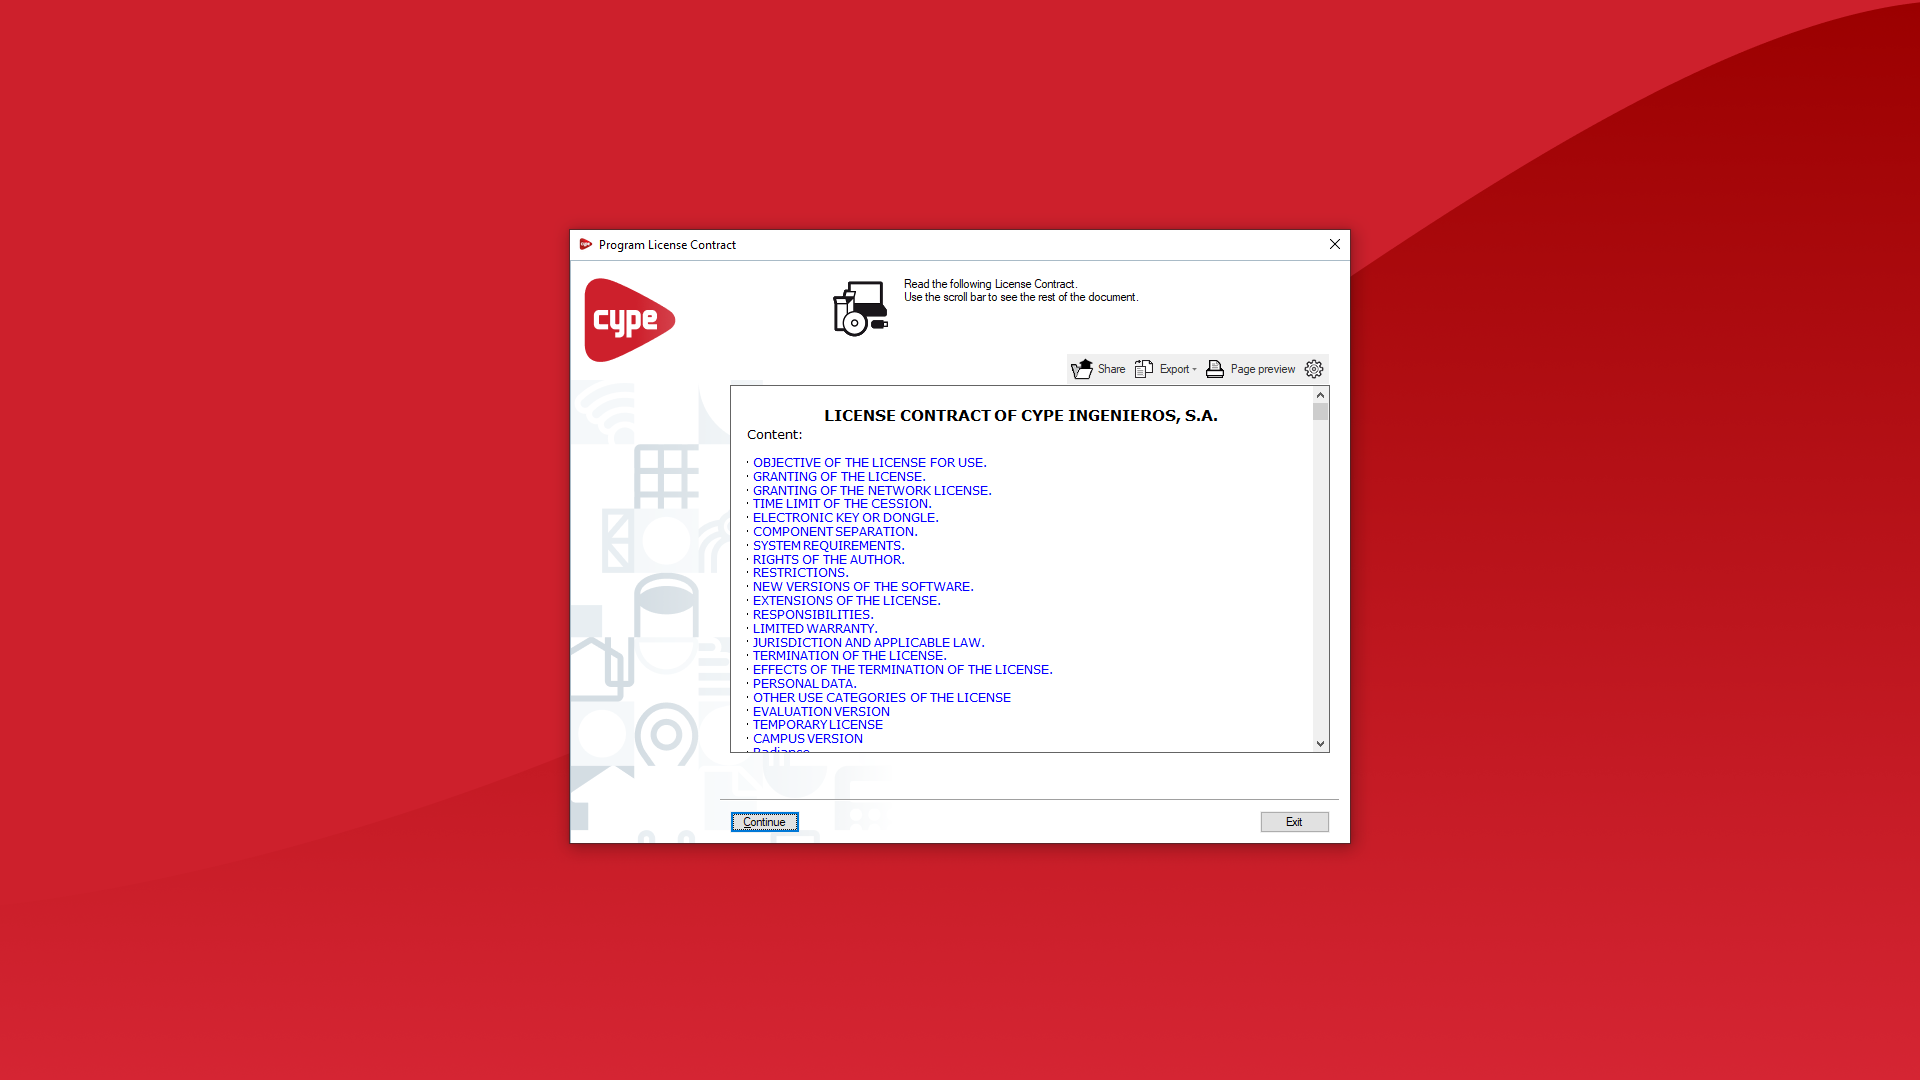
- If you ticked "Install automatically after downloading" in the previous step, the installation wizard will launch automatically. If not, you will need to locate and open the installation executable file in the relevant language within the designated folder, for example, C:\CYPE Ingenieros\Download version 2026.b\CYPE Menu.Full Installation\Installation in English\Install CYPE Menu.Full Installation.exe. In the installation wizard, you must accept the Licence Agreement and the Liability Clause.
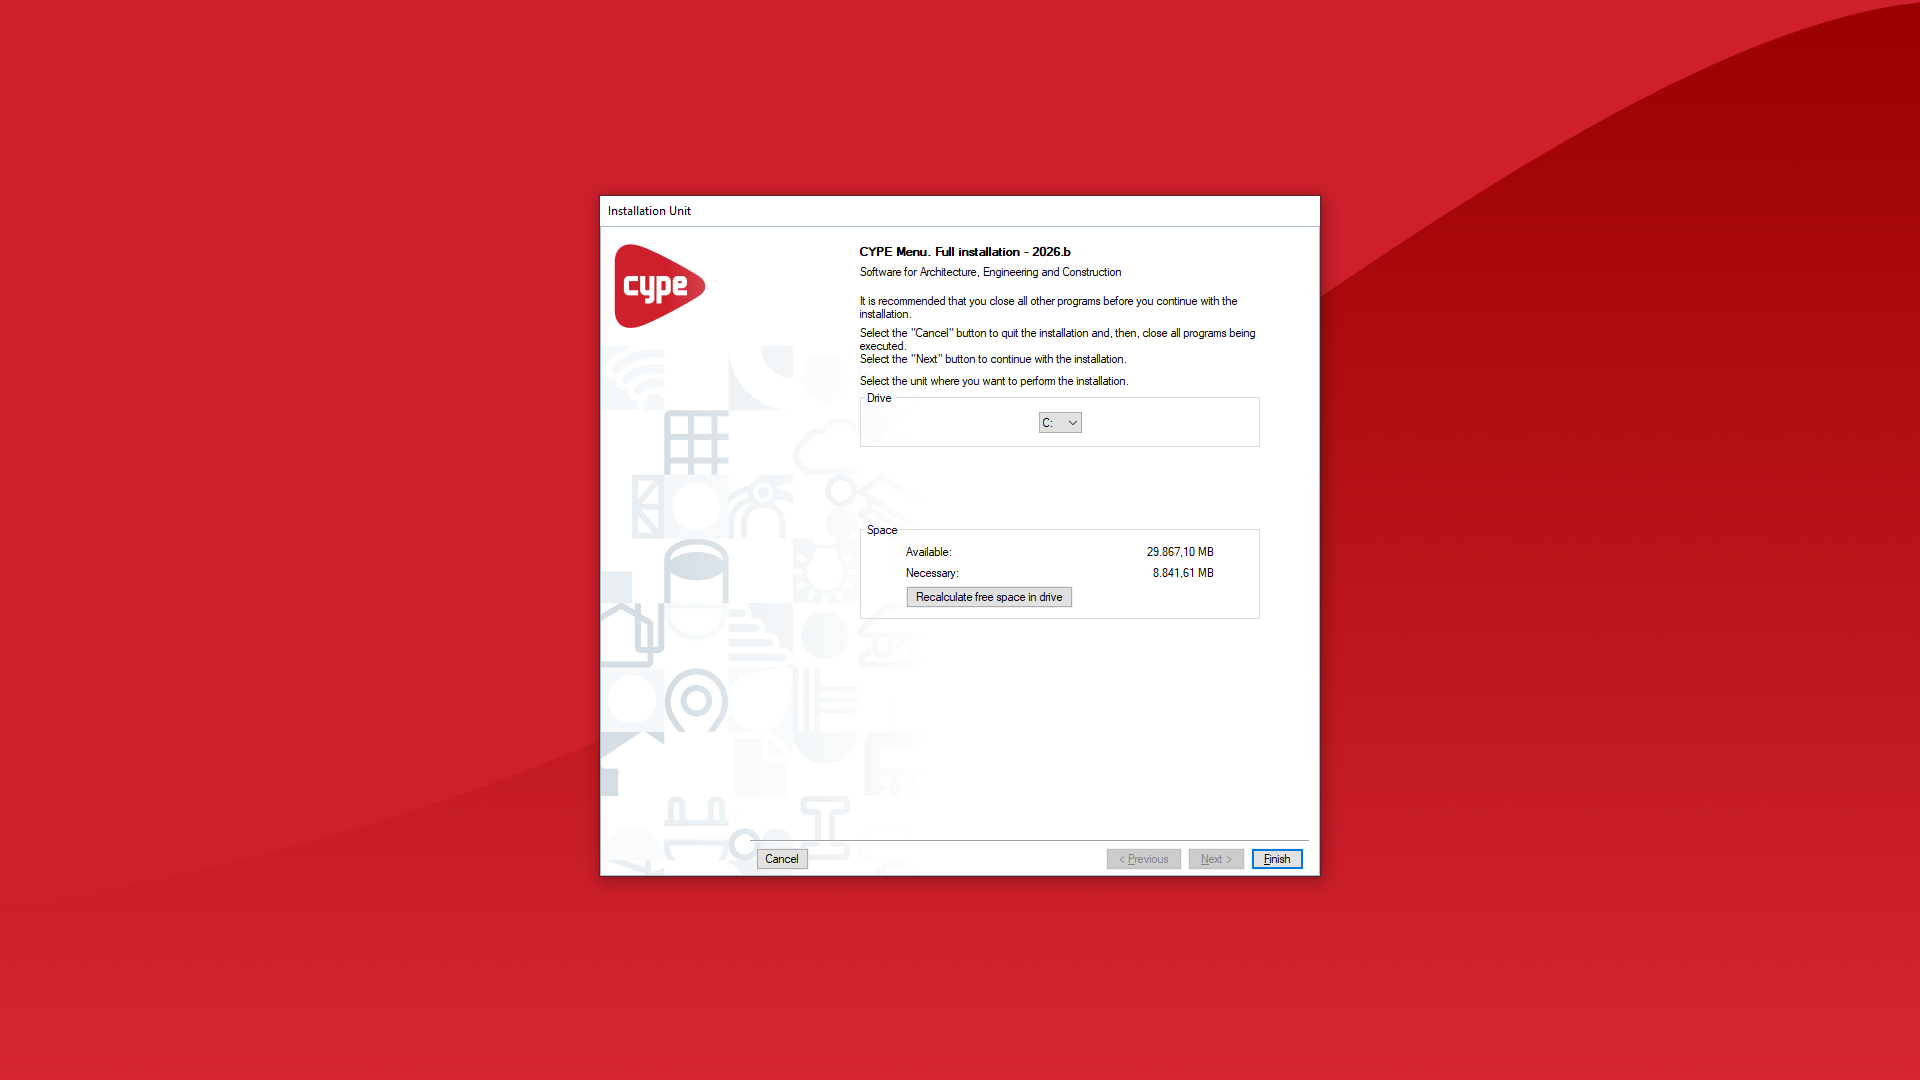
- Select the drive on which you wish to install the program. This will determine the installation path. For example, the installation path for CYPE Menu. Full Installation 2026 is as follows: C:\CYPE Ingenieros\Version 2026\CYPE Menu.Full Installation. You can tick the boxes to create shortcuts on the desktop and in the "Programs" menu, if desired. Finally, click "Finish".
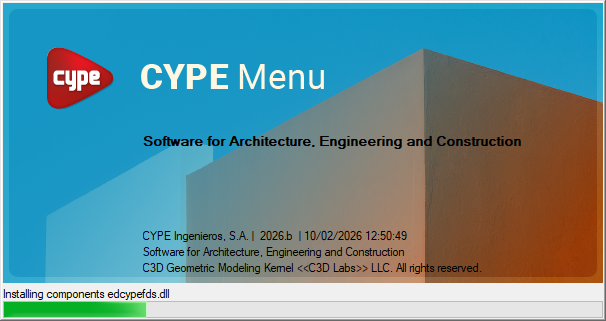
- The program's installation process will then start automatically. This may take a few seconds, depending on your computer. Once complete, the app will open automatically. You will then be able to run it using the shortcuts created during the installation process.
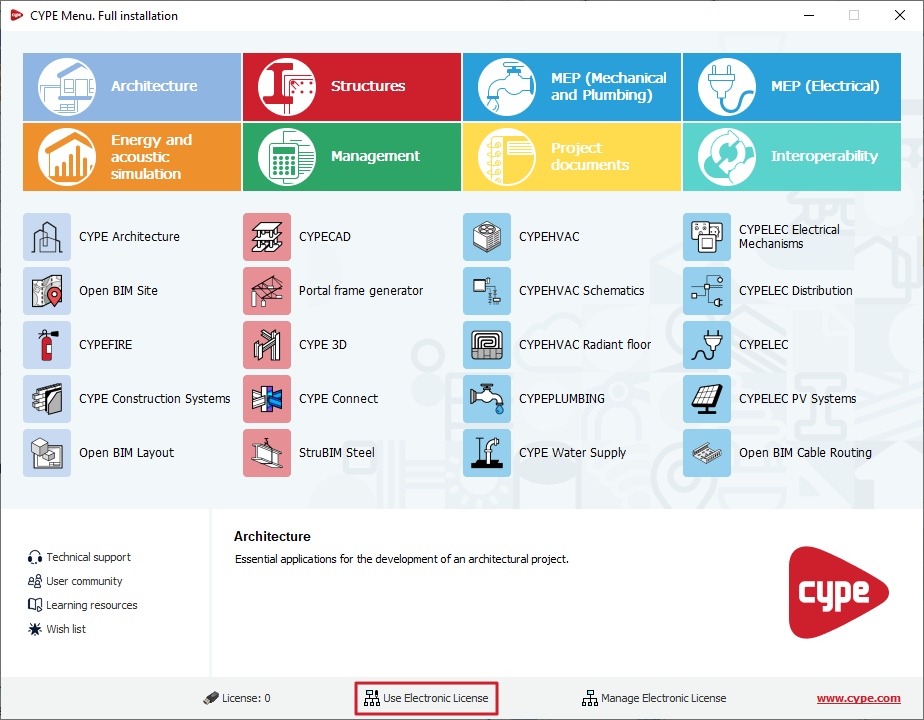
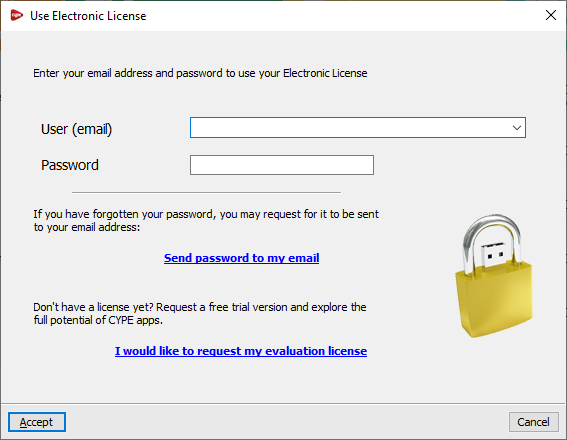
5. Use the electronic licence in CYPE Menu. Full installation
Next, still within CYPE Menu. Full installation, you must enter the email address and password associated with your CYPE licence by selecting the "Use electronic licence" option at the bottom.
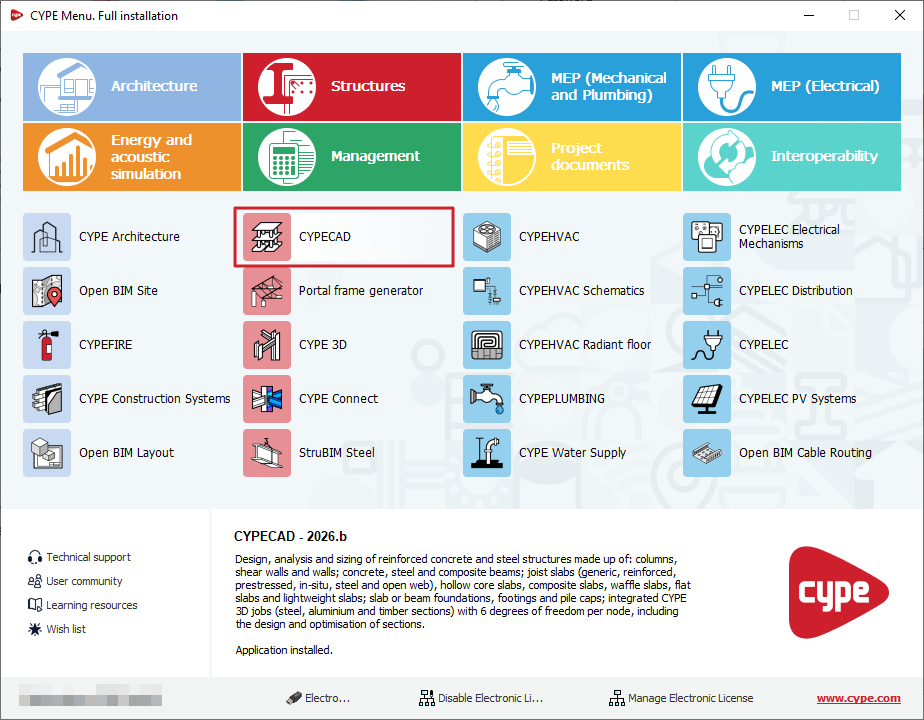
6. Run programs in CYPE Menu. Full installation
Once CYPE Menu. Full Installation has been installed, you can "Run" each program by clicking on the corresponding button. Doing so will open the app's main interface, from which you can start working.
Downloading and installing individual CYPE apps
The steps required to download and install CYPE programs individually are described below.
1. Register with BIMserver.center
First, you need to register on the BIMserver.center platform. To do this, follow the steps below:
- Go to BIMserver.center in your web browser and click on the "Register here" button in the top right-hand corner.
- Once you are on the registration page, enter your "First name", "Surname", "Email address" and "Password". Then click on "Create account".
- You will then need to confirm the validation email that will be sent to your email address. If you do not receive it, please check whether it has been marked as spam.
2. Sign in to BIMserver.center
Once registration is complete, you must sign in to BIMserver.center using your account, as follows:
- Go back to BIMserver.center using your web browser and click on "Sign in" in the top right-hand corner. In the sign-in window, enter your account's "Email" and "Password" and click on "Sign in".
3. Download the app from BIMserver.center
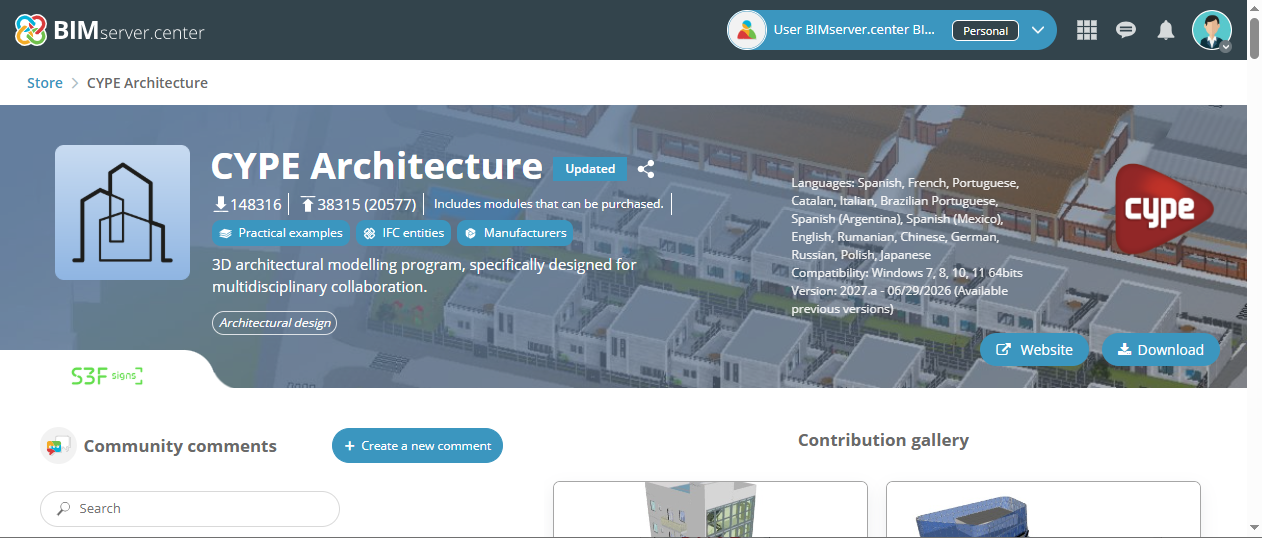
On BIMserver.center, you can search for the app you want, for example, CYPE Architecture, and download it:
- The "Store" option takes you to the app catalogue. In the top left-hand corner, you can search for apps by name, category or tag.
- When you select the desired app, its details page opens, where you will find the "Download" button in the top right-hand corner. Clicking this button will download an executable file to the specified location.
4. Install the app
The file above can be used to download and install the complete app. To do this, you must follow these steps:
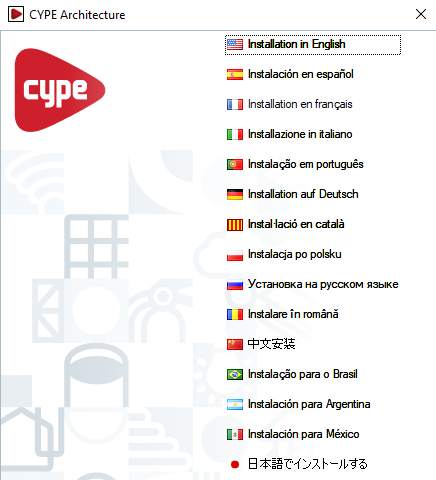
- Run the downloaded file from your downloads folder and select your preferred installation language from the available options.
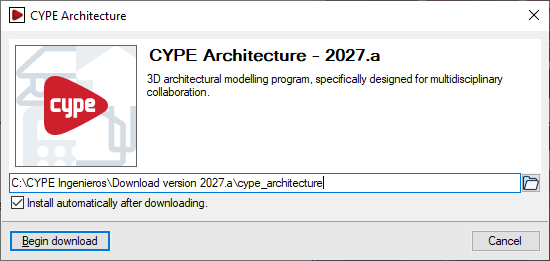
- The path where the full app will be downloaded will be displayed. Tick "Install automatically after downloading" if desired, and click "Start download". If the directory does not exist, the program will ask for confirmation to create it. In that case, select "Yes".
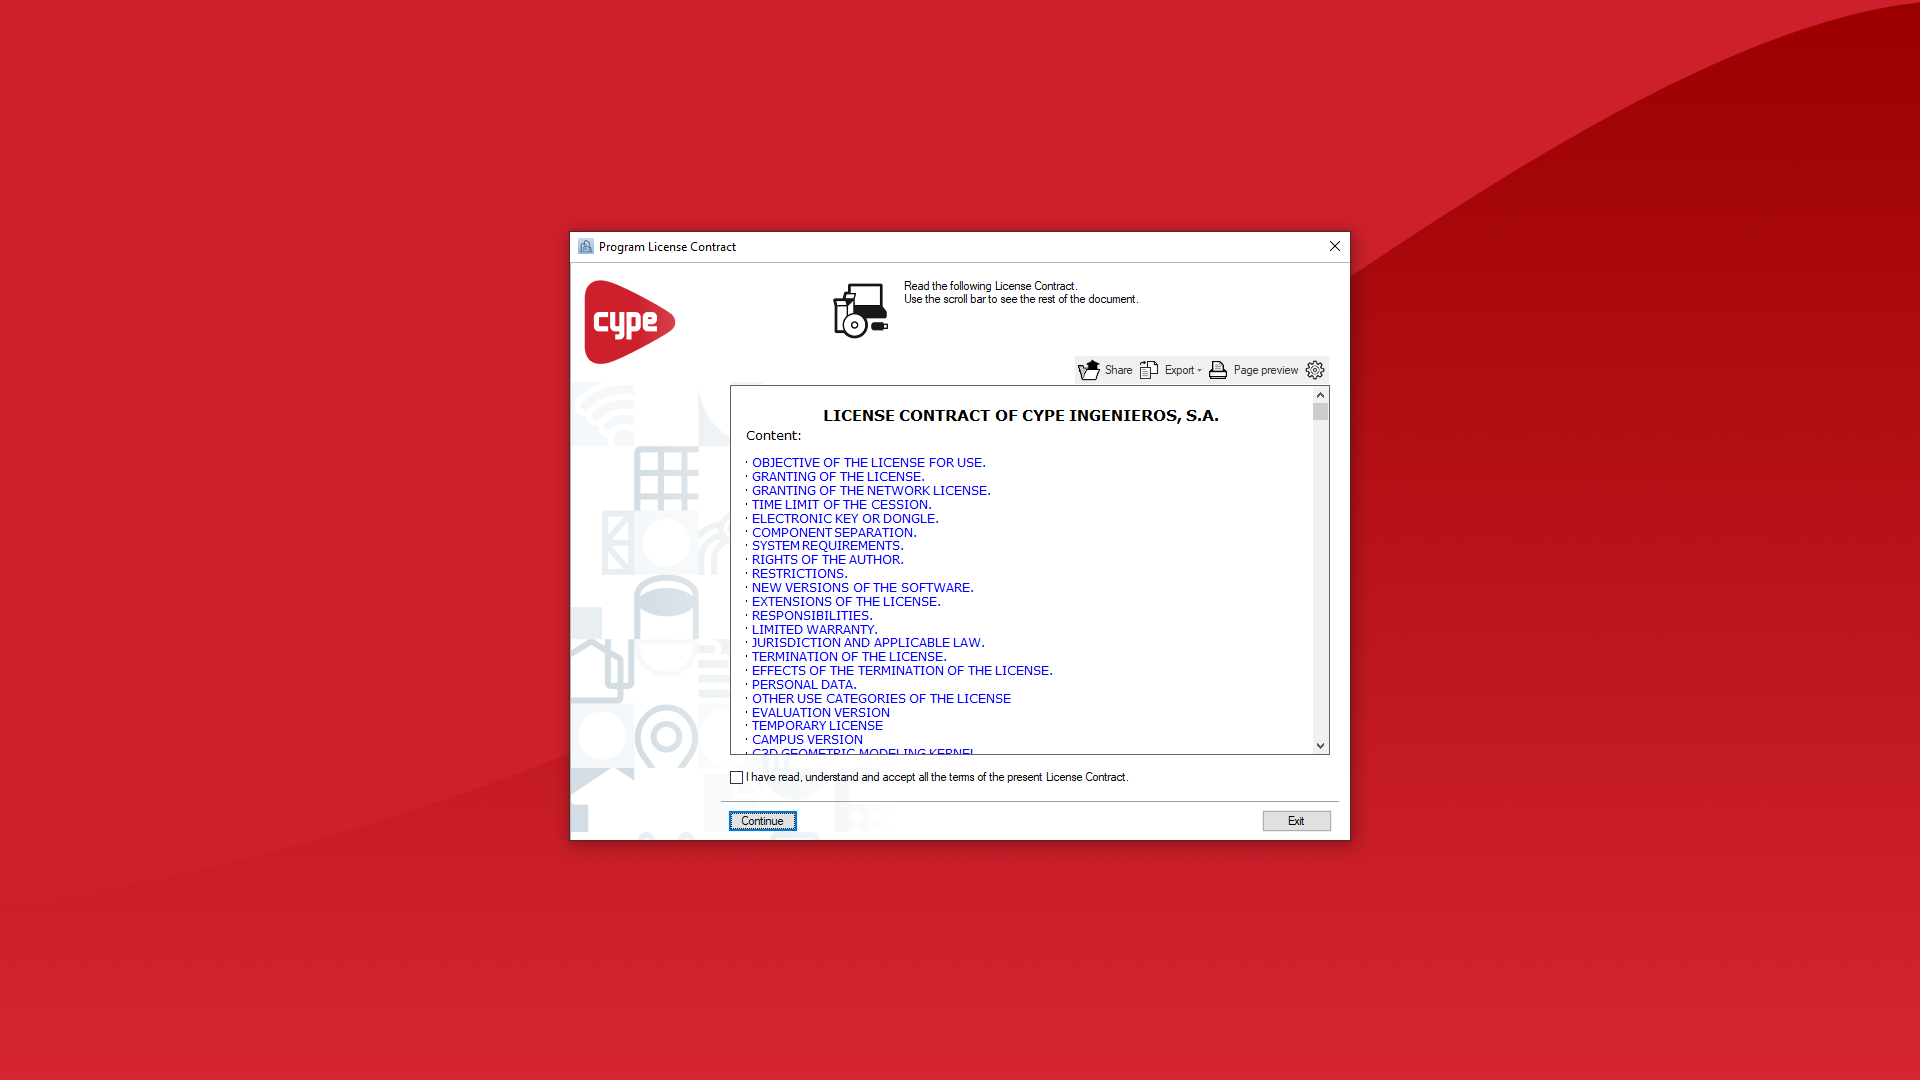
- If you ticked "Install automatically after downloading" in the previous step, the installation wizard will launch automatically. If not, you will need to locate and open the installation executable file in the relevant language within the designated folder, for example, C:\CYPE Ingenieros\Download version 2027.a\CYPE Architecture\Spanish installation\Install CYPE Architecture.exe. In the installation wizard, you must accept the Licence Agreement and the Liability Clause.
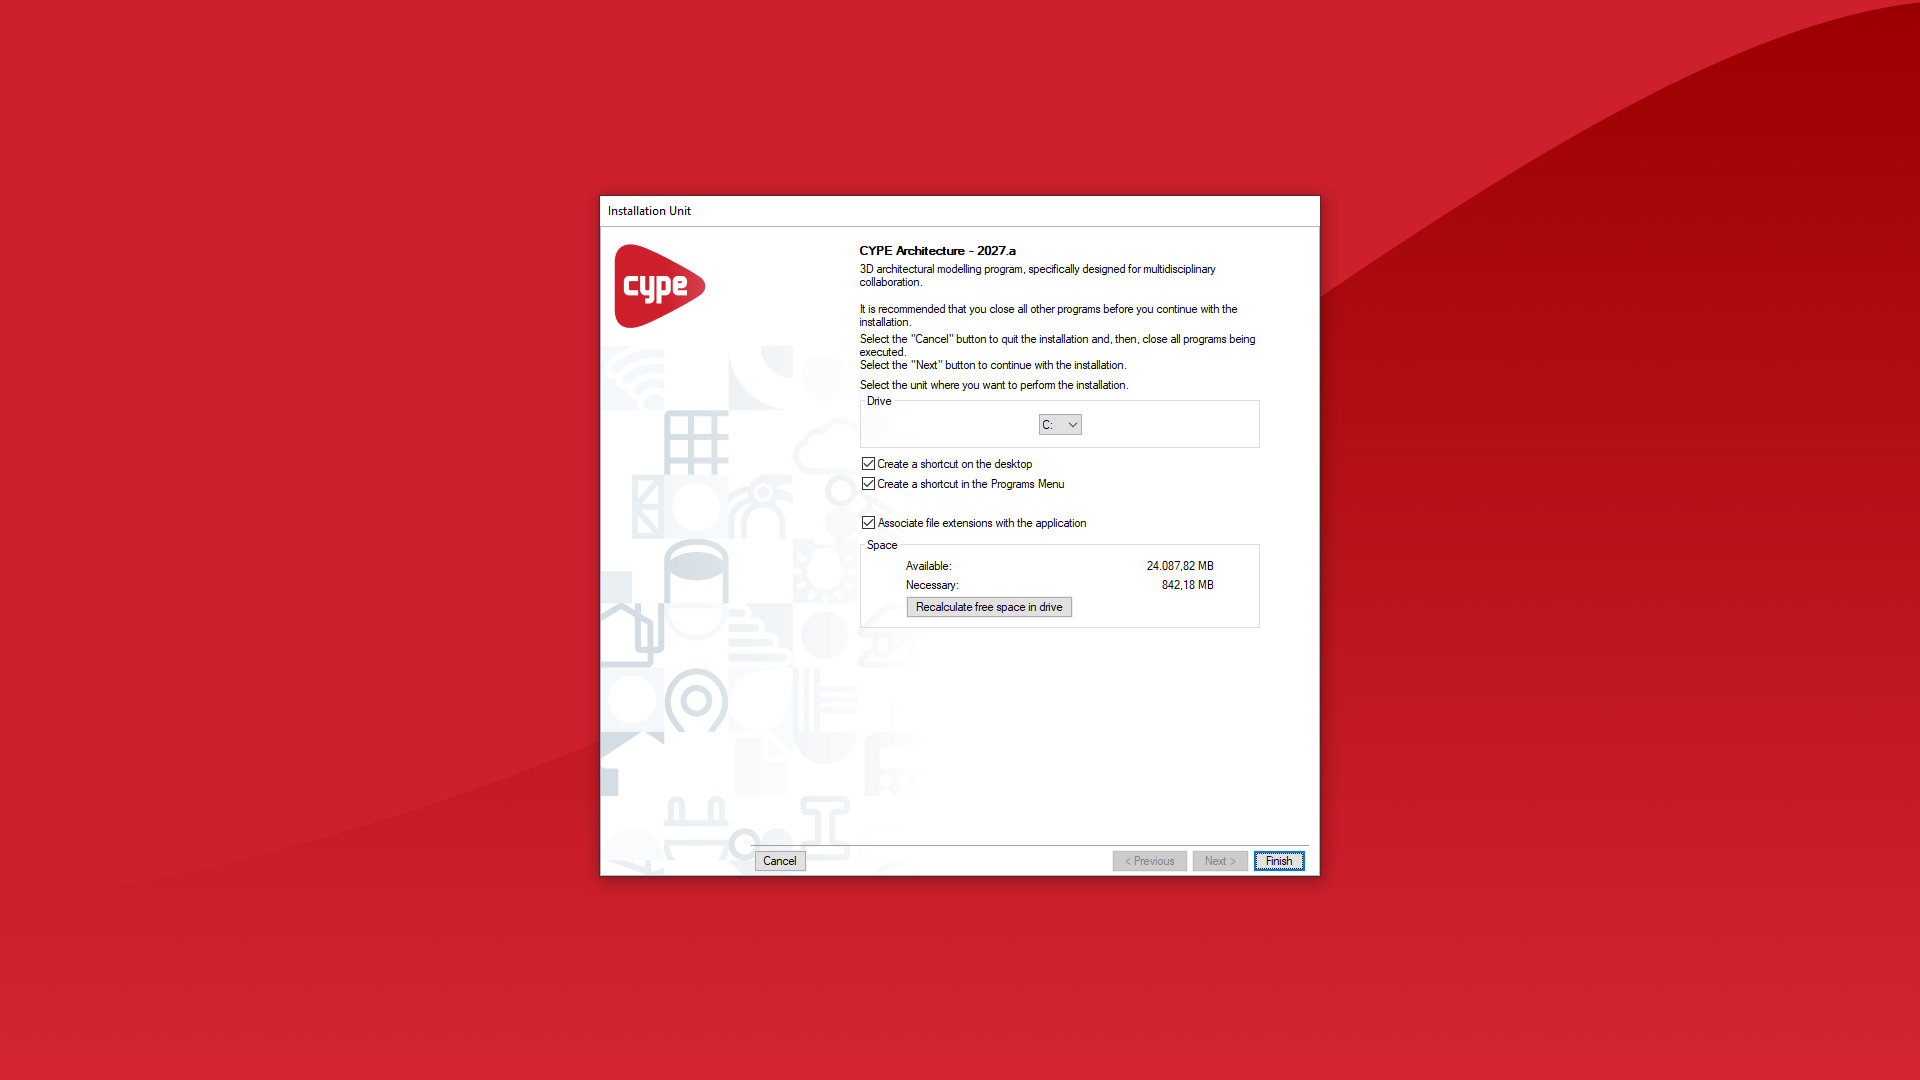
- Select the drive on which you wish to install the program. This will determine the installation path. For example, the installation path for CYPE Architecture 2027 is as follows: C:\CYPE Ingenieros\Version 2027\CYPE Architecture. You can tick the boxes to create shortcuts on the desktop and in the "Programs" menu, if you wish. Finally, click ‘Finish’.
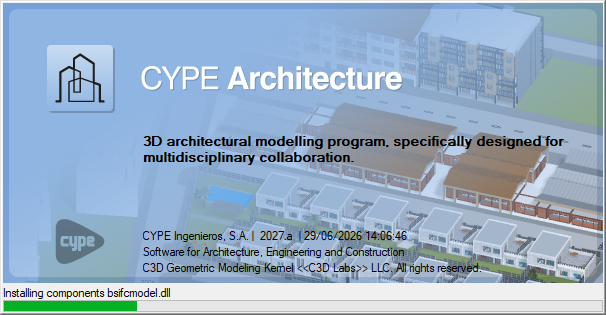
- The program installation process will then start automatically; this may take a few seconds, depending on your computer. Once complete, the app will open automatically. You can then launch it using the shortcuts created during installation. This will open the app’s main interface, from which you can log in to BIMserver.center, enter your licence credentials and start working.
Uninstalling CYPE software
Uninstalling from the CYPE Menu
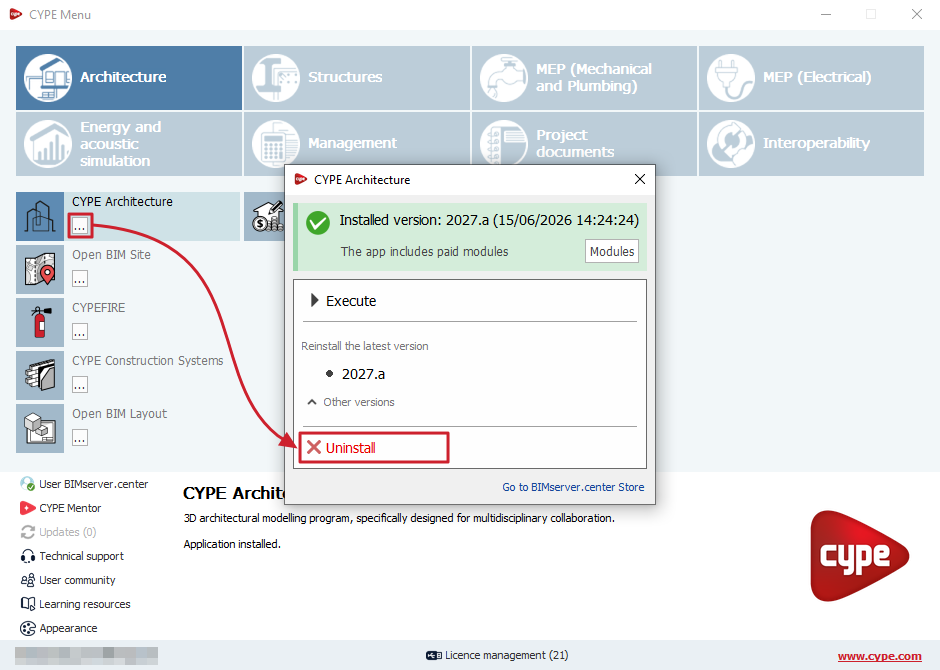
If the program has been installed via CYPE Menu, to uninstall it, open CYPE Menu, click on the options icon next to the program name and, in the pop-up window, select "Uninstall". This will delete the folder “C:\CYPE Ingenieros\Version 20XX\CYPE Menu\app_ID\” corresponding to the program.
Uninstalling using the operating system’s built-in function
You can uninstall CYPE programs using the Windows operating system’s function for removing or uninstalling programs. Depending on which version of Windows you are using, this function can be carried out in different ways. If you are using a recent version of Windows, you can do this via the Windows "Control Panel" by selecting "Programs and Features". Next, locate the program in the list, right-click on the one you wish to uninstall, and select the "Uninstall or change a program" option.
This will cause the operating system to completely remove the selected programme from the computer. If it is currently running, you will need to close the CYPE program you wish to uninstall before proceeding.
Using this function, Windows will delete the following directories or items from the drive where the CYPE programs have been installed:
- The subdirectory "C:\CYPE Ingenieros\Version 20XX\program_name", corresponding to the program and version you have selected for uninstallation.
- The shortcut to the CYPE programs, created automatically by the CYPE program installer, whether it is on the desktop or in the Windows "Start" menu. If the user changes the location or name of this shortcut, it will not be removed when the program is uninstalled.
- If the "Also delete all CYPE program configuration files" option is selected, the user configuration files (subdirectory “C:\Users\username\AppData\Roaming\CYPE Ingenieros\v20XX\"). This option will be disabled by default when you select to uninstall the program via the Windows uninstallation function. We recommend that you do not delete the user configuration files if you expect to need them later. Deleting user configuration files would result in the loss of user-defined program settings across the various CYPE programs installed (such as CYPECAD’s reinforcement tables, the user’s Arquimedes report templates, or the building component materials in building installation calculation programs such as CYPECAD MEP).
| Note: |
|---|
| The remaining subdirectories in "C:\CYPE Ingenieros" (apart from the one mentioned) corresponding to the installation of other versions or other programs not selected during the uninstallation process are not deleted, nor are other subdirectories such as "Projects", "Examples", "Reports" or "DWG Drawings", as CYPE programs save information on projects, examples, reports or generated drawings in these by default. If users would like to delete these subdirectories, they must do so manually and ensure that they have backups of the data they wish to keep. |
Uninstalling manually
If you wish to manually uninstall one or more CYPE programs, simply locate and delete the programs’ installation folders. These folders are named as follows: "C:\CYPE Ingenieros\Version 20XX\program_name" (or, if the program was installed via CYPE Menu, "C:\CYPE Ingenieros\Version 20XX\CYPE Menu\app_ID\").
| Note: |
|---|
| You should not delete the other subfolders within the "CYPE Ingenieros" folder if you want to retain the installation of other versions or other programs, or the project data, examples, output files or generated drawings, which are located in the folders mentioned in the previous point. |
Initial information. Table of contents
Please refer to the following general information to familiarise yourself with CYPE's software and start working with it:
- Access
- Basic installation
- Advanced installation
- Getting started
